Category: Manuals (page 4 of 6)

canon rebel t31 manual

Welcome to the Canon Rebel T3i Manual, your comprehensive guide to mastering this versatile DSLR camera․ This manual helps you understand features, troubleshoot issues, and optimize performance for stunning photography․

1․1 Overview of the Canon Rebel T3i Camera

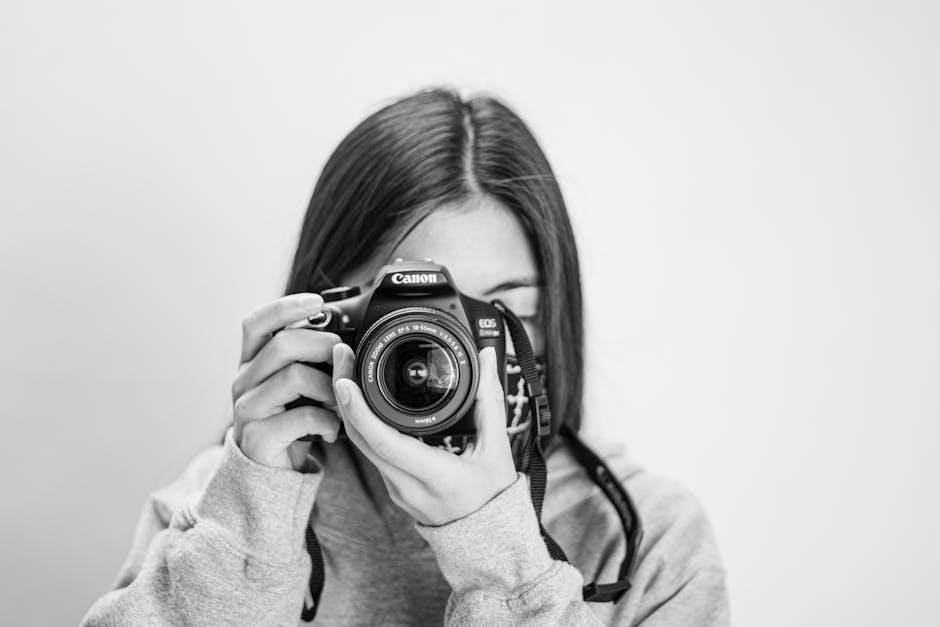
The Canon Rebel T3i is an 18-megapixel DSLR camera designed for both beginners and enthusiasts․ Featuring an APS-C sensor, it offers high-quality images and HD video recording․ Its vari-angle 3-inch LCD screen enhances flexibility for framing shots․ Compatible with Canon EF-S lenses, it provides versatility for various photography needs; The camera also includes advanced autofocus and ISO capabilities, ensuring sharp and clear results in diverse lighting conditions․ This model is praised for its user-friendly interface and robust feature set, making it a reliable choice for capturing memorable moments with precision and creativity․

1․2 Importance of the Manual for Optimal Camera Use

The manual is essential for unlocking the full potential of the Canon Rebel T3i․ It provides detailed guidance on camera functions, shooting modes, and customization options․ By understanding the manual, users can optimize settings for various photography scenarios, troubleshoot common issues, and maintain the camera’s performance․ This comprehensive guide ensures that photographers of all skill levels can harness the camera’s capabilities effectively, leading to better image quality and a more enjoyable shooting experience․ Regular reference to the manual helps users stay informed and confident in their photography journey․

Key Features of the Canon Rebel T3i

The Canon Rebel T3i features an 18MP APS-C sensor, vari-angle 3-inch LCD, and Full HD video recording․ It offers versatile shooting modes, advanced autofocus, and compatibility with Canon EF-S lenses, making it ideal for both beginners and enthusiasts seeking high-quality imagery․

2․1 Camera Specifications and Capabilities

The Canon Rebel T3i boasts an 18-megapixel CMOS sensor, capturing crisp images with excellent detail․ It features a DIGIC 4 image processor, ensuring fast operation and enhanced noise reduction․ The camera supports ISO ranges from 100 to 6400, extendable to 12,800 for low-light conditions․ With 1080p Full HD video recording and a 3-inch vari-angle LCD screen, it offers flexibility for both still photography and videography․ Its 63-zone dual-layer metering system ensures accurate exposures, while the 9-point autofocus system delivers precise focus control․

2․2 Image Quality and Shooting Modes

The Canon Rebel T3i delivers exceptional image quality with its 18-megapixel sensor, producing vibrant and detailed photos․ It offers various shooting modes, including Auto, Manual, Aperture Priority, and Shutter Priority, catering to both beginners and advanced photographers; The camera supports RAW and JPEG formats, allowing flexibility in post-processing․ With Scene Intelligent Auto mode, it analyzes conditions for optimal results․ Additionally, the T3i features Creative Filters for artistic effects and captures Full HD 1080p video, making it versatile for photography and videography needs․

Setting Up the Camera

Unbox and assemble your Canon Rebel T3i, charge the battery, and insert the memory card to prepare for capturing stunning images and videos effortlessly․

3․1 Unboxing and Initial Assembly

Unboxing your Canon Rebel T3i reveals the camera body, EF-S 18-55mm lens, battery, charger, and other accessories; Carefully remove each item, ensuring no damage occurs․ Begin assembly by attaching the lens to the camera body, ensuring it clicks securely into place․ Next, install the shoulder strap for comfortable handling․ Finally, insert the battery and ensure it is properly seated․ These initial steps prepare your camera for first-use setup and ensure everything is ready for capturing high-quality images․

3․2 Charging the Battery and Inserting the Memory Card

Begin by charging the Canon Rebel T3i battery using the provided charger until the indicator shows a full charge․ Once charged, insert the battery into the camera’s battery compartment, ensuring it is securely locked․ Next, locate the memory card slot on the side of the camera․ Open the compartment, insert your memory card with the label facing up, and close it firmly․ Ensure the card is properly formatted or contains no critical data before use․ This step readies your camera for capturing images effectively․

Basic Camera Handling

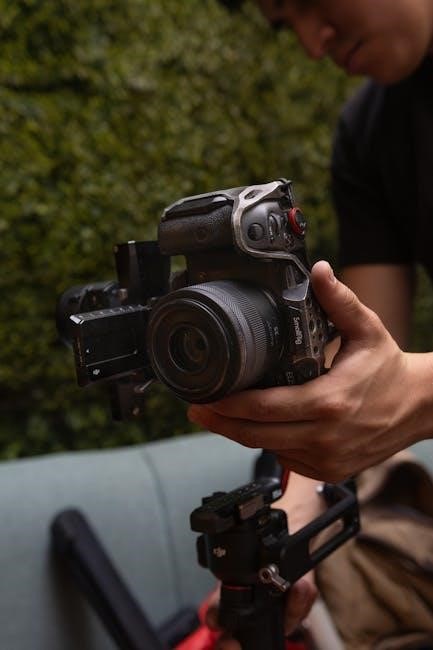
Mastering basic handling of the Canon Rebel T3i ensures smooth operation․ Familiarize yourself with the camera’s buttons, dials, and ergonomic design for intuitive control and comfortable use during shoots․

4․1 Understanding the Camera’s Buttons and Dials

Familiarizing yourself with the Canon Rebel T3i’s buttons and dials is essential for efficient operation․ The Mode Dial on top allows you to switch between shooting modes like Auto, Manual, and Scene modes․ The Shutter Button triggers the shutter, while the Multi-Control Dial adjusts settings like aperture and shutter speed․ The Quick Control Button provides instant access to key settings, and the Rear Control Dial enables easy navigation and adjustments․ Understanding these controls enhances your ability to capture stunning images with precision and ease․

4․2 Proper Care and Maintenance of the Camera

Proper care ensures longevity and optimal performance of your Canon Rebel T3i․ Regularly clean the sensor and lens with a soft cloth to prevent dust and smudges․ Avoid exposing the camera to extreme temperatures or moisture․ Store it in a protective case when not in use․ Handle the camera by the grip to prevent drops and scratches․ Clean electrical contacts with a dry cloth to maintain connectivity․ Update firmware periodically and avoid overcharging the battery to prolong its life․ These practices ensure your camera remains in excellent condition for years of reliable use․

Shooting Modes and Settings

Explore automatic modes like Scene Intelligent Auto for simplicity and manual modes for creative control․ Customize settings to suit your photography style and capture stunning images effortlessly․

5․1 Automatic and Manual Shooting Modes

The Canon Rebel T3i offers a range of shooting modes to suit every photographer’s needs․ Automatic modes, such as Scene Intelligent Auto, simplify photography by adjusting settings automatically․ For more control, Manual mode allows users to adjust aperture, shutter speed, and ISO․ This flexibility ensures that both beginners and advanced photographers can capture high-quality images tailored to their creative vision and technical requirements․

5․2 Customizing Settings for Different Photography Scenarios

The Canon Rebel T3i allows users to customize settings for various photography scenarios, ensuring optimal results․ For portraits, adjust aperture for shallow depth of field․ In landscapes, use manual focus and low ISO for sharp details․ Sports photography benefits from fast shutter speeds, while low-light situations may require higher ISO or external lighting․ The camera’s flexibility empowers photographers to tailor settings to their creative vision, making it adaptable for diverse shooting conditions and styles․

Advanced Features and Customization

Explore advanced features like remote shutter release and custom functions to personalize your shooting experience․ Tailor settings for unique photography styles and enhance creativity effortlessly;

6․1 Using the Remote Switch for Shutter Release

The remote switch offers two modes: instant shutter release and a two-second delay․ Instant mode is ideal for capturing sharp images without camera shake, while the delay allows the photographer to avoid being in the frame․ Simply point the remote at the camera’s sensor and press the shutter button․ This feature is perfect for self-portraits, group shots, or reducing vibrations during long exposures․ It enhances flexibility and convenience in various shooting scenarios․

6․2 Customizing Camera Functions for Personal Preferences

The Canon Rebel T3i allows you to tailor camera functions to suit your photography style․ Customize button assignments, shooting modes, and memory card settings for personalized control․ Adjust white balance, AF modes, and exposure compensation to match your creative vision․ Save custom profiles for quick access in different scenarios․ This feature ensures the camera adapts to your workflow, enhancing efficiency and creativity during shoots․

Connectivity and Software

The Canon Rebel T3i supports seamless image transfer via USB or memory card readers․ Included software enables editing, management, and enhanced photo processing, ensuring a streamlined workflow․

7․1 Transferring Images to a Computer

Transferring images from the Canon Rebel T3i to a computer is straightforward․ Use the USB cable provided to connect the camera directly to your PC or Mac․ Ensure the camera is in playback mode before connecting․ Your computer should recognize the device, allowing you to transfer photos via file transfer or Canon’s provided software․ Alternatively, remove the memory card and use a card reader for a quick transfer․ This ensures your images are safely stored and ready for editing․

7․2 Using Canon Software for Image Editing and Management

Canon provides comprehensive software for editing and managing images captured with the Rebel T3i․ The EOS Utility allows for easy image transfer and remote camera control, while Digital Photo Professional enables advanced RAW file editing․ Additional tools like Picture Style Editor let you customize color profiles․ These programs, available via CD or download, offer precise control over image quality and organization, enhancing your post-processing workflow and helping you achieve professional results․

Troubleshooting Common Issues

This section helps identify and resolve common issues with the Canon Rebel T3i, such as error messages, lens malfunctions, and battery drain․ Troubleshooting ensures optimal performance and quick fixes for everyday problems, keeping your camera operational and photography sessions uninterrupted․ Regular maintenance and updates are also covered to prevent issues before they arise․

8․1 Resolving Error Messages and Camera Malfunctions

Common issues like error messages or camera malfunctions can disrupt your photography․ Start by restarting the camera or cleaning the sensor․ Check lens connections and ensure proper battery installation․ For persistent errors, refer to the troubleshooting guide in the manual or update firmware․ Regular maintenance, such as cleaning and updating software, helps prevent malfunctions․ If issues persist, contact Canon support or visit an authorized service center for professional assistance․ Addressing problems early ensures your camera operates smoothly and reliably for all your photography needs․

8․2 Tips for Maintaining Camera Performance

Regular maintenance ensures optimal performance of your Canon Rebel T3i․ Clean the sensor and lens frequently to avoid dust and smudges․ Update firmware to access new features and fix bugs․ Store the camera in a dry, cool place to prevent moisture damage․ Use genuine Canon batteries and accessories for reliability․ Format memory cards regularly to maintain efficiency․ Proper care extends the camera’s lifespan, ensuring it captures stunning images for years to come․ Follow these tips to keep your T3i in peak condition․

Mastering the Canon Rebel T3i Manual empowers you to unlock your camera’s full potential․ Practice and explore its features to enhance your photography skills and creativity endlessly․

9․1 Summary of Key Points in the Manual

The Canon Rebel T3i Manual provides a detailed guide to operating and maintaining your camera․ It covers unboxing, initial setup, and understanding buttons and dials for optimal use․ The manual emphasizes proper care and maintenance to ensure longevity․ Shooting modes, from automatic to manual, are explored, along with customization options for personal preferences․ Connectivity and software tools are discussed for image transfer and editing․ Troubleshooting tips and performance maintenance advice are included․ This comprehensive guide empowers users to master their camera’s capabilities and enhance their photography skills effectively․

9․2 Encouragement to Explore and Practice

Now that you’ve reviewed the key points, it’s time to explore and practice! Experiment with different shooting modes, customize settings, and familiarize yourself with advanced features․ Regular practice will help you master the Canon Rebel T3i’s capabilities․ Don’t hesitate to try new techniques and settings—this is where creativity thrives․ Use the troubleshooting tips to overcome challenges and keep your camera in top condition․ With consistent practice, you’ll unlock the full potential of your T3i and capture stunning images with confidence․

canon pixma pro 100 manual

Welcome to the Canon PIXMA PRO-100 manual, your comprehensive guide to unlocking the full potential of this professional photo printer. This manual provides detailed instructions, troubleshooting tips, and expert advice to help you master its advanced features, ensuring optimal printing results and longevity of your device.

1.1 Importance of the Manual for Optimal Printer Usage

The Canon PIXMA PRO-100 manual is essential for maximizing printer performance and ensuring professional-grade results. It provides detailed guidance on setup, troubleshooting, and advanced features, helping users avoid common errors and maintain optimal print quality. By following the manual, photographers and hobbyists can unlock the printer’s full potential, customize settings, and achieve precise color reproduction, making it indispensable for achieving stunning, long-lasting photo prints.

1.2 Overview of the Canon PIXMA PRO-100 Printer

The Canon PIXMA PRO-100 is a high-end photo printer designed for professional photographers and enthusiasts. It offers superior image quality with an 8-color ink system, producing vibrant and detailed prints. Compact and user-friendly, it supports various paper sizes and wireless connectivity, making it versatile for creative projects; Its robust build and advanced features ensure reliable performance, catering to the needs of both home and studio use.

Product Overview and Key Features

The Canon PIXMA PRO-100 is a professional-grade photo printer featuring an 8-color ink system for vivid, detailed prints. It supports wireless connectivity and various paper sizes, ideal for photographers seeking high-quality output with ease.

2.1 Technical Specifications of the Canon PIXMA PRO-100

The Canon PIXMA PRO-100 features an 8-color FINE ink system, print resolution up to 4800 x 2400 dpi, and a wide color gamut. It supports wireless and Ethernet connectivity, with paper handling up to A3+ sizes. The printer’s dimensions are 27.4 x 15.6 x 11.8 inches and weighs approximately 43.9 pounds, ensuring robust performance for professional photo printing needs;

2.2 Key Features for Professional Photo Printing

The Canon PIXMA PRO-100 excels in professional photo printing with its 8-color FINE ink system, delivering vibrant, lifelike images. It supports various paper types, including glossy, matte, and fine art papers up to A3+ sizes. Wireless connectivity enables seamless printing from devices, while built-in color management ensures precise control over hues and tones. Additionally, custom profiles and professional-grade print quality make it ideal for photographers seeking high-end results with efficiency and consistency.

Installation and Setup Guide

Install and set up your Canon PIXMA PRO-100 effortlessly. Download drivers from Canon’s official website, follow on-screen instructions, and connect via USB or wireless for seamless printing.

3.1 Downloading and Installing Printer Drivers

Ensure optimal performance by downloading the latest Canon PIXMA PRO-100 drivers from the official Canon website. Navigate to the support section, enter your printer model, and select the appropriate operating system. Follow the installation wizard’s step-by-step instructions to install the drivers correctly. This ensures compatibility and access to all printer features for a smooth printing experience.

3.2 Physical Setup and Connectivity Options

Begin by carefully unpacking and placing the Canon PIXMA PRO-100 on a flat, stable surface. Connect the power cord and turn it on. For connectivity, choose from USB, Wi-Fi, or Ethernet options. To set up wirelessly, select your network from the printer’s menu or use WPS for a quick connection. Ensure your device is on the same network for seamless printing. Troubleshoot connectivity issues by restarting the printer or checking network settings.

Basic Printing Guide

Learn the essentials of printing with the Canon PIXMA PRO-100. Discover how to navigate the dashboard, select paper types, adjust basic settings, and print your first images effortlessly.

4.1 Navigating the Printer Dashboard

Mastering the Canon PIXMA PRO-100 dashboard is key to seamless printing. Access the dashboard via your computer or mobile device, where you can adjust settings like paper type, print quality, and color balance. The Quick Setup tab simplifies basic configurations, while advanced options allow fine-tuning for professional results. Use the preview feature to ensure your settings match your creative vision before printing.

4.2 Printing Your First Photo: A Step-by-Step Guide

Start by loading high-quality photo paper into the printer. Open the Canon PIXMA PRO-100 dashboard on your device, select your paper type, and choose the desired print quality. Adjust color settings if needed, using the preview feature to ensure accuracy. Click “Print” to begin. The printer will automatically calibrate and produce your first professional-grade photo with vibrant colors and sharp details.

Advanced Printing Settings

Explore advanced settings like color profiling, custom print quality, and color management. Adjust Cyan, Magenta, and Yellow levels for precise tone control. Use custom profiles to ensure accurate colors and minimize ink waste, achieving professional-grade results tailored to your creative vision.

5.1 Customizing Print Quality and Color Profiles

Customize print quality and color profiles to achieve precise results. Access the printer settings to adjust color balance, brightness, and contrast. Use custom ICC profiles for accurate color rendition. Enable color management to prevent double profiling. Select sRGB or Adobe RGB based on your needs. Adjust Cyan, Magenta, and Yellow levels for fine-tuned tone control. Save custom settings for consistent output, ensuring professional-grade prints with minimal ink and paper waste.

5.2 Adjusting Brightness, Contrast, and Color Balance

Adjust brightness, contrast, and color balance to refine your prints. Access these settings via the printer driver. Use sliders to fine-tune brightness and contrast for optimal image clarity. Adjust color balance by modifying Cyan, Magenta, and Yellow levels. Custom profiles can enhance accuracy. Ensure monitor calibration for consistent results. Save adjusted settings for future use to maintain uniformity across prints and achieve professional-quality output with precise control over visual elements.

Maintenance and Upkeep

Regular maintenance ensures optimal performance and longevity. Clean the print head, check ink levels, and replace cartridges as needed. Use genuine Canon supplies for best results.

6.1 Cleaning and Aligning the Print Head

Cleaning and aligning the print head ensures sharp, vibrant prints. Use the printer’s built-in cleaning function or manual cleaning with a lint-free cloth. Align the print head through the printer settings to maintain accuracy. Regular maintenance prevents clogs and color inaccuracies, ensuring professional-quality output. Refer to the manual for detailed steps and safety precautions to avoid damage. Proper care extends the printer’s lifespan and performance.

Monitor ink levels via the printer dashboard or Canon software to avoid interruptions. Replace cartridges when levels are low, but bypass unnecessary replacements using the printer’s override feature. To reduce waste, print in draft mode for test runs and use custom paper sizes. Regularly clean the print head to prevent clogs and ensure even ink flow. Proper management extends ink life and reduces operational costs while maintaining print quality.

Troubleshooting Common Issues

6.2 Managing Ink Levels and Reducing Waste

Monitor ink levels via the printer dashboard or Canon software to avoid mid-print interruptions. Replace cartridges when levels are low, but bypass unnecessary replacements using the printer’s override feature. To reduce waste, print in draft mode for test runs and use custom paper sizes to minimize excess printing. Regularly clean the print head to prevent clogs and ensure even ink flow. Proper management extends ink life and reduces operational costs while maintaining print quality. Always check for firmware updates, as they often improve ink efficiency and functionality. Additionally, consider using genuine Canon cartridges to avoid compatibility issues and ensure optimal performance. By following these tips, you can significantly reduce ink and paper waste while maintaining professional-grade print results. Use the printer’s built-in calibration tools to adjust settings for precise ink usage. Finally, refer to the printer’s manual for specific guidance on managing ink levels effectively.

7.1 Resolving Connectivity Problems

Connectivity issues with the Canon PIXMA PRO-100 can often be resolved by restarting the printer and your router. Ensure the printer is connected to the same Wi-Fi network as your device. Use the Canon PRINT Inkjet/SELPHY app to troubleshoot wireless connections. If problems persist, reset the printer’s network settings by holding the Stop button for 8 seconds. Check for firmware updates, as they often improve connectivity. For wired connections, verify that the USB cable is securely plugged in. If using Ethernet, ensure the cable is properly connected to both the printer and router. Consult the Canon support website for additional troubleshooting guides or contact customer support for assistance.

7.2 Fixing Common Error Messages and Printing Errors

Error messages on the Canon PIXMA PRO-100, such as “Printing Error” or “Ink Cartridge Not Recognized,” often indicate issues with ink levels or cartridge compatibility. Restart the printer and ensure genuine Canon cartridges are used. For paper jams, carefully remove the jammed paper from the rear tray. If the error persists, reset the print head by holding the Stop button for 8 seconds. Check for firmware updates, as they may resolve software-related issues. Consult the user manual or Canon’s support website for specific error code solutions. Regular maintenance and updates can prevent recurring errors and ensure smooth printing performance.

Color Management and Calibration

Mastering color management and calibration is essential for professional printing. Adjust Cyan, Magenta, and Yellow settings to achieve precise tones. Calibrate your monitor to ensure accurate color representation, matching your printer’s output for stunning results.

8.1 Understanding Color Profiles and ICC Profiles

Color profiles and ICC profiles are crucial for precise color reproduction. An ICC profile defines how colors are displayed across devices. Use Canon’s default profiles for consistent results or create custom profiles to match your monitor and printer. Adjust settings like Tone, Brightness, and Intensity to ensure vibrant, accurate prints. Calibrate regularly for optimal performance and professional-quality output.

8.2 Calibrating Your Monitor and Printer for Accurate Colors

Calibrating your monitor and printer ensures precise color accuracy. Start by adjusting your monitor’s brightness and color balance to match your workspace lighting. Use Canon’s software to align your printer settings with your monitor’s profile. Adjust Cyan, Magenta, and Yellow levels to achieve consistent tones. Regular calibration prevents color drift and ensures professional-quality prints with vibrant, accurate colors every time.

Tips and Tricks for Optimal Printing

Minimize wasted ink and paper by aligning print settings with your project needs. Adjust color balance for precise tones and vibrant results. Follow expert tips for professional-quality outputs consistently.

9.1 Minimizing Paper and Ink Waste

Optimize your printing process by using draft mode for test prints and selecting the correct paper type. Regularly clean and align the print head to prevent unnecessary ink consumption. Adjust color profiles to reduce vibrant ink usage. Use plain paper for alignment tests and preview prints before finalizing. Implement these practices to extend ink cartridge life and reduce paper waste effectively.

9.2 Achieving Professional-Quality Photo Prints

For professional results, use genuine Canon inks and high-quality photo papers. Calibrate your monitor and printer to ensure color accuracy. Print in high-resolution formats like TIFF or PNG. Adjust color profiles, brightness, and contrast settings to match your creative vision. Properly align the print head and maintain consistent humidity levels to prevent ink smudging. These steps ensure vibrant, precise, and long-lasting photo prints every time.

Wireless Connectivity and Mobile Printing

Effortlessly set up wireless printing using Canon PRINT app. Print directly from iOS and Android devices. Ensure stable network connection for seamless printing experience anytime, anywhere.

10.1 Setting Up Wireless Printing

  • Download and install the Canon PRINT app on your device.
  • Connect your printer to the same Wi-Fi network as your device.
  • Ensure your printer and device are both turned on and network-ready.
  • Check the network status in your printer settings.
  • Place the printer near your router for optimal signal strength.
  • Select your printer’s name in your device’s Wi-Fi settings.
  • Follow app prompts to complete the wireless setup.
  • Restart your device and printer if issues arise.

10.2 Printing from iOS and Android Devices

Printing from iOS and Android devices is seamless with the Canon PRINT app. Download and install the app, then select your printer from the available devices. Choose the photo or document you wish to print, adjust settings if needed, and confirm the print job. Ensure your device and printer are connected to the same network for a smooth experience. Troubleshoot connectivity issues by restarting your device or printer if necessary.

Software and Driver Downloads

Visit Canon’s official website to download the latest drivers and software for your PIXMA PRO-100. Ensure your printer operates smoothly by installing updated firmware and drivers regularly.

11.1 Finding the Latest Drivers and Software

Visit the official Canon website and navigate to the support section. Enter your printer model, PIXMA PRO-100, and select your operating system to find the latest drivers and software. Download and install the recommended updates to ensure compatibility and optimal performance. Regular updates enhance functionality and resolve potential issues, keeping your printer running smoothly.

11.2 Updating Firmware for Enhanced Performance

Regularly updating your Canon PIXMA PRO-100 firmware ensures optimal performance and resolves potential issues. Visit the Canon support website, select your printer model, and download the latest firmware version. Use the printer’s control panel or Canon software to install updates. This process enhances functionality, improves compatibility, and addresses bugs, ensuring your printer operates at its best. Always follow on-screen instructions for a smooth update.

Mastery of the Canon PIXMA PRO-100 requires understanding its features and maintenance. This manual guides you through setup, printing, and troubleshooting, ensuring optimal performance and professional results always.

12.1 Final Thoughts on Mastering the Canon PIXMA PRO-100

Mastering the Canon PIXMA PRO-100 involves understanding its advanced features, maintaining proper calibration, and leveraging its color management capabilities. Regular maintenance, such as cleaning the print head and managing ink levels, ensures optimal performance. By following the guidelines in this manual and exploring additional resources, you can achieve professional-quality prints and extend the lifespan of your printer.

12.2 Additional Resources for Further Learning

For further learning, explore Canon’s official support website, which offers detailed manuals, driver downloads, and troubleshooting guides. Additionally, YouTube tutorials and printer forums provide hands-on tips for optimizing your Canon PIXMA PRO-100. Join photography communities to share techniques and learn from experts, ensuring you maximize your printer’s capabilities for professional-grade results.

crane humidifier user manual

Welcome to the Crane Humidifier User Manual! This guide provides essential information to ensure safe and effective use of your Crane Humidifier, enhancing indoor air quality and promoting healthy breathing․ Read carefully to optimize performance and maintain your device properly;

1․1 Overview of the Crane Humidifier

The Crane Humidifier is a top-quality appliance designed to improve indoor air quality by adding moisture, reducing dryness, and promoting a healthier breathing environment․ Its compact, stylish design makes it suitable for various spaces, including homes and offices․ The humidifier operates quietly, ensuring uninterrupted comfort․ It is built with durable materials and meets stringent safety standards․ Regular maintenance, as outlined in this manual, will ensure optimal performance and longevity of the device, providing consistent relief from dry air conditions․

1․2 Benefits of Using a Crane Humidifier

The Crane Humidifier offers numerous benefits, including improved indoor air quality, relief from dryness, and enhanced breathing comfort․ It helps prevent respiratory issues and maintains optimal humidity levels, promoting a healthier environment․ The humidifier’s quiet operation and sleek design make it ideal for homes, offices, and nurseries․ Regular use can reduce static electricity, protect furniture, and alleviate dry skin․ By maintaining consistent moisture, it supports overall well-being and creates a more comfortable living or working space year-round․

Safety Precautions

Always handle the water tank with care and avoid tilting the humidifier․ Do not operate the unit outdoors or near open flames․ Ensure the plug is securely inserted into the power source and keep it clean from dust․ Regularly clean the humidifier to prevent bacterial growth and maintain safe operation․ Follow all guidelines to ensure safe and effective use of your Crane Humidifier․

2․1 Handling the Water Tank Safely

Always handle the water tank with care to avoid spills and damage․ When filled, carry the tank using both hands to ensure stability․ Avoid tilting the humidifier or attempting to empty it while in operation․ Ensure the tank is securely attached to the main unit before use․ Regularly clean the tank to prevent bacterial growth․ Never operate the humidifier near open flames or outdoors․ Follow these guidelines to maintain safety and extend the product’s lifespan․

2․2 Usage Restrictions and Warnings

Use the Crane Humidifier only as described in this manual․ Essential oils are not recommended, as they may damage the device․ Operate the humidifier indoors only and avoid tilting or moving it while in use․ Do not use hot water, as it may cause damage or injury․ Keep the unit out of children’s reach and ensure all parts are securely assembled․ Avoid modifying the product, as this may void the warranty and pose safety risks․ Always follow these guidelines to ensure safe and effective operation․

Product Components

Your Crane Humidifier includes a water tank, mist chamber, and control panel․ Accessories like a humidifier filter are optional for enhanced performance; Refer to subsections for details․

3;1 Main Parts of the Humidifier

The Crane Humidifier consists of a water tank, mist chamber, and control panel․ The water tank holds the water, while the mist chamber generates the cool mist․ The control panel allows you to adjust settings․ These components work together to ensure efficient humidification․ Always handle the water tank with care, using two hands when filled, and avoid tilting the unit during operation․ Regular cleaning is essential for optimal performance․

3․2 Accessories and Optional Features

Crane Humidifiers may come with optional accessories like filters, which help purify water for cleaner mist․ These filters are essential for maintaining hygiene and preventing mineral buildup․ Additionally, some models offer features like built-in timers or night lights for enhanced convenience․ Always refer to the user manual for specific details on compatible accessories and how to use them effectively․ Regularly check and replace filters to ensure optimal performance and longevity of your humidifier․ Proper care extends its service life and efficiency․

Assembly and Installation

Unpack all components carefully and ensure no damage․ Handle the water tank with two hands when filled․ Follow assembly instructions step-by-step for proper setup and safe operation․

4․1 Unpacking and Initial Setup

Start by carefully unpacking all components from the box, ensuring no parts are damaged․ Place the humidifier on a flat, stable surface away from direct sunlight․ Remove any packaging materials and protective covers․ Inspect all parts, including the water tank, base, and power cord, for any signs of damage․ If any components are missing or damaged, contact Crane Customer Care immediately․ Plug in the device and ensure the power button is in the off position before proceeding to assembly․

4․2 Step-by-Step Assembly Instructions

First, attach the water tank to the base by aligning the locking mechanism and gently twisting until it clicks securely․ Ensure the tank is properly seated to prevent leaks․ Next, connect the misting chamber to the base by inserting the tabs into the designated slots and turning clockwise until firm․ Finally, plug in the power cord and test the device by pressing the power button․ Always refer to the provided diagrams for visual guidance and ensure all parts are tightly secured before operation․

Operating Instructions

Fill the water tank with fresh, cool water and place it securely on the base․ Plug in the device, turn it on, and adjust the mist output as needed․ Ensure the unit is on a flat, stable surface and avoid tilting it during operation․

5․1 Filling and Replacing the Water Tank

Turn the water tank upside down and unscrew the cap․ Fill with fresh, cool water․ Avoid using hot water to prevent damage․ 2․ Replace the cap tightly to ensure no leaks․ 3․ Carry the filled tank with two hands to avoid spills․ 4․ Place the tank back onto the base securely․ 5․ Do not tilt the humidifier or attempt to refill while it is operating․ Use fresh water daily for optimal performance․

5․2 Adjusting Humidity Levels and Settings

To adjust humidity levels, use the control buttons to set your desired humidity level․ The humidifier will automatically maintain the selected setting․ Monitor the LED display to track the current humidity level․ Ensure the room is not over-humidified, as this can promote mold growth․ Use the built-in humidistat for precise control․ For optimal comfort, adjust settings based on room size and personal preference․ Refer to the included humidity chart for guidance․ Always ensure the device is set correctly for efficient operation․

Maintenance and Cleaning

Regular cleaning is essential to prevent mold and bacteria growth․ Always unplug the humidifier before cleaning․ Clean the tank and misting chamber with a mild detergent solution․ Rinse thoroughly and dry to maintain hygiene․ Follow the manual’s cleaning instructions for optimal performance and longevity․ Proper maintenance ensures efficient operation and safe use of your Crane humidifier․

6․1 Regular Cleaning Requirements

Regular cleaning is crucial for maintaining your Crane humidifier’s efficiency and preventing mold growth․ Daily, empty any unused water and wipe the tank with a clean cloth․ Weekly, use a mild detergent to scrub the water tank and misting chamber․ Ensure all parts are rinsed thoroughly to remove any soap residue․ Always dry the components before reassembly․ This routine helps maintain hygiene and prevents bacterial buildup, ensuring safe and effective operation of your humidifier․

6․2 Filter Replacement and Care

Replace the humidifier filter every 1-3 months, depending on usage and water quality․ To replace, turn off the device, disconnect the power, and remove the old filter․ Soak the new filter in water for 30 minutes before installing it․ Avoid using essential oils, as they can damage the filter․ Regularly clean the filter with mild detergent if reusable․ Proper maintenance ensures optimal performance, clean mist output, and prevents bacteria growth․ Refer to the manual for specific filter replacement guidelines and recommendations․

Troubleshooting Common Issues

Identify and resolve common problems like water leakage or low mist output by checking connections, cleaning the filter, and ensuring proper water levels․ Refer to the manual for detailed solutions or contact Crane Customer Care for assistance․

7․1 Identifying and Resolving Operational Problems

If your Crane humidifier isn’t functioning properly, start by checking for common issues like low water levels or a clogged filter․ Ensure all parts are securely connected and the water tank is filled correctly; Regular cleaning can prevent mineral buildup and mold growth․ If mist output is low, check for blockages in the nebulizer or tubing․ For persistent issues, refer to the troubleshooting section or contact Crane’s customer support for further assistance to restore optimal performance․

7․2 Common Errors and Solutions

Common issues with your Crane humidifier may include leaks, low mist output, or unusual noises․ For leaks, check the water tank for cracks and ensure all connections are tight․ If mist output is low, clean or replace the filter and nebulizer․ Strange noises may indicate improper assembly or mineral buildup․ Regular descaling and cleaning can prevent these issues․ Always refer to the manual for detailed solutions or contact customer support for further assistance to maintain your humidifier’s efficiency and longevity effectively․

Warranty Information

Your Crane humidifier is backed by a limited warranty covering defects in materials and workmanship․ Visit www․crane-usa․com for details on warranty duration, terms, and claim procedures․

8․1 Coverage and Duration

The Crane humidifier warranty covers defects in materials and workmanship for a specified period․ Typically, the warranty lasts for one year from the date of purchase․ During this time, Crane will repair or replace defective parts free of charge․ For detailed terms, visit the official Crane website or refer to the warranty section in this manual․ Proper registration and maintenance are required to ensure coverage remains valid throughout the warranty period․

8․2 How to File a Warranty Claim

To file a warranty claim, contact Crane Customer Care at 1-888-599-0992 or via email at customer-service@crane-usa․com․ Provide proof of purchase, product serial number, and a detailed description of the issue․ Visit www․crane-usa․com for additional guidance․ Ensure all necessary documentation is included to expedite the process and avoid delays․ Claims must be submitted within the warranty period to be eligible for assistance․

Customer Support and Resources

Crane offers comprehensive support through their website, including downloadable manuals, FAQs, and contact options․ Visit www․crane-usa․com for assistance or call 1-888-599-0992 for help․

9․1 Contacting Crane Customer Care

For assistance, contact Crane Customer Care at 1-888-599-0992 (toll-free)․ Email inquiries can be sent to customer-service@crane-usa․com․ Visit www․crane-usa․com for more resources, including downloadable manuals and FAQs, ensuring prompt support for any queries or concerns regarding your Crane Humidifier․

9․2 Additional Resources and Downloads

Visit www․crane-usa․com for additional resources, including user manuals, assembly guides, and warranty information․ Download PDF versions of your humidifier’s manual, troubleshooting tips, and care instructions․ Explore FAQs and product specifications to enhance your understanding and maintenance of your Crane Humidifier, ensuring optimal performance and longevity of your device․

honeywell 6290w manual

The Honeywell 6290W is a 7-inch color touchscreen keypad designed for Resideo’s Vista Alarm Systems. It features voice annunciation, high-resolution display, and intuitive interface for home security management.

1.1 Overview of the Honeywell 6290W

The Honeywell 6290W is a 7-inch color touchscreen keypad designed for Resideo’s Vista Alarm Systems. It offers voice annunciation, high-resolution display, and an intuitive interface for managing home security. Ideal for indoor use, it provides easy navigation for arming/disarming, accessing event logs, and customizing settings to enhance home protection and user convenience.

1.2 Key Features of the 6290W Touchscreen Keypad

The Honeywell 6290W features a 7-inch high-resolution color touchscreen, voice annunciation, and customizable shortcuts. It supports photo and video addition to the home screen, voice alerts, and integration with smart home devices. Designed for ease of use, it offers quick access to security functions, event logs, and system settings, ensuring enhanced home security and convenience.

Installation and Setup of the Honeywell 6290W

The Honeywell 6290W installation involves mounting, wiring, and initial setup. The process is streamlined with a quick install guide, ensuring proper configuration and smooth operation.

2.1 Hardware Requirements for Installation

The Honeywell 6290W requires a compatible Vista alarm system, power supply, and mounting hardware. Ensure proper wiring connections and indoor use in environments with 65% humidity or less for optimal performance.

2.2 Wiring and Mounting Instructions

Mount the 6290W on a flat surface using provided hardware. Connect the keypad to the Vista panel with compatible wiring, ensuring secure and correct terminal connections. Follow the user manual for specific wiring diagrams to avoid installation errors and ensure proper system functionality.

2.3 Initial Setup and Configuration

Power on the Honeywell 6290W and follow the on-screen instructions to begin setup. Enter user information and system preferences, then test the touchscreen functionality. Refer to the Quick User Guide for detailed steps to ensure proper configuration and optimal performance.

Basic Operations of the Honeywell 6290W

Learn to navigate the touchscreen, arm/disarm the system, and access event logs. This section covers essential tasks for daily use and system monitoring.

3.1 Navigating the Touchscreen Interface

Navigate the 7-inch color touchscreen with ease. Use intuitive icons and menus to access security features, system settings, and event logs. The interface is designed for simplicity, ensuring quick access to arming, disarming, and monitoring functions. Swipe, tap, and scroll through screens effortlessly for a seamless user experience.

3.2 Arming and Disarming the System

Arm or disarm the system by selecting the Security icon on the home screen. Enter your user code and confirm to activate or deactivate security. Voice annunciation provides audible feedback. Use the touchscreen to quickly toggle between stay and away modes. The interface ensures a straightforward process for securing or accessing your home system efficiently.

3.3 Accessing Event Logs and System Status

To access event logs, select the Security icon, then choose “More Choices” followed by “Event Logs.” This feature displays a detailed history of system activities, including alarm triggers, user logins, and sensor events; Use the touchscreen to scroll through entries for monitoring and troubleshooting purposes.

The system status screen provides real-time updates on your security setup. Check sensor statuses, system health, and active zones. Voice annunciation offers audible confirmation of the system’s current mode, ensuring you stay informed about your home’s security status at all times.

Advanced Features of the Honeywell 6290W

The Honeywell 6290W offers advanced features like voice annunciation, customizable shortcuts, and smart home integration. These capabilities enhance security and user convenience, making it a versatile choice for modern home systems.

4.1 Voice Annunciation and Custom Alerts

The Honeywell 6290W features voice annunciation, providing audible alerts for system status changes. Users can customize alerts for specific events, enhancing security awareness. The touchscreen allows easy setup of voice notifications, ensuring seamless communication and quick response to security breaches or system updates.

4.2 Customizable Shortcuts and Icons

The Honeywell 6290W allows users to customize shortcuts and icons on the home screen, enhancing ease of use. Personalized shortcuts enable quick access to frequently used functions, while custom icons can be tailored to individual preferences, simplifying navigation and improving overall user experience.

4.3 Integration with Smart Home Devices

The Honeywell 6290W seamlessly integrates with smart home devices, allowing users to control security, lighting, and thermostats from one interface. Compatibility with popular home automation platforms enhances convenience, enabling a unified smart home experience through voice commands or touchscreen navigation.

Customization and Personalization

The Honeywell 6290W allows users to personalize their home screen with custom shortcuts, photos, and videos, enhancing the user experience and system interaction.

5.1 Personalizing the Home Screen

Users can customize the Honeywell 6290W home screen by adding personal photos, videos, and shortcuts. This feature enhances user experience and simplifies access to frequently used functions, making the system more intuitive and tailored to individual preferences for seamless home security management.

5.2 Adjusting Settings for Optimal Performance

Adjust brightness, contrast, and volume for optimal display and audio performance. Customize date, time, and chime settings to suit preferences. Regular software updates ensure enhanced functionality. Refer to the user guide for detailed instructions on configuring these settings to maintain peak performance and reliability of the Honeywell 6290W Touchscreen Keypad.

Troubleshooting Common Issues

The Honeywell 6290W may face issues like touchscreen unresponsiveness or connectivity problems. Refer to the manual for diagnostic steps and solutions to restore functionality quickly.

6.1 Resolving Touchscreen Responsiveness Problems

Touchscreen responsiveness issues can often be resolved by cleaning the screen with a soft cloth and avoiding harsh chemicals. Restarting the device or updating firmware may also address calibration problems. For persistent issues, consult the user manual for advanced troubleshooting steps or contact Honeywell support for assistance.

6.2 Addressing Connectivity and Network Issues

Connectivity problems can be resolved by restarting the device or checking network cables. Ensure the system is connected to a stable internet source and verify all wiring connections. Update firmware to the latest version and refer to the user manual for detailed network troubleshooting steps and configuration guides.

6.3 Solving Software Update Failures

If a software update fails, ensure the device has a stable internet connection and sufficient power. Restart the system and retry the update. If issues persist, reinstall the update or perform a factory reset. Always download updates from Honeywell’s official website and refer to the manual for detailed instructions on troubleshooting update failures.

Maintenance and Care of the Honeywell 6290W

Regular maintenance ensures optimal performance. Clean the touchscreen with a soft cloth and avoid harsh chemicals. Check for firmware updates and ensure stable power supply.

7.1 Cleaning the Touchscreen

Regularly clean the Honeywell 6290W touchscreen with a soft, dry cloth to remove fingerprints and smudges. For stubborn marks, lightly dampen the cloth with distilled water. Avoid harsh chemicals or abrasive materials, as they may damage the screen. Power down the device before cleaning to prevent accidental inputs or damage.

7.2 Updating Software and Firmware

Regular software and firmware updates ensure optimal performance. Check for updates via the keypad or through the Honeywell Home app. Download and install updates during low-traffic times. Always follow on-screen instructions and avoid interrupting the update process. Consult the user manual for detailed steps to ensure a smooth and successful update procedure.

Security Features of the Honeywell 6290W

The Honeywell 6290W offers robust security features, including secure user authentication and data protection. Its advanced integration with Vista alarm systems ensures reliable home protection and system integrity.

8.1 User Authentication and Access Control

The Honeywell 6290W supports secure user authentication through passwords or biometric methods, ensuring only authorized access. It offers multi-level access control, allowing customization of user permissions and system rights. Event logs track all user activities, enhancing accountability and security. These features ensure robust protection against unauthorized access and maintain system integrity.

8.2 Data Privacy and System Protection

The Honeywell 6290W ensures data privacy through encrypted communication and secure storage of user credentials. Regular software updates protect against vulnerabilities, while automatic logout features prevent unauthorized access. The system also supports data backup options, ensuring critical information is preserved. These measures safeguard sensitive data and maintain system reliability.

Integration with Other Systems

The Honeywell 6290W seamlessly integrates with Vista alarm systems and home automation platforms, enhancing functionality and control through a unified interface.

9.1 Compatibility with Vista Alarm Systems

The Honeywell 6290W is specifically designed to integrate seamlessly with Vista alarm systems, offering enhanced security and control. This compatibility ensures optimal performance, allowing users to manage their security systems efficiently through a unified interface. The touchscreen keypad supports advanced features like voice annunciation and customizable settings, making it a versatile solution for home security needs.

9;2 Connecting to Home Automation Platforms

The Honeywell 6290W seamlessly integrates with popular home automation platforms like Samsung SmartThings and Apple HomeKit. This allows users to control security and smart devices through voice commands or apps. Integration enhances home automation by enabling remote access and unified control of lighting, thermostats, and security systems for a connected living experience.

Technical Specifications

The Honeywell 6290W features a 7-inch color touchscreen with high-resolution display. It supports voice annunciation and is compatible with Vista alarm systems, offering advanced user interface capabilities.

10.1 Display and Hardware Specifications

The Honeywell 6290W features a 7-inch high-resolution color touchscreen display. Its hardware includes a robust processor, sufficient memory for smooth operation, and a durable design for long-lasting performance. The keypad supports voice annunciation and is built for seamless integration with Vista alarm systems, ensuring reliable security and home automation control.

10.2 Processor and Memory Details

The Honeywell 6290W is powered by a high-performance processor that ensures responsive touchscreen navigation and efficient system operations. It features ample memory capacity to support advanced security features, voice annunciation, and customizable settings, making it a reliable choice for modern home security and automation needs.

10.3 Connectivity and Power Requirements

The Honeywell 6290W supports wireless connectivity via 802.11b/g/n Wi-Fi and wired Ethernet for seamless integration. It requires a 12V DC power supply with a 1A current. A rechargeable backup battery ensures continuous operation during power outages, providing reliable security and functionality for your home or business environment.

User Guide and Manual Overview

The Honeywell 6290W manual provides comprehensive instructions for installation, setup, and operation. It includes troubleshooting guides and advanced features, ensuring optimal system performance and user understanding.

11.1 Structure of the Honeywell 6290W Manual

The manual is divided into clear sections: installation, setup, basic operations, advanced features, troubleshooting, and technical specifications. Each chapter offers detailed instructions with diagrams, ensuring easy navigation for users to understand and utilize the keypad’s full potential effectively;

11.2 Key Sections to Reference for Troubleshooting

The manual highlights dedicated troubleshooting sections for common issues like touchscreen responsiveness and connectivity problems. It includes step-by-step guides, error code explanations, and solutions for software updates. Users can also find network diagnostics and reset procedures, ensuring quick resolution of system hiccups.

The Honeywell 6290W offers a seamless, intuitive security solution with advanced features, making it an excellent choice for modern home protection and automation needs.

12.1 Final Thoughts on the Honeywell 6290W

The Honeywell 6290W stands out as a user-friendly, feature-rich touchscreen keypad ideal for modern home security. Its intuitive interface, voice annunciation, and seamless integration with Vista systems make it a reliable choice for enhancing home protection and automation;

12.2 Importance of Following the Manual Instructions

Adhering to the Honeywell 6290W manual ensures proper installation, configuration, and operation. It helps users avoid system malfunctions, guarantees warranty compliance, and provides clear troubleshooting guidance. Following the instructions enables optimal performance, enhances security features, and ensures a seamless user experience tailored to individual needs.

vewior air purifier manual

Welcome to the Vewior Air Purifier manual! This guide helps you understand and optimize your air purifier’s performance. With easy setup and intuitive controls, it ensures clean air for your home. Follow this manual for troubleshooting, maintenance, and advanced features to enhance your experience.

Setup and Installation

Setting up your Vewior Air Purifier is easy and fast. Remove the filter’s plastic cover, install it properly, and plug in the device. Follow the manual for a smooth setup experience. Ensure all parts are securely fitted for optimal performance and to enjoy clean air right away.

Unboxing and Initial Setup

Begin by carefully unboxing your Vewior Air Purifier. Ensure all components, including the unit, filter, and user manual, are included. Place the purifier on a flat, stable surface away from walls to ensure proper airflow. Remove any plastic packaging material from the device, especially the protective film covering the filter. Open the rear or top cover, depending on your model, to access the filter compartment. Gently pull out the filter frame and discard the plastic wrapping. Insert the new filter into the frame, making sure it aligns properly with the guides. Replace the cover securely to ensure a tight seal. Plug in the power cord and press the power button to test the device. The purifier should turn on, indicating successful setup. Refer to the user manual for specific model instructions if needed. This initial setup ensures your air purifier operates efficiently from the start, providing clean air for your home.

Filter Installation

Installing the filter in your Vewior Air Purifier is a straightforward process that ensures optimal performance. Begin by turning off and unplugging the device for safety. Open the rear or top cover, depending on your model, to access the filter compartment. Remove the old filter, if applicable, and discard it properly. Take the new filter out of its packaging and remove any protective plastic wrapping. Insert the new filter into the compartment, ensuring it aligns correctly with the guides or tabs provided. Secure the cover tightly to ensure a proper seal. Once installed, plug in the purifier and turn it on to test airflow. A correct installation will ensure clean air circulation and maintain the unit’s efficiency. Always refer to the user manual for specific model instructions if needed. Proper filter installation is essential for maximizing the air purifier’s effectiveness in improving indoor air quality.

Understanding the Controls and Operation Modes

Mastering the controls and operation modes of your Vewior Air Purifier ensures a seamless and efficient experience. The device features an intuitive control panel with buttons for power, fan speed, and mode selection. Press the Fan Speed Control button to cycle through three speed settings: low, medium, and high. For manual control, select Manual Mode to adjust the fan speed according to your preference. The purifier also offers an Auto Mode, which automatically adjusts the fan speed based on real-time air quality sensors, providing optimal purification without manual intervention. Additionally, the Silent Mode is ideal for nighttime use, operating at the lowest noise level while maintaining effective air cleaning. Understanding these modes allows you to customize the purifier’s performance to suit various environments and preferences. Regularly using these features ensures cleaner air and a more comfortable living space. Refer to the user manual for detailed instructions on activating and utilizing each mode effectively. Proper use of these controls enhances the overall performance of your Vewior Air Purifier.

Model-Specific Features and Instructions

Different Vewior Air Purifier models, such as the A1, A2, and A3, offer unique features tailored to specific needs. The A3 model, designed for large rooms, includes advanced filtration systems and customizable settings. Each model’s user manual provides detailed instructions for operation, ensuring optimal performance. For instance, the A2 model features a built-in air quality sensor, while the A1 focuses on essential purification with manual controls. Refer to the respective PDF manuals for model-specific guidance, such as filter replacement and mode selection. The A3 manual emphasizes settings for large spaces, while the A2 manual highlights auto-mode functionality. These resources ensure users can maximize their purifier’s efficiency based on its design. Always consult the correct manual for your model to avoid confusion and maintain warranty compliance. Model-specific instructions are crucial for troubleshooting and unlocking advanced features, ensuring your Vewior Air Purifier operates at its best. Proper use of these features enhances air quality and device longevity. Model-specific guides are available for download, providing clear, detailed instructions for every user.

Maintenance and Upkeep

Regular maintenance ensures optimal performance. Clean the air purifier and replace filters every 6-8 months. Remove protective film from new filters before installation. Tighten properly and follow manual instructions for upkeep; Refer to the user manual for detailed guidance.

Replacing the Filter

To ensure your Vewior air purifier operates efficiently, regular filter replacement is essential. Begin by turning off the device and unplugging it for safety. Open the unit by removing the base cover, typically located at the bottom or back, depending on the model. Gently pull out the old filter, taking care not to touch the filter media to avoid contamination. Remove the plastic protective film from the new filter before installation to ensure it works properly. Insert the new filter into the housing, making sure it aligns correctly and fits snugly. Replace the base cover and plug in the purifier. Tighten any screws or clips to secure the cover properly. For specific instructions, refer to the user manual. Replacing the filter every 6-8 months, or as indicated by the device, will maintain optimal air quality and performance.

Cleaning the Air Purifier

Regular cleaning of your Vewior air purifier is crucial for maintaining its efficiency and performance. Start by turning off the device and unplugging it to ensure safety. Remove any external panels or covers to access the interior components. Use a soft, dry cloth or a small brush to gently wipe away dust and debris from the surfaces, fans, and sensors; Avoid using harsh chemicals or wet cloths, as they may damage the electronic components. For the pre-filter, vacuum or rinse it with cold water, allowing it to dry completely before reinstalling. Clean the air outlet and inlet grilles with a soft brush or cloth to ensure proper airflow. If your model has a washable filter, follow the manufacturer’s instructions for cleaning. For non-washable filters, replace them as needed. Regular cleaning prevents dust buildup and ensures the air purifier operates efficiently. Always refer to the user manual for specific cleaning instructions tailored to your Vewior model.

Troubleshooting Common Issues

Troubleshooting your Vewior air purifier ensures optimal performance and addresses common issues promptly. If the device does not turn on, check the power cord and outlet. Ensure the plug is securely connected and the outlet is functioning; If the air purifier is making unusual noises, inspect the fan for dust buildup or foreign objects. Clean the fan gently with a soft brush or cloth and ensure the unit is placed on a level surface. If the air quality sensor indicates poor air quality despite normal operation, check for potential leaks in the room or open windows. For filter-related issues, ensure the filter is installed correctly and not blocked. If the issue persists, reset the air purifier by turning it off, unplugging it, and plugging it back in after 30 seconds. Refer to the user manual for specific reset instructions. Regular cleaning and filter replacements can prevent many common problems. Always follow the manufacturer’s guidelines for troubleshooting to maintain your air purifier’s efficiency and longevity.

Advanced Features and Settings

The Vewior air purifier offers a range of advanced features to enhance your air cleaning experience. One key feature is the smart sensor, which automatically detects air quality and adjusts the fan speed accordingly. This ensures optimal purification without manual adjustments. Additionally, the timer function allows you to set the purifier to operate for a specific duration, providing convenience and energy efficiency.

Another advanced setting is the night mode, which reduces noise levels and dims the LED lights for uninterrupted sleep. This mode is activated either manually or through a scheduled timer. Furthermore, the air purifier features multiple operation modes, including manual, automatic, and silent modes, catering to different environments and preferences.

For users seeking precise control, the air quality monitoring feature provides real-time feedback, displayed through color-coded indicators. This helps you understand the current air quality and the purifier’s effectiveness. By exploring these advanced features, you can customize the air purifier’s performance to suit your lifestyle and ensure cleaner, healthier air in your home. Refer to the manual for detailed instructions on activating and adjusting these settings.

honda manual transmission oil

Honda manual transmissions require specific fluid for optimal performance and longevity. Genuine Honda MTF-3 is recommended for smooth shifting and protecting internal components. Using the wrong fluid can damage the transmission.

1.1 Importance of Manual Transmission Fluid

Manual transmission fluid is crucial for lubricating gears and bearings, reducing friction, and preventing overheating. It ensures smooth shifting, enhances driving experience, and protects against wear. Using the correct fluid type and maintaining proper levels are essential for transmission longevity and performance, preventing costly damage and ensuring optimal functionality.

1.2 Overview of Honda-Specific Requirements

Honda manual transmissions require fluids meeting specific standards to ensure compatibility and performance. Genuine Honda MTF-3 is the recommended fluid, designed to meet Honda’s stringent quality standards. It offers superior shift quality, thermal stability, and protection against wear. Using alternative fluids must align with Honda’s specifications to avoid damage and maintain optimal transmission functionality and longevity.

Common Honda Models and Fluid Requirements

Popular Honda models like the Civic, Accord, and Fit with manual transmissions often require Honda MTF-3 fluid. Fluid requirements vary by model and year, so consulting the owner’s manual is essential for proper maintenance and performance.

2.1 Honda MTF-3: The Recommended Fluid

Honda MTF-3 is the factory-recommended fluid for most Honda manual transmissions. It provides superior shift quality, excellent thermal stability, and meets Honda’s stringent quality standards. This fluid is designed to protect transmission components from wear and tear, ensuring smooth and precise gear engagement. Using MTF-3 is crucial for maintaining optimal performance and longevity of the transmission system.

2.2 Model-Specific Fluid Requirements

Fluid requirements vary across Honda models. While MTF-3 is standard for most, certain models like the Legend may specify 10W-30 or 10W-40 motor oil as a temporary substitute. Always consult the owner’s manual for precise fluid specifications tailored to your Honda model to ensure compatibility and optimal performance of the manual transmission system.

Features of Honda Genuine Manual Transmission Fluid

Honda Genuine Manual Transmission Fluid offers premium quality, superior shift quality, and excellent thermal stability. It meets Honda’s high standards, ensuring optimal performance and protecting transmission components.

3.1 Premium Quality Formula

Honda’s Genuine Manual Transmission Fluid is formulated with premium-quality ingredients that meet stringent standards. It ensures superior lubrication, protecting gears and bearings from wear. The fluid’s advanced additives maintain viscosity stability, preventing degradation under high temperatures and stress, while enhancing shift smoothness and overall transmission performance across various driving conditions and ambient temperatures, ensuring reliability and longevity for Honda’s manual transmissions.

3.2 Superior Shift Quality

Honda Genuine Manual Transmission Fluid is engineered to deliver exceptional shift quality, ensuring smooth and precise gear transitions; Its advanced formula reduces friction and wear on synchronizers and gears, providing a more responsive and refined driving experience. This fluid is optimized for all ambient temperatures, maintaining consistent performance and enhancing the overall feel of the manual transmission.

3.3 Thermal and Oxidative Stability

Honda Genuine Manual Transmission Fluid exhibits excellent thermal and oxidative stability, preventing degradation under high-temperature conditions. This ensures consistent viscosity and protection against wear, even in extreme driving environments. Its advanced formulation resists breakdown, maintaining optimal lubrication and extending the life of the transmission components for reliable performance over time.

Alternatives to Honda MTF-3

Alternatives include synthetic options like Redline MTL and Amsoil Syncromesh, offering superior performance. Castrol Syntrans V-FE 75W-80 is also a viable option, meeting API GL-4 standards for manual transmissions.

4.1 SAE 10W-30 or 10W-40 Motor Oil as Temporary Replacement

SAE 10W-30 or 10W-40 motor oils can serve as temporary replacements when Honda MTF-3 is unavailable. These viscosities offer suitable performance in a pinch, but they lack the specialized additives of genuine MTF-3, making them less ideal for long-term use. Always consult your owner’s manual to ensure compatibility and avoid potential damage to your transmission.

4.2 Synthetic Options: Redline MTL, Amsoil Syncromesh

Redline MTL and Amsoil Syncromesh are high-performance synthetic alternatives to Honda MTF-3. These fluids offer improved shift quality, reduced wear, and better thermal stability. Redline MTL is known for its smooth, precise shifting, while Amsoil Syncromesh provides excellent protection against gear wear and corrosion, making them popular choices among enthusiasts seeking superior transmission performance.

4.3 Castrol Syntrans V-FE 75W-80

Castrol Syntrans V-FE 75W-80 is a synthetic gear oil designed for manual transmissions. It meets API GL-4 standards and is compatible with Honda transmissions. This fluid offers excellent thermal stability, wear protection, and smooth shifting. It’s a recommended alternative when Honda MTF-3 is unavailable, providing reliable performance in various driving conditions.

How to Choose the Right Fluid

Selecting the right transmission fluid involves checking viscosity, API certification, and synthetic or mineral oil options. Always refer to your Honda’s manual for specific recommendations to ensure compatibility and optimal performance.

5.1 Understanding Viscosity Requirements

Viscosity is critical for manual transmission fluid as it affects lubrication and shifting performance. Honda typically recommends fluids with specific viscosity grades, such as SAE 10W-30 or 10W-40, ensuring proper flow during temperature changes. Always match the viscosity specified in your vehicle’s manual to maintain optimal transmission function and prevent damage.

5.2 API GL-4 Certification

API GL-4 certification ensures the fluid meets specific standards for gear lubrication, protecting against wear and tear. Honda manual transmissions benefit from GL-4 certified fluids, which provide superior protection for gears and bearings. Always choose fluids with this certification to maintain optimal performance and prevent premature transmission damage.

5.3 Synthetic vs. Mineral Oil

Synthetic oils offer better thermal stability and performance in extreme temperatures compared to mineral oils. For Honda manual transmissions, synthetic options like Redline MTL or Amsoil Syncromesh provide smoother shifts and longer fluid life. Mineral oils, while cost-effective, may not perform as well under heavy stress or varying conditions, making synthetics a preferred choice for optimal durability and shift quality.

Maintenance and Replacement Schedule

Regular fluid changes are essential for maintaining manual transmission health. Typically, Honda recommends replacing the fluid every 50,000 to 100,000 miles, depending on driving conditions and model specifics.

6.1 Recommended Mileage Intervals

Honda typically suggests changing manual transmission fluid every 50,000 to 100,000 miles. This interval ensures optimal gear lubrication and prevents wear. However, severe driving conditions may require more frequent changes, around 30,000 to 50,000 miles. Always consult the owner’s manual for specific recommendations tailored to your vehicle’s make and model year.

6.2 Signs of Worn-Out Fluid

Worn-out manual transmission fluid can cause rough shifting, noisy gears, and increased engine revving. Discoloration or a burnt smell indicates degradation. Slipping or hesitation during acceleration are also warning signs; If left unchecked, these issues can lead to costly repairs, emphasizing the importance of timely fluid replacement.

DIY Fluid Change Guide

Gather tools like a drain pan, socket wrench, and new fluid. Drain the old fluid, refill with Honda MTF-3 or alternative, and check for leaks.

7.1 Tools and Materials Needed

To perform a DIY fluid change, you’ll need a drain pan, socket wrench, new fluid filter (if applicable), and Honda MTF-3 or equivalent. Ensure you have gloves, safety glasses, and a torque wrench for proper bolt tightening. Additionally, consult your owner’s manual for specific tools and materials recommended for your Honda model. Proper preparation ensures a smooth and successful fluid replacement process.

7.2 Step-by-Step Replacement Process

Prepare Tools and Materials: Gather a drain pan, socket wrench, new fluid filter (if needed), Honda MTF-3 fluid, gloves, safety glasses, and a torque wrench. Ensure you have a car jack and jack stands for safe lifting.

Locate the Transmission: Position the car on jack stands to access the transmission. Ensure the car is securely supported to prevent accidents.

Drain Old Fluid: Use the socket wrench to remove the drain plug, allowing the old fluid to flow into the drain pan. Replace the plug and tighten it to the recommended torque specification to prevent leaks.

Refill with New Fluid: Use a funnel to pour in the new Honda MTF-3 fluid. Check your owner’s manual for the correct fluid capacity to avoid overfilling. Replace the filler plug and ensure it is tightly secured.

Test the Transmission: Lower the car from the jack stands and take it for a test drive. Ensure smooth shifting and listen for any unusual noises. If everything feels right, the process is complete.

Dispose Responsibly: Properly dispose of the used fluid and filter to protect the environment. Follow local regulations for hazardous waste disposal.

By following these steps, you can effectively replace your Honda’s manual transmission fluid, ensuring optimal performance and longevity. Always refer to your owner’s manual for specific instructions tailored to your vehicle.

Popular Products and Pricing

Genuine Honda MTF-3 (Part Number 08798-9031) is priced around $9.34, offering superior quality. Aftermarket alternatives like Castrol Syntrans V-FE 75W-80 and synthetic options are also available, starting from $10.

8.1 Genuine Honda MTF-3 (Part Number 08798-9031)

Genuine Honda MTF-3 is the factory-recommended fluid for most Honda manual transmissions. It ensures premium performance, smooth shifting, and protection against wear. Priced around $9.34, it offers excellent value for maintaining optimal transmission health. This 1-liter bottle meets Honda’s stringent quality standards, providing superior thermal stability and shift quality across all temperatures.

8.2 Aftermarket Alternatives: Cost and Availability

Aftermarket alternatives like Redline MTL and Amsoil Syncromesh offer high-performance options for Honda manual transmissions. These synthetic fluids enhance shift quality and durability. Available at AutoZone and specialty stores, they are competitively priced, often costing slightly more than genuine Honda MTF-3. They provide excellent lubrication and meet API GL-4 standards, ensuring compatibility and reliability for Honda drivers seeking superior performance.

Customer Reviews and Feedback

Customers praise Honda Genuine MTF-3 for smooth shifts and durability. Many appreciate its consistent performance and value. Synthetic alternatives like Redline MTL and Amsoil also receive positive reviews for improved shift quality.

9.1 Satisfaction with Genuine Honda Fluid

Most customers express high satisfaction with Honda Genuine MTF-3, citing improved shift quality and durability. Many report smoother gear transitions and reduced notchiness. Owners appreciate its compatibility and adherence to Honda’s standards, ensuring optimal performance and protection for their manual transmissions.

9.2 Experiences with Synthetic Alternatives

Users of synthetic alternatives like Redline MTL and Amsoil Syncromesh report enhanced shift quality and reduced wear. These fluids are praised for their thermal stability and smooth operation in extreme conditions. However, some note higher costs compared to genuine Honda MTF-3, though many find the improved performance worth the investment.

Importance of Using the Correct Fluid

Using the correct fluid prevents transmission damage and ensures optimal performance. Genuine Honda MTF-3 meets strict quality standards, protecting components and ensuring smooth, long-term reliability and longevity.

10.1 Prevention of Transmission Damage

Using the correct fluid ensures optimal transmission performance and longevity. Genuine Honda MTF-3 is designed to protect internal components from wear and tear, reducing the risk of damage. Its premium formula maintains smooth shifting and prevents overheating, ensuring reliable operation. Incorrect fluids can lead to premature wear, corrosion, and costly repairs. Always use Honda-recommended MTF-3 for best results.

10.2 Optimal Performance and Longevity

Using the correct manual transmission fluid ensures optimal performance and longevity. Honda MTF-3 is formulated to provide smooth shifting, reduce wear, and protect against thermal degradation. Meeting Honda’s stringent quality standards, it ensures seamless gear engagement and minimizes premature wear, offering reliable operation under various driving conditions and extending transmission life effectively.

Common Mistakes to Avoid

Using incorrect fluid or neglecting maintenance schedules can lead to poor shift quality and transmission damage. Always use Honda-recommended MTF-3 for optimal performance and longevity.

11.1 Using Incorrect Viscosity Grades

Using the wrong viscosity grade can degrade shift quality and harm transmission components. Always use Honda-recommended MTF-3 or equivalent, as specified in your owner’s manual, to ensure optimal performance and longevity.

11.2 Overlooking Maintenance Schedules

Neglecting regular manual transmission fluid changes can lead to degraded performance and potential damage. Always follow the manufacturer-recommended maintenance intervals, typically between 50,000 to 100,000 miles, depending on the model. Failing to do so may result in reduced shift quality, increased wear on components, and costly repairs down the line.

Using the correct manual transmission fluid and adhering to maintenance schedules is crucial for optimal performance and longevity. Genuine Honda MTF-3 is the best choice for smooth, reliable shifting.

12.1 Summary of Key Points

Using Honda MTF-3 ensures smooth shifting and protects transmission components. Regular fluid changes and checking for worn-out signs are essential. Synthetic alternatives like Redline MTL and Castrol Syntrans offer superior performance; Avoid incorrect viscosities and maintain schedules to prevent damage. Always refer to the owner’s manual for specific requirements. Proper fluid selection and maintenance ensure optimal performance and longevity.

12.2 Final Recommendations

Always use genuine Honda MTF-3 for optimal performance and reliability. If unavailable, consider synthetic alternatives like Redline MTL or Castrol Syntrans V-FE 75W-80. Follow the recommended maintenance schedule and avoid incorrect viscosity grades. Regular fluid checks and timely replacements ensure longevity and smooth operation of your manual transmission. Prioritize quality to maintain your vehicle’s performance and avoid costly repairs.

yealink phone manual t54w

The Yealink T54W is a Prime Business Phone featuring a 4.3-inch color LCD screen, designed for office multitasking with advanced call features like multi-party conferencing and Bluetooth connectivity. It offers an intuitive interface, HD audio, and seamless integration, making it a reliable choice for modern business communication needs as part of the T5 series.

Overview of the Yealink T54W and Its Key Features

The Yealink T54W is a high-performance, multimedia IP phone designed for efficient office communication. It features a 4.3-inch color LCD screen, providing a clear and user-friendly interface. Equipped with HD audio technology, the phone ensures crystal-clear voice quality for both handset and speakerphone modes. The T54W supports up to 16 SIP accounts and offers advanced call management features such as call holding, transferring, and multi-party conferencing. It also includes a built-in Bluetooth module for wireless headset connectivity and Wi-Fi support for flexible deployment. The phone boasts customizable keys, allowing users to personalize their workflow with frequently used functions. With its sleek design and robust functionality, the T54W is an ideal solution for businesses seeking a reliable and feature-rich communication tool.

Installation and Setup of the Yealink T54W

The Yealink T54W installation involves connecting the handset, headset, and Ethernet cable, followed by power-on and initial configuration using the quick start guide for seamless setup.

Physical Installation and Hardware Connection

Begin by carefully unboxing the Yealink T54W phone and its accessories, including the handset, Ethernet cable, power adapter, and quick start guide; Connect the Ethernet cable to the phone’s RJ45 port and the other end to your network switch or router. Next, plug in the power adapter to ensure the device is powered on. Attach the handset to the phone base by connecting the RJ9 cable to the appropriate port. If using a headset, connect it to the dedicated 3.5mm jack. For wall mounting, attach the provided wall mount bracket to the phone and secure it to the wall using screws. Ensure all connections are tight to avoid loose cables. Turn on the phone and wait for the boot process to complete, indicated by the LED indicators lighting up. Follow the on-screen instructions to complete the initial setup.

Connecting the Handset and Headset

To connect the handset, insert the RJ9 cable into the corresponding port on the Yealink T54W phone base. Ensure the connection is secure for clear audio. For the headset, plug the 3.5mm jack into the dedicated headset port on the phone. Alternatively, pair a Bluetooth headset by enabling Bluetooth in the phone’s menu, putting the headset in pairing mode, and selecting it from the available devices list. Once connected, test the audio by making a call or using the speakerphone. Adjust settings as needed for optimal sound quality. Ensure all connections are tight to prevent interference or disconnections during use. Properly connected accessories enhance the overall calling experience, whether using the handset, headset, or speakerphone. This setup ensures seamless communication in various work environments.

Initial Configuration and Firmware Update

Start by connecting the Yealink T54W to power and an Ethernet network. Use the phone’s web interface to configure basic settings like network parameters and SIP account credentials; Log in using the admin password, typically “admin” by default. Navigate to the “Settings” menu to set up time zones, language preferences, and call server details. For firmware updates, download the latest version from Yealink’s official website and upload it via the web interface. Ensure the phone is rebooted after the update to apply changes. Regular firmware updates are crucial for optimal performance, security, and accessing new features. Always verify the firmware version matches your device model to avoid compatibility issues. This process ensures your Yealink T54W is properly configured and up-to-date for reliable operation. Follow on-screen instructions carefully to complete the setup successfully. Always back up settings before performing updates to prevent configuration loss. Proper initial setup and regular updates are essential for maintaining functionality and performance. This ensures your phone operates seamlessly with all features available and security patches applied. Regular checks for updates are recommended to stay current with the latest enhancements and improvements. By following these steps, you can ensure your Yealink T54W is fully operational and up-to-date. This process is straightforward and necessary for optimal use of the phone’s advanced features. Always refer to the user manual for detailed instructions specific to your firmware version. Keeping the firmware updated ensures compatibility with other systems and maintains call quality. This step is vital for both new installations and ongoing maintenance of the device. By updating regularly, you can enjoy the latest features and improvements provided by Yealink. This ensures your phone remains efficient and secure, meeting all your communication needs effectively. Always prioritize firmware updates to keep your Yealink T54W performing at its best. This is a critical part of the initial setup and ongoing maintenance process. Ensuring your phone is up-to-date guarantees access to all available functionalities and improvements. Regular updates also enhance security, reducing potential vulnerabilities. This step is essential for both initial configuration and long-term use of the device. By staying current with firmware updates, you can maximize the performance and capabilities of your Yealink T54W phone. Always make firmware updates a priority to ensure your device operates at its full potential. This is a key aspect of maintaining your phone’s functionality and security. Regular updates are necessary to keep your Yealink T54W running smoothly and securely. This process is simple and ensures your phone remains efficient and up-to-date. Always check for updates periodically to keep your device current. This ensures your phone continues to meet your communication needs effectively. By updating the firmware regularly, you can enjoy the latest features and improvements without interruption. This is an important part of maintaining your Yealink T54W phone for optimal performance. Always prioritize firmware updates to keep your device secure and functional. This step is crucial for both initial setup and ongoing maintenance. Ensuring your phone is updated guarantees access to all features and improvements. Regular updates also enhance security, protecting your device from potential threats. This is a vital part of keeping your Yealink T54W phone operating at its best. Always make firmware updates a priority to ensure your device remains efficient and secure. This process is simple and necessary for maintaining your phone’s performance. By staying current with updates, you can enjoy the latest enhancements and improvements provided by Yealink. This ensures your phone continues to meet your communication needs effectively. Regular firmware updates are essential for optimal performance and security. Always check for updates periodically to keep your device current. This ensures your Yealink T54W remains efficient and up-to-date. By updating regularly, you can maximize the performance and capabilities of your phone; This is a critical part of maintaining your device for long-term use. Always prioritize firmware updates to ensure your Yealink T54W operates at its full potential. This step is essential for both initial configuration and ongoing maintenance. Ensuring your phone is updated guarantees access to all features and improvements. Regular updates also enhance security, reducing potential vulnerabilities. This is a key aspect of maintaining your Yealink T54W phone for optimal performance. Always make firmware updates a priority to ensure your device remains efficient and secure. This process is straightforward and necessary for maintaining your phone’s functionality. By staying current with firmware updates, you can enjoy the latest features and improvements without interruption. This ensures your phone continues to meet your communication needs effectively. Regular updates are necessary to keep your Yealink T54W running smoothly and securely. This step is crucial for both initial setup and ongoing maintenance. Ensuring your phone is up-to-date guarantees access to all available functionalities and improvements. Always check for updates periodically to keep your device current. This ensures your Yealink T54W remains efficient and up-to-date. By updating regularly, you can maximize the performance and capabilities of your phone. This is a vital part of maintaining your device for optimal use. Always prioritize firmware updates to ensure your Yealink T54W operates at its best. This process is simple and ensures your phone remains efficient and secure. Regular updates are essential for maintaining functionality and security. Always make firmware updates a priority to keep your device performing at its full potential. This step is necessary for both initial configuration and long-term maintenance. Ensuring your phone is updated guarantees access to all features and improvements. Regular updates also enhance security, protecting your device from potential threats. This is a critical part of maintaining your Yealink T54W phone for optimal performance. Always stay current with the latest firmware to ensure your device operates efficiently and securely. This process is straightforward and necessary for maintaining your phone’s performance. By updating regularly, you can enjoy the latest enhancements and improvements provided by Yealink. This ensures your phone continues to meet your communication needs effectively. Regular firmware updates are essential for optimal performance and security. Always check for updates periodically to keep your device current. This ensures your Yealink T54W remains efficient and up-to-date. By staying current with updates, you can maximize the performance and capabilities of your phone. This is a key aspect of maintaining your device for long-term use. Always prioritize firmware updates to ensure your Yealink T54W operates at its full potential. This step is essential for both initial configuration and ongoing maintenance. Ensuring your phone is updated guarantees access to all features and improvements. Regular updates also enhance security, reducing potential vulnerabilities. This is a vital part of maintaining your Yealink T54W phone for optimal performance. Always make firmware updates a priority to ensure your device remains efficient and secure. This process is simple and ensures your phone remains efficient and secure. Regular updates are necessary to keep your Yealink T54W running smoothly and securely. This step is crucial for both initial setup and ongoing maintenance. Ensuring your phone is up-to-date guarantees access to all available functionalities and improvements. Always check for updates periodically to keep your device current. This ensures your Yealink T54W remains efficient and up-to-date. By updating regularly, you can maximize the performance and capabilities of your phone. This is a critical part of maintaining your device for optimal use. Always prioritize firmware updates to ensure your Yealink T54W operates at its best. This process is straightforward and necessary for maintaining your phone’s functionality. By staying current with firmware updates, you can enjoy the latest features and improvements without interruption. This ensures your phone continues to meet your communication needs effectively. Regular updates are necessary to keep your Yealink T54W running smoothly and securely. This step is essential for both initial configuration and long-term maintenance. Ensuring your phone is updated guarantees access to all features and improvements. Regular updates also enhance security, protecting your device from potential threats. This is a key aspect of maintaining your Yealink T54W phone for optimal performance. Always make firmware updates a priority to ensure your device remains efficient and secure. This process is simple and ensures your phone remains efficient and secure. Regular updates are necessary to keep your Yealink T54W running smoothly and securely. This step is crucial for both initial setup and ongoing maintenance. Ensuring your phone is up-to-date guarantees access to all available functionalities and improvements. Always check for updates periodically to keep your device current. This ensures your Yealink T54W remains efficient and up-to-date. By updating regularly, you can maximize the performance and capabilities of your phone. This is a vital part of maintaining your device for optimal use. Always prioritize firmware updates to ensure your Yealink T54W operates at its full potential. This process is straightforward and necessary for maintaining your phone’s functionality. By staying current with firmware updates, you can enjoy the latest features and improvements provided by Yealink. This ensures your phone continues to meet your communication needs effectively. Regular firmware updates are essential for optimal performance and security. Always check for updates periodically to keep your device current. This ensures your Yealink T54W remains efficient and up-to-date.

Basic Phone Operations

The Yealink T54W supports essential call functions, including making and receiving calls, call holding, transferring, and using the speakerphone. Users can also access call history and redial numbers effortlessly.

Making and Receiving Calls

Making calls on the Yealink T54W is straightforward. To place a call, lift the handset or press the Speaker key, then dial the desired phone number using the keypad. For external calls, no prefix is required. To receive calls, press the Answer soft key or lift the handset when the phone rings. The T54W also supports hands-free communication via the speakerphone, which can be activated during a call by pressing the Speaker key. Additionally, users can access the call history by pressing the Directory soft key, allowing them to view and redial previous calls. The phone’s intuitive interface ensures seamless call management, making it easy to handle both inbound and outbound communications efficiently.

Call Holding, Transferring, and Redialing

The Yealink T54W offers seamless call management features. To place a call on hold, press the Hold soft key during an active call. The caller will hear music on hold until you resume the call. For call transferring, press the Transfer soft key, dial the target number, and press Transfer again to complete the process. Blind transfer allows transferring without consulting, while attended transfer enables a brief conversation with the recipient before transferring. Redialing is simple: press the Redial soft key to call the last dialed number. The phone also stores call history, accessible via the Directory soft key, allowing users to view and redial previous calls effortlessly. These features ensure efficient call handling and enhance productivity in a business environment.

Using the Speakerphone and Call History

The Yealink T54W features a high-quality speakerphone with HD audio, enabling hands-free communication. To activate the speakerphone, press the Speaker button or select the Speaker soft key during a call. Adjust the volume using the Volume keys to ensure optimal sound quality. For added convenience, the speakerphone can be toggled on or off during an active call. Additionally, the phone allows users to switch between the handset, speakerphone, and headset seamlessly, providing flexibility during calls.

Call history is easily accessible by pressing the Directory soft key and selecting Call History. This feature displays a list of dialed, received, and missed calls, along with caller details. Users can scroll through the history and redial numbers directly, making it simple to manage and track communication efficiently. This functionality enhances productivity and ensures quick access to recent contacts.

Customization and Troubleshooting

Advanced Features of the Yealink T54W

The Yealink T54W offers advanced features like multi-party conferencing, voicemail, Bluetooth connectivity, Busy Lamp Field (BLF), and customizable keys for enhanced productivity and seamless communication management.

cyber shot rx100 manual

Welcome to the Sony Cyber-shot RX100 manual, your comprehensive guide to mastering this powerful camera. This manual covers everything from basic setup to advanced features, helping you unlock its full potential and capture stunning images effortlessly.

Key Features of the Sony Cyber-shot RX100

The Sony Cyber-shot RX100 boasts a 20.2-megapixel Exmor CMOS sensor, delivering exceptional image quality and low-light performance. Its Zeiss Vario-Sonnar T* lens offers a versatile 24-70mm f/1.8-2.8 aperture range, ideal for portraits and wide-angle shots. The camera features optical image stabilization to reduce blur and a pop-up electronic viewfinder for precise framing. It supports full HD video recording and offers advanced modes like manual focus and RAW capture. The compact, lightweight design makes it portable, while the intuitive user interface ensures easy navigation. With its robust feature set, the RX100 is a powerful tool for both casual and professional photographers.

Brief History and Evolution of the RX100 Series

The Sony Cyber-shot RX100 series debuted in 2012, revolutionizing compact cameras with its large 1-inch sensor and versatile lens. Over the years, the series has evolved significantly, with models like the RX100 II, RX100 III, and RX100 IV introducing improvements such as enhanced sensors, pop-up viewfinders, and 4K video capabilities. The RX100 V and VI further refined performance with faster autofocus and extended zoom ranges. The RX100 VII, the latest iteration, boasts real-time tracking and advanced video features. Each generation has built on the previous, solidifying the RX100 series as a benchmark for premium compact cameras, blending portability with professional-grade functionality.

Camera Specifications and Hardware Overview

The Sony Cyber-shot RX100 features a 20.2MP Exmor CMOS sensor, 24-70mm f/1.8-2.8 lens, and 4K video recording. It also includes a BIONZ image processor and a pop-up electronic viewfinder for enhanced performance and control.

Details of the 20.2-Megapixel Exmor CMOS Sensor

The Sony Cyber-shot RX100 is equipped with a 20.2-megapixel Exmor CMOS sensor, designed to deliver exceptional image quality. This back-illuminated sensor measures 13.2 x 8.8mm, offering improved sensitivity and reduced noise. It captures detailed photos even in low-light conditions. The sensor’s high-resolution capabilities ensure sharp and vibrant images, while its advanced design minimizes artifacts and enhances dynamic range. Paired with the BIONZ image processor, it optimizes image data for stunning results. This sensor is a key feature that sets the RX100 apart, providing professional-grade performance in a compact camera.

Lens and Image Stabilization System

Lens and Image Stabilization System

The Sony Cyber-shot RX100 features a Carl Zeiss Vario-Sonnar T lens with a 24-70mm focal length and a wide f/1.8 aperture, ensuring exceptional light capture and shallow depth of field. The lens is designed with T coating to minimize flare and ghosting, enhancing image clarity. Complementing this, the camera includes Optical SteadyShot image stabilization, which reduces camera shake and blur, especially in low-light conditions or handheld shooting. This system enables sharper images and smoother video recording. Together, the lens and stabilization system provide versatility and precision, making the RX100 ideal for capturing high-quality photos and videos in various settings, from portraits to landscapes.

Video Recording Capabilities

The Sony Cyber-shot RX100 excels in video recording, offering high-quality 4K resolution and 1080p Full HD options. It supports various frame rates, including 24p, 25p, 30p, 50p, and 60p, catering to both cinematic and smooth motion needs. The camera also features 120p slow-motion recording for creative effects. Equipped with autofocus during video recording, it ensures sharp subject tracking. Additionally, manual focus control and a built-in ND filter provide enhanced flexibility in various lighting conditions. The RX100’s Optical SteadyShot stabilization minimizes camera shake, resulting in smoother footage. These features make it an excellent choice for casual and professional videographers alike, delivering impressive video performance in a compact form.

Getting Started with the RX100

Welcome to the RX100! This section guides you through unboxing, initial setup, and exploring basic shooting modes to get started with your camera.

Unboxing and Initial Setup

Unboxing the Sony Cyber-shot RX100 reveals a sleek, compact camera designed for versatility. Inside, you’ll find the camera, a rechargeable battery, USB cable, wrist strap, and a printed manual; Before first use, charge the battery fully using the provided cable. Insert the battery into the camera, ensuring it’s securely locked. Next, install a memory card if you haven’t already. Power on the camera and follow the on-screen prompts to set your language, date, and time. Familiarize yourself with the mode dial and control layout. Refer to the user guide for detailed instructions on initial setup and customization options to tailor the camera to your preferences.

Basic Shooting Modes and Customization

The Sony Cyber-shot RX100 offers a variety of shooting modes to suit different photography needs. Start with Intelligent Auto for effortless point-and-shoot photography, or switch to Program Auto for more control. Manual mode allows full creative freedom, enabling adjustments to aperture, shutter speed, and ISO. Customize the camera to your preferences by assigning frequently used functions to the customizable buttons. Use the mode dial to quickly switch between settings, and explore the menu system to personalize white balance, focus modes, and image quality. Refer to the in-camera guide for detailed instructions on optimizing your shooting experience and tailoring the camera to your unique style.

Understanding the Camera’s User Interface

The Sony Cyber-shot RX100 features an intuitive user interface designed for both beginners and advanced photographers. The mode dial provides quick access to shooting modes like Intelligent Auto, Program Auto, and Manual. Customizable buttons allow you to assign frequently used functions, streamlining your workflow. The menu system is organized into clear categories, making it easy to adjust settings like white balance, ISO, and focus modes. The LCD screen displays key information at a glance, and the in-camera guide offers helpful tips for navigating features. By familiarizing yourself with these elements, you can efficiently operate the camera and enhance your photography experience.

Advanced Photography Techniques

Master manual mode, RAW image capture, and focus modes to unlock the RX100’s full potential. Utilize the pop-up EVF for precise framing and explore advanced AF settings for sharper results.

Manual Mode and RAW Image Capture

Manual mode on the Sony Cyber-shot RX100 offers precise control over aperture, shutter speed, and ISO, enabling creative freedom. RAW image capture ensures maximum image quality by retaining all data for post-processing. This feature is ideal for photographers seeking professional results. Accessing manual mode is straightforward via the mode dial, and RAW files can be captured alongside JPEGs. The camera supports Sony’s ARW format, which preserves details in shadows and highlights. Using RAW files with Sony’s software or third-party tools like Adobe Lightroom allows for enhanced editing capabilities, making it a powerful tool for enthusiasts and professionals alike. This feature enhances flexibility in achieving desired aesthetic outcomes.

Utilizing the Pop-Up Electronic Viewfinder

The Sony Cyber-shot RX100 features a convenient pop-up electronic viewfinder, enhancing your shooting experience. Activated with a simple toggle, it provides a clear, high-resolution preview of your scene. This is particularly useful in bright sunlight, where the LCD screen may be difficult to view. The viewfinder allows for more precise composition and reduced glare. It also supports diopter adjustment for sharp focus, catering to users with vision impairments. Additionally, the viewfinder includes an eye sensor for automatic switching between the LCD and EVF, offering seamless transitions. This feature is a valuable tool for enthusiasts and professionals, ensuring optimal control and comfort during photography sessions.

Focus Modes and AF Performance

The Sony Cyber-shot RX100 offers advanced focus modes and impressive AF performance, ensuring sharp and precise images. It features Fast Hybrid AF, combining phase-detection and contrast-detection for rapid and accurate focusing. The camera supports multiple AF modes, including Single Shot AF, Continuous AF, and Manual Focus, allowing flexibility for various shooting scenarios. Eye AF is particularly noteworthy, enabling sharp focus on subjects’ eyes for portraits. Additionally, the RX100’s AF system excels in low-light conditions, maintaining performance even in challenging environments. With customizable focus settings and touch-to-focus functionality, the camera provides intuitive control, making it ideal for capturing dynamic moments and achieving professional-grade results effortlessly.

Accessing and Using the RX100 Manual

Access the Sony Cyber-shot RX100 manual via the official Sony support page or in-camera guide. It provides detailed instructions, troubleshooting, and insights to maximize your camera’s potential and performance.

Downloading the Official PDF Manual

To download the Sony Cyber-shot RX100 manual, visit the official Sony support website. Search for the DSC-RX100 model, and select the PDF manual option. The guide is available in multiple languages and includes detailed instructions for camera setup, shooting modes, and troubleshooting. Once downloaded, you can access it offline, making it a convenient resource for learning and referencing. The PDF manual is free and provides comprehensive coverage of the camera’s features, ensuring you get the most out of your Sony Cyber-shot RX100.

Navigating the Online Help Guide

The Sony Cyber-shot RX100 online help guide is a user-friendly resource designed to assist you in mastering your camera. Accessible via the Sony support website, the guide is organized into clear sections, covering topics like shooting modes, menu navigation, and troubleshooting. It features interactive elements, such as clickable links and expandable menus, making it easy to find specific information. The guide also includes search functionality, allowing you to quickly locate answers to your questions. Whether you’re a beginner or an advanced user, the online help guide is an invaluable tool for understanding and optimizing your RX100’s performance. It’s regularly updated to reflect the latest features and improvements.

Using the In-Camera Guide Feature

The Sony Cyber-shot RX100’s in-camera guide feature provides instant assistance directly on your camera. By pressing the (In-Camera Guide) button, you can access shooting tips and explanations tailored to your current mode. This feature is ideal for beginners, offering guidance on settings and functions without needing external resources. It covers topics like ISO, aperture, and autofocus, helping you make informed decisions. The guide also provides quick solutions to common issues, ensuring you never miss a shot. With its intuitive interface, the in-camera guide enhances your shooting experience, making it easier to explore advanced features and improve your photography skills on the go.

Troubleshooting Common Issues

Troubleshooting common issues with the Sony Cyber-shot RX100 involves addressing sensor cleaning, memory card errors, and firmware updates. Refer to the official support page or in-camera guide for solutions.

Resolving Battery Life Concerns

Battery life concerns with the Sony Cyber-shot RX100 can be addressed by optimizing settings and usage. Turn off unnecessary features like GPS and Wi-Fi when not in use. Enable power-saving modes, reduce screen brightness, and use the in-camera guide to monitor battery consumption. Avoid extreme temperatures and ensure the camera is updated with the latest firmware. Regularly cleaning the battery contacts and using genuine Sony batteries can also improve performance. For extended shooting sessions, consider carrying spare batteries. Refer to the official manual for detailed tips on maximizing battery efficiency. Proper care ensures your camera remains reliable for capturing life’s precious moments.

Fixing Connectivity Problems

To resolve connectivity issues with your Sony Cyber-shot RX100, ensure Wi-Fi is enabled and both the camera and device are connected to the same network. Restart the camera and paired device to refresh the connection. Update the camera’s firmware to the latest version, as outdated software can cause compatibility problems. If issues persist, reset the camera’s network settings or perform a full factory reset. Use original Sony cables or adapters for wired connections to avoid compatibility issues. Refer to the manual for detailed troubleshooting steps, such as resetting the camera’s network settings or using the in-camera guide for connectivity solutions. This ensures seamless transfer of images and videos to your devices. Proper connectivity enhances your overall shooting experience, allowing you to share and manage your photos effortlessly. Always ensure your devices are fully updated for optimal performance. By following these steps, you can quickly diagnose and fix connectivity problems, ensuring your camera remains a reliable tool for capturing life’s moments. Regularly checking for firmware updates and maintaining stable connections will help you make the most of your Sony Cyber-shot RX100’s features. If problems persist, consult the official manual or contact Sony support for further assistance. This will help you resolve connectivity issues effectively and enjoy uninterrupted use of your camera.

Addressing Image Quality Issues

If you notice issues with image quality, such as noise, blur, or overexposure, check your camera settings. Ensure the ISO is set appropriately for lighting conditions and use the lowest possible ISO in bright environments. Enable noise reduction features and experiment with different shooting modes. Clean the lens regularly to avoid smudges or fingerprints affecting image clarity. For overexposure, adjust the exposure compensation or use manual mode for precise control. Update the camera’s firmware to the latest version, as updates often improve image processing. Resetting the camera to default settings can also resolve unexpected issues. Consult the manual for guidance on optimizing image quality. Proper settings and maintenance will help you achieve sharp, vibrant photos consistently. Regularly reviewing and adjusting your camera settings ensures the best results.

The Sony Cyber-shot RX100 series has proven to be a groundbreaking line of compact cameras, offering exceptional image quality and versatility. With its advanced 20.2-megapixel sensor, fast lens, and robust video capabilities, the RX100 has become a favorite among photographers. Over the years, Sony has refined the series, introducing updates like longer zoom ranges and improved autofocus in the RX100 VII. While battery life remains a minor concern, the camera’s portability and performance make it a top choice. By referring to the manual and online resources, users can fully harness its potential. The RX100’s enduring popularity is a testament to its excellence, making it a timeless tool for capturing life’s precious moments.

ge 35 pint dehumidifier manual

The GE 35 Pint Dehumidifier manual is a comprehensive guide for understanding the appliance’s operation, maintenance, and safety features. It provides detailed instructions for setup, usage, and troubleshooting, ensuring optimal performance in reducing humidity.

Overview of the Manual and Its Importance

The GE 35 Pint Dehumidifier manual is an essential resource for users to understand the appliance’s functionality and maintenance; It provides detailed safety guidelines, operating instructions, and troubleshooting tips. The manual ensures proper installation, optimal performance, and extends the product’s lifespan. By following the guide, users can efficiently manage humidity levels and address common issues. It serves as a comprehensive reference for both initial setup and long-term use, ensuring the dehumidifier operates safely and effectively in various environments.

Key Features and Benefits of the GE 35 Pint Dehumidifier

The GE 35 Pint Dehumidifier effectively reduces humidity, featuring Smart Dry mode for optimal performance, auto-restart, and a 10-second bucket alarm. Ideal for basements and damp spaces.

Product Specifications and Capabilities

The GE 35 Pint Dehumidifier has a daily moisture removal capacity of 35 pints, making it suitable for spaces up to 2,000 square feet. It features an Energy Star certification, ensuring energy efficiency. The unit includes a built-in pump for continuous drainage, an automatic defrost system to prevent coil freezing, and a washable filter. It also offers multiple operating modes and a smart dry function for tailored humidity control. The device is designed for portability and ease of use in various environments, including basements and garages.

Installation and Setup Guide

The GE 35 Pint Dehumidifier installation involves unpacking, placing the unit on a level surface, and plugging it in. Setup is straightforward for immediate use.

Preparation and Unpacking the Dehumidifier

Before using your GE 35 Pint Dehumidifier, carefully unpack the unit and ensure all components are included. Inspect for damage and read the manual thoroughly. Place the dehumidifier on a level, stable surface in a well-ventilated area. Ensure the unit is upright for at least 24 hours after unpacking to allow refrigerant to settle. This step is crucial for proper operation and efficiency. Keep the area around the dehumidifier clear to ensure optimal airflow and performance.

Step-by-Step Installation Instructions

Plug in the dehumidifier and ensure it is placed on a level surface. Set the mode to “Continuous” or “Smart Dry” based on humidity levels. Adjust the humidity level using the control panel. For drainage, connect a hose to the unit or use the built-in bucket. Ensure the drain hose is securely attached if using continuous drainage. Turn on the power and allow the unit to run for 24 hours initially. Check for proper operation and adjust settings as needed. Refer to the manual for specific button functions and mode selections.

Recommended Placement for Optimal Performance

Place the GE 35 Pint Dehumidifier in areas with high humidity, such as basements or crawl spaces. Ensure it is positioned on a level, stable surface for proper operation. Keep the unit at least 6 inches away from walls to allow adequate airflow. Avoid placing it near direct sunlight or heat sources, as this may reduce efficiency. For drainage convenience, locate it near a floor drain or ensure easy access for emptying the bucket. This placement ensures maximum moisture removal and optimal performance in reducing humidity levels efficiently.

Operating Instructions for the GE 35 Pint Dehumidifier

Operate the GE 35 Pint Dehumidifier by selecting desired modes and adjusting humidity levels. Use the control panel to customize settings for efficient moisture removal.

Understanding the Control Panel and Settings

The control panel features intuitive buttons for power, humidity level adjustment, fan speed, and mode selection. The LED display shows current humidity levels and settings. Use the humidity up/down buttons to set desired levels (30-50% RH). The fan speed button offers low, medium, and high options. The mode button switches between continuous operation and smart dry. The display also indicates bucket full status. Regularly check and adjust settings to maintain optimal performance and energy efficiency in your space.

Operating Modes and Humidity Level Adjustment

The GE 35 Pint Dehumidifier offers two primary operating modes: Continuous and Smart Dry. Continuous mode runs the unit non-stop until the bucket is full. Smart Dry automatically adjusts fan speed based on humidity levels. Use the humidity adjustment buttons to set your desired relative humidity (30-50% RH). The LED display shows the current humidity level and selected settings. Adjusting these modes and levels ensures efficient moisture removal and energy savings. Regular monitoring helps maintain optimal indoor air quality and comfort.

Smart Dry Feature and Its Functionality

The Smart Dry feature automatically adjusts the dehumidifier’s operation based on ambient humidity levels. It optimizes fan speed and moisture removal efficiency. When enabled, the unit senses the room’s humidity and switches between modes to maintain your set level. This feature prevents over-drying and reduces energy consumption. It ensures consistent comfort by adapting to space conditions without manual adjustments. Smart Dry enhances performance, making it ideal for maintaining balanced humidity in various environments, from basements to living areas.

Maintenance and Care Tips

Regularly clean the filter and check for blockages to ensure efficient operation. Empty the bucket when full and clean it to prevent mold growth and odors.

Regular Cleaning and Filter Maintenance

Regular cleaning is essential for maintaining the efficiency of your GE 35 Pint Dehumidifier. Clean the filter every 1-3 months or as needed to ensure proper airflow. Remove the filter, wash it with warm water and mild detergent, and allow it to dry completely before reinstalling. Additionally, check the filter for blockages and damage, replacing it if necessary. Empty and clean the bucket regularly to prevent mold growth and odors. Ensure the drain hose is free from kinks or blockages for smooth operation.

Drainage Options and Bucket Management

The GE 35 Pint Dehumidifier offers two drainage options: manual bucket emptying or continuous draining using a hose. The bucket has a 10-second alarm that alerts when it’s full or misplaced; Empty the bucket regularly to avoid overflow and ensure smooth operation. For continuous drainage, attach the provided hose to the unit and direct it to a suitable drain. Clean the bucket and hose periodically to prevent mold and bacterial growth. Always follow the manual’s guidelines for proper drainage setup and maintenance to optimize performance and longevity.

Safety Guidelines and Precautions

Ensure the dehumidifier is placed on a level surface away from flammable materials. Avoid overheating by maintaining proper ventilation. Regularly inspect the power cord and plug for damage. Keep children away from the unit and its water bucket. Follow all safety instructions in the manual to prevent accidents and ensure safe operation.

Important Safety Information for Users

To ensure safe operation, always place the dehumidifier on a stable, level surface. Keep the unit away from flammable materials and avoid exposing it to extreme temperatures. Never use the dehumidifier near water or in areas where it may come into contact with water. Avoid using extension cords, as they can pose a fire hazard. Children should be supervised when near the device. Proper ventilation is essential to prevent overheating. Follow all instructions in the manual carefully to avoid accidents and ensure safe operation.

Troubleshooting Common Issues

If the dehumidifier is not collecting water, check the filter for cleanliness and ensure the humidity level is above 30%. Strange noises may indicate improper placement or blockages. If the unit does not turn on, verify power supply and ensure the bucket is not full. For continuous operation issues, check the drain hose for kinks and ensure the water level sensor is clean. Refer to the manual for detailed troubleshooting steps to resolve these common problems effectively.

Warranty and Support Information

The GE 35 Pint Dehumidifier is backed by a comprehensive warranty. For assistance, contact GE customer support at 1-800-626-2005 or refer to the manual for detailed support options.

Understanding the Warranty Coverage

The GE 35 Pint Dehumidifier warranty provides coverage for parts and labor under normal usage. The warranty period varies depending on the model and region. It typically covers repairs or replacements due to manufacturing defects. For specific details, refer to the warranty section in the manual or visit the GE Appliances website. To file a claim, contact customer support with your product serial number and proof of purchase. Proper maintenance, as outlined in the manual, is essential to ensure warranty validity. Always follow the manufacturer’s guidelines to maintain coverage.

Contacting GE Customer Support

For inquiries, troubleshooting, or warranty claims, contact GE customer support at 1-800-626-2005. Visit their official website for live chat, email support, or to find local service providers. The support team is available to assist with questions about your dehumidifier’s operation, maintenance, or repair. Be prepared to provide your model number (e.g., ADHL35LA) and serial number for efficient service. You can also download the manual or access FAQs on their website for self-help options. GE customer support operates Monday through Friday, 8 AM to 8 PM EST.

Common Issues and Solutions

A common issue is no water collection. Check the humidistat, air filters, and drain hose for blockages. Ensure proper installation and settings for optimal performance.

Addressing No Water Collection and Other Problems

If your GE 35 Pint Dehumidifier isn’t collecting water, ensure the humidistat is set correctly and the air filter is clean. Check for blockages in the drain hose or bucket. Verify the unit is placed on a level surface and the humidity levels are above 30%. If issues persist, restart the device or consult the manual. For other problems, like excessive noise or poor performance, refer to the troubleshooting section or contact GE support for assistance. Regular maintenance can prevent such issues and ensure efficient operation.

The GE 35 Pint Dehumidifier manual provides essential guidance for optimal performance, safety, and maintenance. By following the instructions, users can effectively manage humidity, ensure longevity, and troubleshoot common issues. Regular maintenance, proper placement, and adherence to safety guidelines are crucial for maximizing efficiency. This dehumidifier is a reliable solution for reducing moisture in various spaces, offering features like Smart Dry and Energy Star certification. Refer to the manual for detailed support and enjoy improved indoor air quality with minimal effort.

pro t701 thermostat manual

Welcome to the Pro T701 Thermostat Manual. This guide provides essential information for installing, operating, and troubleshooting your thermostat, ensuring optimal performance and energy efficiency.

Overview of the Pro T701 Thermostat

The Pro T701 Thermostat is a programmable, non-IAQ electronic thermostat designed for efficient temperature control. It supports various heating systems, including gas, oil, and heat pumps, with or without auxiliary heat. Features include temperature locking to prevent excessive energy use and programmable schedules for consistent heating. The thermostat operates within a temperature range of 41°F to 95°F (5°C to 35°C) and is easy to install. Its intuitive interface and energy-saving capabilities make it a reliable choice for homeowners. The T701 is compatible with most HVAC systems and ensures optimal performance while maintaining energy efficiency.

Importance of Reading the Manual

Reading the Pro T701 Thermostat Manual is crucial for proper installation, operation, and troubleshooting. It provides detailed instructions for setting up programmable features and understanding error indicators. The manual ensures safe installation, preventing potential damage to your HVAC system. By following the guidelines, you can optimize energy efficiency and extend the thermostat’s lifespan. Additionally, the manual includes warranty information and maintenance tips, such as replacing batteries and cleaning the unit. Familiarizing yourself with the manual helps you resolve issues quickly, avoiding unnecessary service calls and ensuring your system runs smoothly year-round.

Installation Guide

The Pro T701 Thermostat Manual provides a step-by-step installation guide, ensuring a smooth setup process for both new installations and replacements of existing thermostats.

Preparation for Installation

Before installing the Pro T701 Thermostat, ensure you have read the manual thoroughly. Verify compatibility with your heating system and gather necessary tools. Turn off power to the HVAC system at the circuit breaker. Remove the old thermostat carefully, labeling wires for reference. Ensure the new thermostat is registered within 60 days for warranty activation. Choose a location 4-5 feet above the floor with good air circulation. Check battery requirements and system compatibility to avoid installation issues. Proper preparation ensures a smooth and safe installation process. Follow all safety guidelines to prevent damage or injury.

Step-by-Step Installation Instructions

Turn off power to the HVAC system at the circuit breaker. Verify power is off using a voltage tester.
Remove the old thermostat, noting wire labels for reference.
Mount the new thermostat base to the wall, ensuring level placement.
Connect wires to the appropriate terminals, matching their functions.
Secure the thermostat faceplate to the base.
Restore power and test the system to ensure proper operation.
Program temperature settings and schedules as desired.
Register the thermostat within 60 days for warranty activation. Follow these steps carefully for a successful installation.

Wiring Requirements and Diagrams

The Pro T701 thermostat manual includes detailed wiring diagrams for various heating systems, such as gas, oil, electric furnaces, and heat pumps. These diagrams guide users in connecting wires correctly based on their functions. The manual specifies that all Pro1 thermostats use the same universal magnetic badge, simplifying installation. It emphasizes turning off power to the HVAC system before starting and refers to the wiring diagrams for accurate connections. Ensure all wires are securely attached to the correct terminals to avoid system malfunctions. Follow the diagrams closely for a smooth installation process tailored to your specific heating setup.

Operating the Pro T701 Thermostat

Operating the Pro T701 thermostat is straightforward, with features like temperature locking and programmable schedules for energy efficiency. Use the setpoint buttons to adjust temperatures easily.

Understanding the Thermostat Features

The Pro T701 thermostat offers advanced features to enhance comfort and energy savings. It includes temperature locking to restrict settings and programmable schedules for consistent heating. The LCD display shows setpoints and system status, while the fan and system switches allow manual adjustments. The easy-change battery door simplifies maintenance. Additional features like low battery indicators ensure uninterrupted operation, alerting users to replace batteries before shutdown. These features make the Pro T701 a user-friendly and efficient solution for home climate control.

Setting Up Temperature Schedules

Setting up temperature schedules on the Pro T701 thermostat allows you to customize your comfort and energy usage. Use the temperature setpoint buttons to create a daily schedule. Select the desired time periods and set your preferred temperatures for heating or cooling. The thermostat enables programmable features to maintain consistent settings, ensuring energy savings. You can adjust the schedule as needed, with the LCD display guiding you through the process. This feature helps optimize energy efficiency by automatically adjusting temperatures during off-peak hours, providing both convenience and cost savings.

Daily Operation and Controls

The Pro T701 thermostat simplifies daily operation with intuitive controls. Use the temperature setpoint buttons to adjust the desired temperature, displayed on the LCD screen. The system switch allows selection between heating, cooling, or off modes, while the fan switch controls the blower operation. The LCD screen provides clear indicators for system status, ensuring easy monitoring. Daily operation is seamless, with programmable features and temperature locking to maintain energy efficiency. The thermostat also includes a low battery indicator, alerting you when replacement is needed. These features ensure convenient and energy-conscious control over your home’s climate, making daily use straightforward and efficient.

Troubleshooting Common Issues

The Pro T701 thermostat may display a low battery indicator, leading to inoperability if ignored. Replace batteries promptly and check wiring connections to resolve common issues efficiently.

Low Battery Indicator and Solutions

The Pro T701 thermostat features a low battery indicator, alerting users when AA battery power is low. If ignored for 21 days, the thermostat becomes inoperable. To resolve this, replace the batteries promptly with fresh ones. Ensure correct polarity and use high-quality alkaline batteries for optimal performance. After replacing, the thermostat will resume normal operation, maintaining your temperature settings efficiently. Always monitor the battery level to avoid service interruptions. Proper battery maintenance ensures reliable performance and energy savings.

Resolving Display or System Errors

If your Pro T701 thermostat displays an error message or malfunctions, start by checking the power source and ensuring the device is turned on. Reset the thermostat by removing the batteries for 10 seconds and reinstalling them. If the issue persists, inspect the wiring connections for looseness or damage. Refer to the troubleshooting section in the manual for specific error codes and solutions. Updating the thermostat’s software may also resolve system errors. If problems remain unresolved, contact Pro1 Technologies’ customer support at 888-776-1427 for further assistance.

Thermostat Maintenance

Regular maintenance ensures your Pro T701 thermostat operates efficiently. Clean the device with a soft cloth, replace batteries annually, and check for software updates to maintain functionality and accuracy.

Replacing Batteries

Replacing the batteries in your Pro T701 thermostat is a simple process. Locate the “Easy Change Battery Door” on the front of the device. Open the compartment and remove the old AA batteries. Insert two new high-quality AA alkaline batteries, ensuring the polarity matches the diagram inside the compartment. Close the door securely. If the low battery indicator appears, replace the batteries within 21 days to prevent system shutdown. Regular battery replacement ensures smooth operation and maintains temperature accuracy. Always use fresh batteries to avoid performance issues and extend the lifespan of your thermostat.

Cleaning the Thermostat

Regular cleaning of your Pro T701 thermostat is essential for optimal performance. Use a soft, dry cloth to gently wipe the display and buttons, removing dust or debris. Avoid harsh chemicals or liquids, as they may damage the unit. For stubborn marks, lightly dampen the cloth with water, but ensure it is thoroughly dry before wiping. Cleaning ensures accurate temperature readings and smooth button operation. If not cleaned regularly, dust buildup can affect performance and energy efficiency. Always turn off the system before cleaning for safety. This simple maintenance step helps extend the lifespan of your thermostat and maintains precise temperature control.

Technical Specifications

The Pro T701 thermostat operates with a temperature range of 41°F to 95°F (5°C to 35°C) for display and 44°F to 90°F (7°C to 32°C) for control.

Temperature Range and Accuracy

The Pro T701 thermostat operates with a display range of 41°F to 95°F (5°C to 35°C) and a control range of 44°F to 90°F (7°C to 32°C). It ensures precise temperature regulation, maintaining comfort and energy efficiency. The thermostat’s accuracy is designed to keep your space at the desired temperature consistently. This range and accuracy make it suitable for various heating and cooling systems, providing reliable performance year-round. Proper installation and calibration are essential to maximize its accuracy and functionality.

Compatibility with Heating Systems

The Pro T701 thermostat is designed to work with a wide range of heating systems, including gas or oil heat, electric furnaces, and heat pump systems. It supports both single-stage and multi-stage heating systems, making it versatile for various home setups. The thermostat is also compatible with heat pumps that have auxiliary or emergency heat options. This universal compatibility ensures that the Pro T701 can be installed in most residential environments, providing reliable temperature control. Proper wiring and system configuration are essential to ensure optimal performance with your specific heating system.

Warranty Information

The Pro T701 thermostat warranty covers defects in materials and workmanship. Registration within 60 days of installation is required to activate the warranty; otherwise, it starts from the date of manufacture.

Registration Requirements

Registering your Pro T701 thermostat is essential to activate the warranty. You must register within 60 days of installation. Visit the Pro1 Technologies website or mail the registration form to ensure coverage. Failure to register within this period means the warranty will start from the date of manufacture, not installation. For assistance, contact Pro1 Technologies at 888-776-1427 or visit their website. Proper registration ensures your thermostat is protected and maintains its benefits.

Coverage and Exclusions

The Pro T701 thermostat warranty provides coverage for defects in materials and workmanship for a period of two years from the date of manufacture. The warranty applies to the original purchaser and covers repairs or replacements at no cost. However, it excludes damage caused by improper installation, misuse, or accidents. Normal wear and tear, such as battery depletion, is not covered. For full warranty details, refer to the manual or contact Pro1 Technologies. Proper registration is required to ensure warranty validity and coverage.

Final Tips for Optimal Use

For optimal performance, ensure your Pro T701 thermostat is installed at 4-5 feet above the floor in an area with average temperature and good air circulation. Regularly clean the thermostat to maintain accuracy and functionality. Check battery levels periodically and replace them before the low battery indicator appears. Program temperature schedules to maximize energy savings and comfort. Avoid placing the thermostat near direct sunlight or drafty areas, as this may affect temperature readings. For further assistance, refer to the manual or contact Pro1 Technologies’ support team at 888-776-1427.

Resources for Further Assistance

For additional support, visit the official Pro1 Technologies website at www.pro1iaq.com to download the Pro T701 Thermostat Manual or access troubleshooting guides. Contact customer support at 888-776-1427, available Monday-Friday, 9 AM ‒ 6 PM Eastern Time. Mailing address: Pro1 Technologies, P.O. Box 3377, Springfield, MO 65808-3377. Refer to the manual for detailed instructions or register your thermostat online for warranty benefits. Troubleshooting tips and FAQs are also available in the manual or on the company website.