Month: March 2026 (page 1 of 1)

bike frame size guide

Bike Frame Size Guide: Finding Your Perfect Fit (Updated 2026)

Finding the correct bike size is paramount for comfort, efficiency, and injury prevention. This comprehensive guide, updated for 2026, will help you navigate the complexities of bike sizing, ensuring a perfect match.

A proper bike fit transcends mere comfort; it’s fundamental to maximizing performance and safeguarding your health. Establishing the correct size is the most important initial step when purchasing a new bicycle. While adjustments can be made, starting with the right frame dramatically improves the riding experience.

Incorrect sizing can lead to discomfort, pain, and even long-term injuries. A well-fitted bike allows for efficient power transfer, reducing fatigue and enhancing enjoyment. Human physiology varies greatly, mirroring the diverse range of bike sizes available. Manufacturers invest heavily in frame geometry, recognizing its profound impact on ride quality and rider well-being. Don’t rely solely on listed sizes, as standardization is lacking – a size 10 in one brand may differ in another.

Understanding Bike Frame Measurements

Several key measurements define bike frame size, each offering a unique perspective on fit. Traditional sizing uses inches or centimeters, often referring to the seat tube length – the distance from the center of the bottom bracket to the top of the seat tube. However, this method is becoming less reliable due to varying frame designs.

Effective Top Tube Length (ETT) is a more accurate indicator, measuring the horizontal distance from the head tube to the seatpost. Reach and Stack are modern measurements defining horizontal (reach) and vertical (stack) distance from the bottom bracket to the head tube, providing a comprehensive view of frame geometry and rider positioning.

Traditional Frame Size (Inch/Centimeter)

Historically, bike frame size was determined by measuring the length of the seat tube, expressed in inches or centimeters. This measurement runs from the center of the bottom bracket to the top of the seat tube. While still referenced, it’s becoming less dependable due to diverse frame geometries and manufacturers’ interpretations.

Sizes typically range from extra-small (XS) to extra-large (XL), with numerical values corresponding to approximate rider height. However, relying solely on this measurement can be misleading, as different brands may size their frames differently. It’s crucial to remember there’s no standardization across the industry.

Effective Top Tube Length (ETT)

Effective Top Tube Length (ETT) is a more reliable indicator of frame size than traditional seat tube measurements. ETT represents the horizontal distance from the head tube to the seat post, influencing reach and overall riding position. It’s a key factor in determining how stretched out or compact a bike will feel.

A longer ETT generally provides a more aggressive, aerodynamic position, while a shorter ETT offers a more upright and comfortable ride. Comparing ETT across different bikes helps ensure a consistent fit, regardless of brand or frame geometry. Consider your flexibility and riding style when evaluating ETT.

Reach and Stack

Reach and Stack are modern frame measurements offering a precise fit assessment. Reach measures the horizontal distance from the bottom bracket to the head tube, impacting your extension towards the handlebars. Stack indicates the vertical distance, influencing handlebar height and overall posture.

Unlike traditional sizing, Reach and Stack account for frame geometry variations. These measurements allow for a more accurate comparison between different bike brands and models. Utilizing both Reach and Stack ensures optimal comfort and control, minimizing strain and maximizing power transfer. They are crucial for dialing in your perfect fit.

Measuring Yourself for a Bike

Accurate self-measurement is the first step towards finding the right bike size. Three key measurements are essential: inseam, torso length, and arm length. Inseam, measured while standing with shoes on, determines standover height and seatpost adjustment. Torso length influences reach and handlebar positioning.

Arm length impacts handlebar width and drop. Use a flexible measuring tape for accuracy. Ensure a helper assists for torso and arm measurements. These measurements, combined with bike-specific charts, provide a solid starting point for determining your ideal frame size. Remember, these are guidelines; professional fitting is recommended.

Inseam Measurement

Determining your inseam is crucial for selecting the appropriate bike frame size. Stand with your back against a wall, wearing cycling shoes. Place a book between your legs, mimicking a saddle. Measure from the top of the book to the floor – this is your inseam.

Ensure the measurement is accurate, as it directly impacts standover height. A proper standover height allows for safe mounting and dismounting. Use a flexible measuring tape for precision. This measurement is a primary factor in bike size charts, particularly for road and mountain bikes. Double-check your measurement for optimal results.

Torso Length Measurement

Torso length, measured from the pubic bone to the sternal notch, influences reach and overall bike fit. Sit upright against a wall, and have someone measure this distance. This measurement is vital for determining the appropriate frame geometry and handlebar reach.

A longer torso generally requires a longer top tube and stem. Conversely, a shorter torso benefits from a more compact cockpit. This measurement, combined with arm length, helps fine-tune your riding position for comfort and efficiency. Accurate torso length measurement is key to avoiding back pain and maximizing performance.

Arm Length Measurement

Accurate arm length measurement is crucial for determining handlebar reach and drop. Stand with your back against a wall and measure from the acromion process (bony point of the shoulder) to the center of your clenched fist. Ensure your elbow is slightly bent during measurement.

Longer arms typically require a longer reach and potentially a lower handlebar position. Shorter arms benefit from a shorter reach and a more upright riding posture. This measurement, alongside torso length, helps optimize cockpit setup for comfort and control, preventing shoulder and neck strain.

Bike Size Charts by Bike Type

Different bike disciplines necessitate varying frame geometries and sizing approaches. Road bikes prioritize aerodynamic efficiency and aggressive positioning, while mountain bikes demand maneuverability and clearance. Gravel bikes blend both, offering versatility. Hybrid and city bikes focus on comfort and practicality.

Therefore, a universal size chart is insufficient. Below, you’ll find dedicated size charts for each bike type – Road, Mountain, Gravel, Hybrid/City, and BMX. These charts correlate rider height with recommended frame sizes, providing a starting point for your search. Remember to consider other measurements for a truly personalized fit.

Road Bike Size Chart

Road bike sizing typically uses traditional frame sizes (cm or inches) alongside Effective Top Tube Length (ETT). Aggressive road bikes often favor a slightly smaller frame for enhanced aerodynamics, while endurance road bikes lean towards a more relaxed, upright position with a larger frame.

Here’s a general guideline:

  • Height 5’4” – 5’6” (163cm – 168cm): Frame Size 49-52cm
  • Height 5’6” – 5’8” (168cm – 173cm): Frame Size 52-54cm
  • Height 5’8” – 5’10” (173cm – 178cm): Frame Size 54-56cm
  • Height 5’10” – 6’0” (178cm – 183cm): Frame Size 56-58cm

Always prioritize ETT and reach for a precise fit.

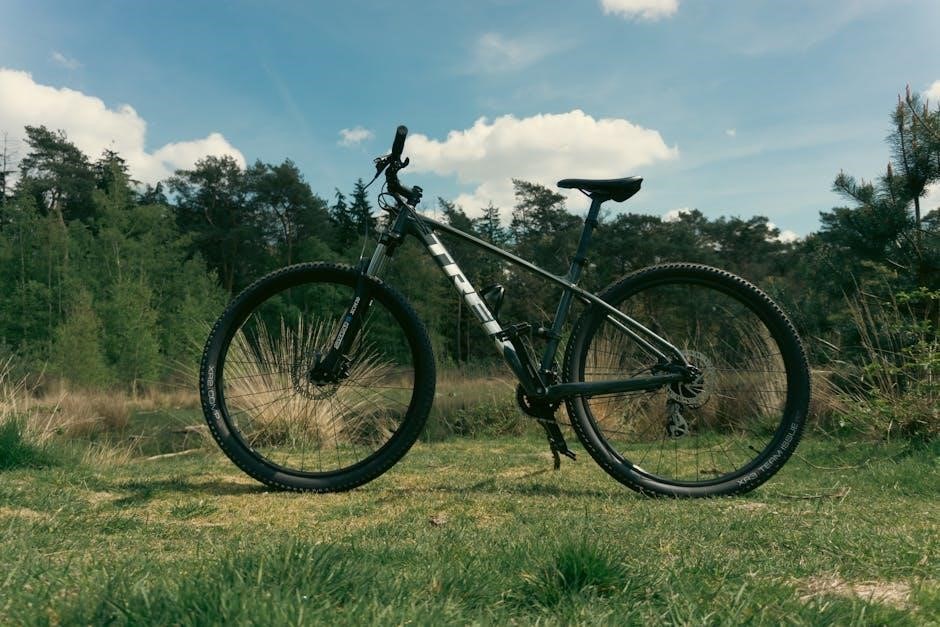
Mountain Bike Size Chart

Mountain bike sizing differs significantly from road bikes, focusing on reach and stack due to varied geometry and intended terrain. Unlike standardized road bike sizing, mountain bike frames aren’t always consistent between brands; relying solely on frame size (Small, Medium, Large) can be misleading.

Here’s a general guideline:

  • Height 5’3” – 5’6” (160cm – 168cm): Frame Size Small (15-16 inch)
  • Height 5’6” – 5’9” (168cm – 175cm): Frame Size Medium (17-18 inch)
  • Height 5’9” – 6’0” (175cm – 183cm): Frame Size Large (19-20 inch)

Prioritize reach and stack measurements for a comfortable and controlled ride.

Gravel Bike Size Chart

Gravel bikes blend road and mountain bike characteristics, requiring a sizing approach that balances efficiency and comfort for varied terrain. Generally, gravel bike sizing mirrors road bike sizing, but with a slightly more relaxed geometry and increased tire clearance.

Here’s a typical guide:

  • Height 5’4” – 5’7” (163cm – 170cm): Frame Size 50-52cm (XS-S)
  • Height 5’7” – 5’10” (170cm – 178cm): Frame Size 54-56cm (S-M)
  • Height 5’10” – 6’0” (178cm – 183cm): Frame Size 58-60cm (M-L)

Consider reach and stack, and test ride to ensure a comfortable position for long distances on mixed surfaces.

Hybrid/City Bike Size Chart

Hybrid and city bikes prioritize comfort and practicality for commuting and recreational riding. Their sizing tends to be more forgiving than performance-oriented bikes, focusing on an upright riding position and ease of use.

Here’s a general sizing guideline:

  • Height 5’0” – 5’4” (152cm – 163cm): Frame Size 13” – 15” (XS-S)
  • Height 5’4” – 5’8” (163cm – 173cm): Frame Size 15” – 17” (S-M)
  • Height 5’8” – 6’0” (173cm – 183cm): Frame Size 17” – 19” (M-L)

Prioritize standover height and reach for a comfortable, confident ride. Adjust seat height and handlebar position for optimal ergonomics.

BMX Bike Size Chart

BMX bike sizing differs significantly from other bike types, prioritizing maneuverability and strength for tricks and stunts. Frame size is typically measured in top tube length, not traditional height-based sizing.

Here’s a general guideline:

  • Rider Height under 5’0” (152cm): Top Tube Length 17” – 18”
  • Rider Height 5’0” – 5’3” (152cm – 160cm): Top Tube Length 18” – 19”
  • Rider Height 5’3” – 5’6” (160cm – 168cm): Top Tube Length 19” – 20”
  • Rider Height 5’6”+ (168cm+): Top Tube Length 20”+

Standover height is crucial; you should have at least 1-2 inches of clearance. BMX sizing is often a matter of personal preference and riding style.

Gender-Specific Sizing Considerations

Historically, bike sizing often differentiated between men’s and women’s frames, but modern approaches are evolving. Traditional “women’s” bikes featured lower standover heights and more upright geometries.

However, body proportions, not gender, are the primary determinant of fit. Women generally have shorter torsos and longer legs relative to men, influencing optimal reach and stack. Many manufacturers now offer unisex frames with a wider range of sizes.

It’s crucial to focus on individual measurements—inseam, torso length, and arm reach—rather than relying solely on gender labels. A professional bike fit is invaluable for finding the perfect geometry.

Women’s Bike Sizing

Traditionally, women’s bikes were designed with lower top tubes for increased standover clearance, catering to typically shorter limbs. However, this approach is becoming less prevalent as manufacturers embrace more inclusive sizing.

Women often benefit from narrower handlebars and smaller crank arms for improved comfort and control. Saddle width is also a key consideration, as wider saddles can cause chafing.

When using size charts, it’s vital to prioritize inseam and torso length measurements. Don’t assume a smaller frame is always necessary; focus on achieving the correct reach and stack for your body proportions. A professional bike fit is highly recommended to fine-tune the setup.

Men’s Bike Sizing

Men’s bike sizing generally follows standard frame measurements, but individual proportions vary significantly. Relying solely on height can be misleading; accurate measurements are crucial.

Consider torso length and arm reach when selecting a frame size. Longer torsos often require a longer reach, while shorter arms may necessitate a shorter stem.

Modern bike geometry is increasingly unisex, blurring the lines between traditional men’s and women’s designs. However, men may prefer wider handlebars and larger crank arms for optimal power transfer. Prioritize a comfortable and efficient riding position, and don’t hesitate to explore different stem lengths and handlebar widths.

Dealing with In-Between Sizes

Finding yourself between bike sizes is common, presenting a crucial decision: size up or down? Generally, erring slightly larger offers more adjustability, particularly with seatpost height.

A slightly larger frame allows for a longer seatpost extension, fine-tuning your riding position. Conversely, a frame that’s too large can feel unwieldy and difficult to control;

Stem length plays a vital role in bridging the gap. A shorter stem can compensate for a frame that’s slightly too long, while a longer stem can address a frame that feels too compact. Professional bike fitting is invaluable in these scenarios, ensuring optimal comfort and performance.

Sizing Up vs. Sizing Down

When faced with an in-between size, the choice between sizing up or down depends on your riding style and flexibility. Sizing up generally suits riders prioritizing comfort and a more relaxed geometry, allowing for a more upright position.

However, a larger frame can feel less responsive. Sizing down is often preferred by aggressive riders seeking a more aerodynamic and responsive feel, but it may require greater flexibility.

Consider your core strength and back flexibility. A smaller frame demands more core engagement. Ultimately, a professional bike fit is the best way to determine which size will optimize your performance and prevent discomfort.

The Role of Seatpost Height and Stem Length

Even with the correct frame size, fine-tuning with seatpost height and stem length is crucial. Seatpost height directly impacts pedaling efficiency and knee health; a proper height minimizes strain and maximizes power transfer.

Stem length influences reach and handling. A shorter stem provides more control, while a longer stem offers a more stretched-out, aerodynamic position.

Small adjustments can make a significant difference. These components allow for personalized adjustments to compensate for slight sizing discrepancies or individual preferences, ensuring optimal comfort and performance on the bike.

The Impact of Frame Geometry

Frame geometry profoundly influences a bike’s handling and rider position. It’s not just about size, but how that size is shaped.

Head tube angle affects steering responsiveness; a steeper angle offers quicker handling, while a slacker angle provides more stability, especially at high speeds.

Seat tube angle impacts pedaling efficiency and weight distribution. A steeper angle positions the rider more over the bottom bracket, enhancing power transfer; Understanding these angles is vital when selecting a bike, as they dictate the overall ride experience.

Head Tube Angle

The head tube angle, measured in degrees, is crucial for steering responsiveness and stability. A steeper angle (typically 73-74 degrees on road bikes) results in quicker, more agile handling, ideal for responsive cornering and fast acceleration. Conversely, a slacker angle (66-68 degrees on mountain bikes) provides increased stability at higher speeds and over rough terrain.

This angle directly affects the bike’s trail, influencing how much the front wheel self-corrects. Choosing the right angle depends on your riding style and the intended terrain, impacting overall control and comfort.

Seat Tube Angle

The seat tube angle significantly impacts pedaling efficiency and weight distribution. A steeper seat tube angle (typically 73-74 degrees) positions the rider more over the bottom bracket, enhancing power transfer during climbs and sprints. This is common in road and triathlon bikes prioritizing performance.

A slacker angle (around 68-70 degrees) shifts weight rearward, improving comfort and control on descents, often found in mountain bikes. The correct angle ensures optimal biomechanics, reducing strain and maximizing power output. Consider your riding style and preferred terrain when evaluating this crucial geometry aspect.

Using Online Bike Size Calculators

Online bike size calculators offer a convenient starting point, but remember they provide estimations, not definitive answers. These tools typically ask for your height, inseam, and sometimes arm length to suggest a frame size range. Accuracy can vary depending on the calculator’s algorithm and the precision of your measurements.

Limitations exist as calculators don’t account for individual flexibility, riding style, or preferred bike handling characteristics. Recommended calculators include those offered by Competitive Cyclist and BikeFit. Use these as a guide, but always prioritize a test ride and consider a professional bike fit for optimal results.

Accuracy and Limitations of Calculators

While convenient, online bike size calculators aren’t foolproof. Their accuracy hinges on the precision of your inputted measurements – even a small error can skew results. Calculators generalize, failing to account for individual body proportions, flexibility, and riding preferences. They often don’t factor in the nuances of different bike geometries.

Limitations are significant; calculators can’t replicate a professional bike fit. They provide a starting point, but shouldn’t be the sole basis for your decision. Consider them a rough estimate and always supplement with a test ride and, ideally, expert advice to ensure a comfortable and efficient fit.

Recommended Calculators

Several online bike size calculators can offer a helpful initial estimate. Competitive Cyclist’s bike fit calculator is widely respected, utilizing a detailed questionnaire to refine recommendations. BikeInsights provides a wealth of geometry data and sizing suggestions for various brands. Wrench Science’s fit calculator is another valuable resource, focusing on rider positioning.

However, remember these are tools, not definitive answers. Use multiple calculators and compare results. Always prioritize a test ride on a bike within the suggested size range. These resources are best used to narrow down your options before seeking professional guidance for a truly personalized fit.

Professional Bike Fitting

Investing in a professional bike fit is the most reliable way to achieve optimal comfort and performance. A qualified fitter will analyze your body’s unique proportions, flexibility, and riding style. They’ll assess your current bike or guide you towards the correct frame size and geometry. Expect a dynamic assessment, observing you pedal and move on the bike.

Benefits include reduced risk of injury, increased power output, and enhanced enjoyment. During a fit, adjustments are made to saddle height, handlebar reach, and cleat position. A comprehensive fit report will detail all adjustments and provide recommendations for future refinements.

Benefits of a Professional Fit

A professional bike fit delivers a multitude of advantages beyond simply feeling more comfortable. Primarily, it significantly reduces the risk of overuse injuries, such as knee pain, back pain, and numbness. Optimized positioning enhances pedaling efficiency, translating to increased power output and speed. You’ll experience less fatigue on longer rides, allowing you to push your limits.

Furthermore, a proper fit improves bike handling and control, boosting confidence. It ensures you’re utilizing the correct muscle groups, maximizing performance and minimizing strain. Ultimately, a professional fit elevates your overall cycling experience, making every ride more enjoyable and sustainable.

What to Expect During a Bike Fit

A professional bike fit is a detailed process, typically lasting between one to three hours. It begins with a thorough interview discussing your cycling history, goals, and any existing discomfort. Expect a physical assessment of your flexibility, posture, and biomechanics. You’ll then be observed riding your bike on a stationary trainer, allowing the fitter to analyze your position.

Using specialized tools and software, adjustments are made to saddle height, fore/aft position, handlebar reach, and stem length. Cleat positioning is also addressed. The fitter will provide recommendations for component changes if necessary, ensuring optimal comfort and performance. Expect ongoing feedback and adjustments throughout the session.

nikon f4 manual

Nikon F4 Manual: A Comprehensive Guide

This guide offers detailed instructions for the Nikon F4 and F4S film cameras‚ including downloadable PDF manuals and resources for users seeking assistance․

The Nikon F4‚ released in 1988‚ represents a pivotal moment in Nikon’s professional film SLR history․ This camera quickly became a favorite among photojournalists and serious enthusiasts due to its advanced features and robust build quality․

Understanding the Nikon F4 requires access to its comprehensive manual‚ readily available online as a PDF download․ These manuals‚ often found in multiple languages‚ detail every aspect of operation‚ from basic film loading to advanced custom functions․ Whether you’ve recently acquired an F4 or are a seasoned user‚ a readily accessible manual is invaluable․

This guide aims to supplement the official documentation‚ offering clarity and assistance in navigating the camera’s complexities․

Historical Context and Significance

Released in 1988‚ the Nikon F4 arrived during a golden age of photojournalism and professional film photography․ It succeeded the F3‚ building upon its predecessor’s reputation for reliability while introducing significant technological advancements․ The F4’s advanced autofocus system and enhanced metering capabilities were groundbreaking for the time․

The availability of the Nikon F4 manual – initially a printed booklet‚ now widely accessible as a PDF – played a crucial role in photographers quickly mastering its complex features․ Its significance lies in bridging the gap between fully mechanical cameras and the emerging digital era․

The F4’s robust construction and professional features cemented its place as a workhorse for demanding photographers worldwide․

Key Features and Specifications

The Nikon F4 boasts a sophisticated autofocus system with five focus points‚ selectable via controls detailed in the Nikon F4 manual․ It supports various metering modes – spot‚ center-weighted‚ and matrix – offering precise exposure control․ Shutter speeds range from 1/8000 to 30 seconds‚ ensuring versatility in diverse lighting conditions․

Film advance is both manual and motor-driven‚ accommodating different shooting styles․ The camera accepts standard Nikon F-mount lenses․ The manual highlights its compatibility with DX-coded films for automatic ISO setting․

Power is supplied by six AA batteries‚ providing substantial shooting capacity․ Its durable build and comprehensive feature set made it a professional favorite․

Understanding the Camera Body

Explore the Nikon F4’s robust construction‚ control placement‚ and detailed viewfinder display‚ as explained in the comprehensive Nikon F4 manual for optimal use․

Physical Controls and Layout

The Nikon F4 boasts a thoughtfully designed array of physical controls‚ meticulously detailed within the Nikon F4 manual․ Users will find clearly labeled dials and buttons governing essential functions like shutter speed‚ aperture‚ and drive mode․

The top panel houses the main command dial‚ film advance lever‚ and shutter release button‚ all positioned for comfortable and intuitive operation․ Rear controls include access to autofocus settings‚ exposure compensation‚ and custom functions․

The manual provides diagrams illustrating the precise location of each control‚ alongside explanations of their respective functions․ Understanding this layout is crucial for efficient operation and accessing the camera’s full potential‚ allowing photographers to quickly adjust settings without removing their eye from the viewfinder․

Viewfinder Information and Display

The Nikon F4’s bright and spacious viewfinder is a key feature‚ offering a comprehensive display of shooting information as detailed in the Nikon F4 manual․ Photographers can view crucial settings like shutter speed‚ aperture‚ exposure compensation‚ and focus confirmation directly within the viewfinder․

An LCD panel within the viewfinder presents additional data‚ including film counter‚ battery level‚ and selected drive mode․ The manual explains each indicator and its significance‚ enabling users to quickly assess shooting parameters․

Customization options allow photographers to tailor the viewfinder display to their preferences‚ prioritizing the information most relevant to their shooting style․ This clear and informative display enhances accuracy and control․

Battery Compartment and Power Management

The Nikon F4 utilizes readily available batteries‚ detailed within the Nikon F4 manual‚ for powering its advanced functions․ The battery compartment‚ typically located at the camera’s base‚ securely holds the power source․ Proper battery insertion is crucial for reliable operation‚ as illustrated in the manual’s diagrams․

Power management is efficient‚ with the camera employing automatic power-off features to conserve battery life during inactivity․ The viewfinder LCD displays battery level‚ providing a clear indication of remaining power․

The manual also outlines recommended battery types and provides guidance on maximizing battery performance‚ ensuring photographers can rely on the camera during extended shooting sessions․

Film Handling and Loading

The Nikon F4 manual details procedures for loading 35mm film‚ rewinding‚ and selecting advance modes‚ ensuring proper film transport and preventing damage․

Supported Film Types and Speeds

The Nikon F4 is designed for compatibility with a wide range of 35mm film formats․ According to the manual‚ it supports both black and white negative film‚ color negative film‚ and color reversal (slide) film․

ISO speeds are selectable from 6 to 6400‚ offering versatility for various lighting conditions and film stocks․ The camera’s metering system accurately handles films with different sensitivities․ Users can manually set the ISO or utilize the camera’s DX coding feature‚ which automatically detects the ISO speed when using compatible film cartridges․

Proper film selection and ISO setting are crucial for achieving optimal exposure and image quality with the Nikon F4․ Refer to the manual for detailed guidance on matching film types to shooting scenarios․

Film Loading and Rewinding Procedures

Loading film into the Nikon F4 involves opening the back cover‚ inserting the film canister onto the film rail‚ and threading the film leader into the take-up spool․ Ensure the film is advancing smoothly before closing the back cover․

Rewinding the film is accomplished using the rewind crank located on the camera’s top deck․ After shooting‚ press the film rewind button on the bottom of the camera and turn the crank in the direction of the arrow until the film is fully retracted into the canister․

The manual emphasizes careful handling of the film to prevent damage and ensure proper operation․ Always follow the illustrated steps in the manual for correct loading and rewinding․

Film Advance Modes and Settings

The Nikon F4 offers several film advance modes‚ including single-step advance‚ continuous low-speed advance‚ and continuous high-speed advance․ These settings are controlled via the film advance mode selector on the camera’s top panel․

The manual details how to adjust the advance speed to suit different shooting situations․ Continuous advance is ideal for action photography‚ while single-step is better for deliberate compositions․

Self-timer functionality is also linked to the film advance system‚ allowing for delayed exposures․ Refer to the manual for specific instructions on utilizing these features and customizing the advance settings for optimal performance․

Exposure Settings and Modes

The Nikon F4 provides versatile exposure control‚ featuring Aperture Priority‚ Shutter Priority‚ Program‚ and Manual modes for diverse photographic scenarios․

Aperture Priority Mode

In Aperture Priority mode‚ the photographer selects the desired aperture (f-stop) to control depth of field‚ while the camera automatically determines the appropriate shutter speed for correct exposure․ This is ideal for situations where controlling depth of field is paramount‚ such as landscape or portrait photography․

The Nikon F4’s metering system evaluates the scene’s brightness and calculates the necessary shutter speed to achieve a balanced exposure based on the chosen aperture․ Users can also employ exposure compensation to fine-tune the results‚ brightening or darkening the image as needed․ This mode allows for creative control over the image’s aesthetic‚ prioritizing artistic intent over purely technical accuracy․

Remember to monitor the shutter speed displayed in the viewfinder to ensure it remains within a usable range‚ avoiding motion blur or underexposure․

Shutter Priority Mode

Shutter Priority mode on the Nikon F4 allows photographers to select a specific shutter speed‚ prioritizing the capture of motion or freezing action․ The camera then automatically adjusts the aperture to achieve proper exposure․ This is particularly useful for sports photography‚ capturing fast-moving subjects‚ or creating intentional motion blur effects․

The F4’s metering system calculates the appropriate aperture based on the selected shutter speed and the scene’s brightness․ Exposure compensation remains available for fine-tuning․ Be mindful of the resulting aperture value; extremely narrow apertures can introduce diffraction‚ reducing image sharpness․

Always check the aperture displayed to ensure sufficient light reaches the film‚ preventing underexposure․

Program Mode and Variations

Program Mode on the Nikon F4 offers a balanced automatic operation‚ where the camera selects both the shutter speed and aperture for optimal exposure․ It’s ideal for general photography when quick settings are desired․ However‚ the F4 provides variations within Program mode‚ enhancing creative control․

Programmed Auto with Flexible Program allows shifting the program exposure while maintaining the same exposure value․ Programmed Auto with Aperture Priority and Shutter Priority override options are also available․ These variations provide a stepping stone towards manual control․

Utilizing these Program mode variations allows photographers to subtly influence depth of field or motion blur without fully switching to Aperture or Shutter Priority․

Manual Mode and Customization

Manual Mode on the Nikon F4 grants complete control over both aperture and shutter speed‚ essential for experienced photographers or challenging lighting scenarios․ This mode demands a thorough understanding of the exposure triangle․ The F4’s extensive Custom Functions further enhance this control․

Customization options allow tailoring the camera to individual shooting preferences․ These functions cover areas like autofocus behavior‚ metering settings‚ and display information․ Programmed settings can be saved and recalled‚ streamlining workflow․

The F4’s ability to personalize operation makes it a highly adaptable tool‚ catering to diverse photographic styles and ensuring efficient operation in various conditions․

Focusing System

The Nikon F4 features advanced autofocus modes‚ selectable focus areas‚ and precise manual focus capabilities‚ offering versatility for diverse photographic subjects and conditions․

Autofocus Modes and Selection

The Nikon F4 provides a robust autofocus system with several modes to suit various shooting scenarios․ Single Servo AF (S) is ideal for stationary subjects‚ locking focus when the shutter button is half-pressed․ Continuous Servo AF (C) tracks moving subjects‚ continuously adjusting focus as they change position – perfect for sports or wildlife photography․

Automatic AF selection allows the camera to determine the best mode‚ while manual selection gives the photographer full control․ The F4 also offers focus lock‚ enabling you to lock focus on a specific point and recompose the shot․ Understanding these modes and their applications is crucial for achieving sharp‚ well-focused images consistently․ Proper selection ensures optimal performance based on the subject’s movement and the desired photographic outcome․

Focus Area Modes and Control

The Nikon F4 offers versatile focus area control‚ allowing precise selection of where the camera prioritizes focus․ Dynamic Area AF utilizes multiple focus points around the selected point‚ tracking subjects as they move within the frame․ Single Area AF focuses solely on the chosen point‚ best for static subjects requiring pinpoint accuracy․

Wide Area AF employs all focus points‚ suitable for general photography where the subject’s exact location is uncertain․ The F4’s control allows photographers to shift the active focus point quickly‚ adapting to changing compositions․ Mastering these modes enhances the ability to capture sharp images‚ ensuring the intended subject is consistently in focus‚ regardless of its position or movement․

Manual Focus Operation

The Nikon F4 provides precise manual focusing capabilities‚ essential for situations where autofocus may struggle‚ or for photographers preferring direct control․ Switching to manual focus is achieved via a dedicated switch on the camera body․ The viewfinder displays a split-image rangefinder and microprism collar to aid in achieving critical focus․

Rotating the focusing ring on the lens smoothly adjusts the image until the subject appears sharp within the viewfinder’s focusing aids․ This method offers ultimate control‚ particularly beneficial in low light or when shooting through obstructions․ Careful use of manual focus ensures accurate results‚ allowing photographers to override the autofocus system when needed․

Advanced Features and Settings

Explore custom functions‚ metering modes‚ drive settings‚ and self-timer options to personalize the Nikon F4‚ unlocking its full potential for diverse photographic needs․

Metering Modes and Compensation

The Nikon F4 offers versatile metering modes to suit various shooting scenarios․ These include Matrix‚ Center-weighted‚ and Spot metering‚ each providing different approaches to light measurement․ Matrix metering analyzes the entire frame for balanced exposure‚ ideal for general photography․ Center-weighted prioritizes the center of the frame‚ useful for portraits․ Spot metering measures light from a very small area‚ perfect for challenging lighting conditions․

Exposure compensation allows you to fine-tune the camera’s metering system․ This is crucial when shooting subjects that are significantly brighter or darker than the surrounding environment․ The F4 provides a generous range of compensation‚ enabling precise control over exposure․ Understanding these features is key to achieving consistently well-exposed images with the Nikon F4․

Drive Modes and Self-Timer

The Nikon F4 provides a selection of drive modes to accommodate different shooting styles․ Single shooting captures one frame each time the shutter button is pressed․ Continuous shooting allows for rapid-fire image capture‚ ideal for action photography․ Low-speed continuous offers a slower burst rate for subjects with moderate movement․ Self-timer enables delayed shutter release‚ perfect for group photos or when the photographer wants to be included in the shot․

The self-timer duration is adjustable‚ offering flexibility in timing․ These drive modes‚ combined with the self-timer‚ enhance the F4’s versatility‚ allowing photographers to capture a wide range of subjects effectively․

Custom Functions and Personalization

The Nikon F4 boasts extensive custom functions‚ allowing photographers to tailor the camera to their individual preferences․ These functions cover various aspects of operation‚ including autofocus behavior‚ metering settings‚ and display options․ Users can personalize button assignments‚ streamlining workflow and enhancing efficiency․ Customization extends to the viewfinder display‚ enabling photographers to prioritize essential information․

Through these settings‚ the F4 adapts to diverse shooting scenarios and user habits․ Personalization ensures a comfortable and intuitive shooting experience‚ maximizing creative control and responsiveness․ Exploring these options unlocks the camera’s full potential․

Troubleshooting and Maintenance

This section details common Nikon F4 issues‚ solutions‚ cleaning procedures‚ proper storage‚ and explains error codes for optimal camera performance and longevity․

Common Issues and Solutions

Encountering problems with your Nikon F4 is not uncommon‚ especially with a vintage camera․ A frequent issue is the battery compartment corrosion‚ requiring careful cleaning with a cotton swab and isopropyl alcohol․ Another is the viewfinder display becoming dim; check battery contacts and replace if needed․

Film advance issues can stem from worn drive gears‚ potentially needing professional repair․ If the shutter doesn’t fire‚ verify the battery and check the shutter speed dial․ Error codes‚ as detailed in the manual‚ provide clues; for example‚ an ‘E’ error often indicates a communication problem․

Sticky shutter curtains can occur from infrequent use or improper storage; avoid attempting self-repair‚ as this can cause further damage․ Always consult the full manual for specific error code meanings and recommended solutions․

Cleaning and Storage Recommendations

Maintaining your Nikon F4 requires gentle care․ Regularly blow out dust from the camera body and lens mount using a blower․ Avoid liquids directly on the camera; use a slightly damp (not wet!) microfiber cloth for exterior cleaning․ The viewfinder should be cleaned with a lens brush specifically designed for delicate optics․

For long-term storage‚ remove the batteries to prevent corrosion․ Store the camera in a cool‚ dry place‚ ideally in a camera bag or case․ Avoid extreme temperatures and humidity․ Periodically check the battery compartment for any signs of corrosion․

Proper storage will preserve the functionality and value of your classic Nikon F4․ Remember to consult the full manual for detailed cleaning instructions and precautions․

Error Codes and Their Meanings

The Nikon F4 utilizes an error code system to indicate malfunctions․ While a comprehensive list isn’t readily available without the full manual‚ common issues trigger specific displays․ A blinking “Err” message often signals a problem with the film advance or rewind mechanism‚ potentially requiring professional attention․

Other codes might relate to battery issues‚ or problems with the autofocus system․ The manual provides a detailed breakdown of each code and suggested troubleshooting steps․ Ignoring error codes can lead to further damage․

Always refer to the official Nikon F4 manual (available as a PDF download) for a complete and accurate interpretation of error messages․ Professional repair is recommended for unresolved errors․

Resources and Further Information

Explore downloadable PDF manuals‚ online forums dedicated to the Nikon F4‚ and Nikon’s official support channels for comprehensive assistance and community insights․

Where to Download the Full Manual (PDF)

Finding a complete Nikon F4 manual in PDF format is readily achievable through several online resources․ Numerous websites archive and offer these manuals for free download‚ catering to both the F4 and F4S models․

One convenient option is to search directly for “Nikon F4 Owners Manual PDF‚” which will yield links to sites hosting the 111-page document (approximately 4MB in size)․

Alternatively‚ platforms like Internet Archive offer access to scanned versions‚ and some photography enthusiast sites compile links to various language versions‚ including Japanese․

Be cautious when downloading from unfamiliar sources and always scan files for viruses․ A freshly printed PDF manual‚ as opposed to a bound booklet‚ is commonly available․

Online Forums and Communities

Engaging with online forums and communities dedicated to film photography and Nikon cameras provides invaluable support for F4 users․ These platforms host experienced photographers willing to share knowledge‚ troubleshoot issues‚ and discuss advanced techniques․

Dedicated threads often address specific F4 questions‚ covering everything from repair advice to custom function settings․

These communities are excellent resources for finding answers not explicitly detailed in the manual‚ and for learning practical tips from fellow enthusiasts․

Searching online for “Nikon F4 forum” will reveal active groups where you can connect with others and expand your understanding of this classic camera․

Nikon Support and Service Centers

For professional repairs‚ maintenance‚ or assistance beyond the scope of online resources‚ contacting Nikon’s official support and service centers is crucial․ While the F4 is a vintage camera‚ Nikon continues to offer support for its legacy products‚ though service options may vary by region․

Locating an authorized service center ensures repairs are performed by trained technicians using genuine Nikon parts․

Nikon’s website provides a directory of service locations worldwide‚ allowing you to find the nearest center․

Be prepared to discuss the specific issue with your F4 and potentially ship the camera for evaluation and repair․

rival rice maker instructions

Rival Rice Maker Instructions: A Comprehensive Guide

Discover effortless cooking with Rival rice cookers! This guide provides detailed instructions, troubleshooting, and safety tips for optimal performance and delicious results.

Rival rice cookers offer a convenient and reliable way to prepare perfectly cooked rice every time. From basic models to those with advanced features, Rival caters to diverse cooking needs. Finding Rival online manuals, including those for Delron models, is often possible through various databases. These cookers simplify meal preparation, eliminating guesswork and ensuring consistent results. Whether you’re a seasoned chef or a beginner, a Rival rice cooker is a valuable addition to your kitchen, offering ease of use and dependable performance.

Understanding Your Rival Rice Cooker Model

Identifying your specific Rival model number – like RC101 or 4356 – is crucial for accessing the correct user manual and instructions. These manuals detail unique features and settings. Familiarize yourself with key components; understanding these parts ensures proper operation and maintenance. Online resources offer downloadable manuals for various Rival cookers. Knowing your model allows you to troubleshoot effectively and maximize your cooking experience, ensuring perfectly cooked rice and steamed dishes every time.

Identifying Your Specific Model Number

Locating your Rival rice cooker’s model number is the first step towards accessing tailored support and instructions. Typically, this number is found on a sticker located on the bottom or back of the unit. It’s essential for downloading the correct user manual online, as different models have varying features and settings. Knowing your model – such as RC101, 4356, or 4450 – unlocks specific cooking guidelines and troubleshooting advice, guaranteeing optimal performance and delicious results.

Key Components of a Rival Rice Cooker

Understanding the parts of your Rival rice cooker ensures proper use and maintenance. Core components include the outer housing, removable inner cooking pot (often non-stick), a heating plate, a condensation collector, and the lid with a steam vent. Some models feature a steaming basket for simultaneous food preparation. Familiarize yourself with the control panel, including the “Cook” and “Warm” settings, and the power cord. Knowing these elements facilitates efficient operation and extends the lifespan of your appliance.

Preparing to Cook: Essential Steps

Before you begin, proper preparation is key for perfectly cooked rice. Accurately measure your rice using a standard measuring cup. Thoroughly wash the rice in a separate bowl under cold water until the water runs clear, removing excess starch. This step improves texture. Determine the correct water-to-rice ratio based on the type of rice you’re using – white, brown, jasmine, or basmati – consulting your model’s instructions for best results.

Measuring Rice Accurately

Consistent measurements are crucial for successful rice cooking; Always use a standard measuring cup – typically marked in cups and milliliters – to ensure the correct rice-to-water ratio. Avoid using cutlery or estimating, as this can lead to inconsistent results. Level off the rice in the measuring cup for precise amounts. Note that different rice varieties may have slightly different volume-to-weight ratios, so refer to specific guidelines when available.

Washing the Rice for Optimal Results

Rinsing rice before cooking removes excess starch, resulting in fluffier, less sticky grains. Place the measured rice in a bowl and cover with cold water. Gently swirl the rice with your hand, then drain the cloudy water. Repeat this process several times – typically 3-5 times – until the water runs relatively clear. This step significantly improves the texture of the cooked rice, preventing it from becoming gummy or clumping together during the cooking process.

Water-to-Rice Ratio Guidelines

Achieving perfectly cooked rice relies on the correct water-to-rice ratio. For white rice, a general guideline is a 1:1 ratio – one cup of rice to one cup of water. Brown rice typically requires more water, around 1 cup of rice to 2.25-2.5 cups of water. Jasmine and Basmati rice may need slightly less. Always refer to your specific Rival model’s instructions, as variations exist. Adjust slightly based on desired texture; less water for firmer rice, more for softer.

Basic Cooking Instructions: White Rice

Begin by adding the measured and washed white rice to the Rival rice cooker. Then, carefully add the appropriate amount of water, following the water-to-rice ratio guidelines for your model. Secure the lid tightly. Select the “Cook” setting on your Rival cooker. The cooking cycle will automatically begin, and the cooker will switch to the “Warm” setting when finished. Allow the rice to rest for 10 minutes before fluffing and serving for optimal texture and flavor.

Adding Rice and Water to the Cooker

First, measure the desired amount of rice and gently place it into the inner cooking pot of your Rival rice cooker. Ensure the rice is evenly distributed. Next, carefully pour in the required water, referencing the water-to-rice ratio specific to your model and the type of white rice you’re using. Avoid exceeding the maximum fill line indicated inside the cooker. Securely position the inner pot within the cooker before closing the lid.

Selecting the “Cook” Setting

Once the lid is securely closed, locate the “Cook” setting on your Rival rice cooker. This is typically a switch or button that you press to initiate the cooking cycle. For basic white rice, simply select the “Cook” setting. Some models may have specific settings for different rice types; ensure you’ve chosen the appropriate one. The indicator light will illuminate, signaling that the cooking process has begun. Avoid lifting the lid during cooking to maintain optimal temperature and steam.

The Cooking Cycle and Automatic Shut-Off

During the cooking cycle, the Rival rice cooker will automatically adjust the temperature to perfectly cook your rice. Resist the urge to lift the lid, as this releases steam and affects the cooking process. Once the rice has finished cooking, the cooker will automatically switch to the “Warm” setting. This feature keeps the rice at a serving temperature without overcooking it. The indicator light will typically change to signify this transition, ensuring perfectly cooked rice every time.

Cooking Different Types of Rice

Rival rice cookers aren’t limited to white rice! Adjustments are needed for optimal results with other varieties. Brown rice requires a longer cooking time and more water – typically a 2:1 water-to-rice ratio. Jasmine and Basmati rice generally need less water, around a 1.5:1 ratio, for a fluffy texture. Experimentation may be needed to find your preferred consistency, as rice types and personal preferences vary; Always refer to package instructions as a starting point.

Brown Rice Cooking Instructions

For perfectly cooked brown rice with your Rival cooker, use a 2:1 water-to-rice ratio. Add the measured brown rice and water to the cooker. Select the appropriate setting – if available, choose a “Brown Rice” setting. Otherwise, use the standard “Cook” setting. The cooking cycle will be longer than white rice, typically 45-50 minutes. Allow the cooker to automatically switch to the “Warm” setting after cooking, and let it rest for 10 minutes before fluffing and serving.

Jasmine Rice Cooking Instructions

To achieve fragrant and fluffy Jasmine rice, a slightly adjusted water ratio is key. Use a 1.5:1 water-to-rice ratio for best results. Combine the measured Jasmine rice and water within the Rival rice cooker. Select the “Cook” setting to initiate the cooking process. Jasmine rice generally cooks faster, around 20-25 minutes. Once the cycle completes and the cooker switches to “Warm”, let it stand for 10 minutes before gently fluffing with a fork and serving this delightful grain.

Basmati Rice Cooking Instructions

For perfectly separated and aromatic Basmati rice, precise measurements are crucial. Employ a 1.75:1 water-to-rice ratio. Thoroughly rinse the Basmati rice until the water runs clear, removing excess starch. Add the rinsed rice and water to your Rival cooker. Select the “Cook” setting and allow approximately 25-30 minutes for the cooking cycle. After automatic shut-off, let the rice rest, covered, for 10 minutes. Gently fluff with a fork to release the grains and enjoy this flavorful side dish.

Steaming with Your Rival Rice Cooker

Expand your culinary options by utilizing the steaming function! Your Rival rice cooker isn’t just for rice; it’s a versatile steamer. Ensure sufficient water is in the base – do not exceed the maximum fill line. Place vegetables or proteins within the included steaming basket, ensuring they aren’t submerged. Select the “Cook” setting, and steam until tender. This method preserves nutrients and delivers healthy, delicious results alongside your perfectly cooked rice.

Using the Steaming Basket

Maximize your Rival cooker’s versatility with the steaming basket! This accessory fits securely inside, elevating food above the boiling water. Ensure the basket sits firmly and doesn’t touch the water. For best results, cut vegetables into uniform sizes for even steaming. Don’t overcrowd the basket; allow steam circulation. The basket is ideal for fish, poultry, and delicate vegetables, offering a healthy, flavorful cooking method alongside rice preparation.

Vegetable Steaming Guide

Achieve perfectly steamed vegetables using your Rival cooker! Add approximately 1-2 cups of water to the inner pot. Place chopped vegetables – broccoli, carrots, or green beans – into the steaming basket. Select the “Cook” setting, and steam for 8-15 minutes, depending on the vegetable and desired tenderness. Check for doneness with a fork. Steaming preserves nutrients and delivers a crisp-tender texture, making it a healthy and delicious side dish option.

Protein Steaming Guide

Effortlessly steam fish, chicken, or dumplings with your Rival rice cooker! Add 1-2 cups of water to the inner pot. Place seasoned protein onto the steaming basket, ensuring it doesn’t touch the water. Select the “Cook” setting and steam for 12-20 minutes, depending on the protein’s thickness and type. Check for internal temperature to ensure it’s fully cooked. Steaming keeps proteins moist and tender, offering a healthy and flavorful meal option.

Advanced Features and Settings

Explore beyond basic cooking! The “Warm” function maintains rice at serving temperature for hours, preventing it from drying out. Some models offer a “Delay Start” for convenient, timed cooking. Specialty settings like “Soup” or “Oatmeal” expand your culinary options. Refer to your specific model’s manual to unlock these features. Utilizing these advanced settings enhances convenience and allows for diverse meal preparation with your Rival rice cooker.

“Warm” Function: Keeping Rice at Serving Temperature

The “Warm” function automatically activates after the cooking cycle completes, transitioning the cooker to a warming mode. This maintains rice at an ideal serving temperature for extended periods – often several hours – without overcooking or drying it out. It’s perfect for staggered mealtimes or keeping rice ready for guests. Simply leave the rice in the cooker, and enjoy perfectly warmed grains whenever you’re ready to eat!

Delay Start Function (If Applicable)

Some Rival rice cooker models feature a convenient delay start function. This allows you to pre-set a cooking time, enabling the cooker to automatically begin cooking later. This is ideal for preparing rice in advance, ensuring a hot meal is ready when you are. Consult your specific model’s manual for detailed instructions on programming the delay start timer, as procedures can vary between different Rival cookers.

Specialty Settings (e.g., Soup, Oatmeal)

Beyond basic rice cooking, certain Rival models boast versatile specialty settings. These can include options for preparing soups, stews, or even oatmeal directly within the cooker. Utilizing these settings often involves adjusting water levels and selecting the appropriate program. Always refer to your user manual for precise instructions and recommended recipes for each specialty function, ensuring optimal results and preventing potential issues with cooking times or textures.

Cleaning and Maintenance

Regular cleaning ensures your Rival rice cooker’s longevity and hygiene. Begin by unplugging the unit and allowing it to cool completely. Disassemble removable parts like the inner pot, steaming basket, and lid, washing them with warm, soapy water. Avoid abrasive cleaners. Carefully wipe the heating plate with a damp cloth; never immerse the base in water. Thoroughly dry all components before reassembling. Consistent maintenance prevents buildup and maintains optimal performance.

Disassembling the Rice Cooker

Before cleaning, safely disassemble your Rival rice cooker. First, ensure the unit is unplugged and cool. Gently lift off the lid. Remove the inner cooking pot and steaming basket, if present. Most models allow for easy removal of these components. Avoid forcing any parts; consult your model’s specific manual if needed. Proper disassembly facilitates thorough cleaning and prevents damage to the cooker’s internal mechanisms, ensuring lasting usability.

Washing Removable Parts

Thoroughly wash the inner pot, lid, and steaming basket with warm, soapy water after each use. Avoid abrasive cleaners, as they can damage the non-stick coating. A soft sponge or cloth is ideal. Rinse all parts completely to remove any soap residue. The inner pot may be dishwasher safe – check your model’s manual for confirmation. Ensure all components are fully dry before reassembling the rice cooker for storage or subsequent use, preventing mildew.

Cleaning the Heating Plate

Carefully wipe the heating plate with a damp, soft cloth after the cooker has completely cooled and is unplugged. Avoid submerging the base unit in water or any liquids. Stubborn food residue can be gently loosened with a plastic scraper, but never use metal utensils. Ensure no water enters the vents or electrical components. A clean heating plate ensures efficient heat transfer and prevents burning smells during future cooking cycles, maintaining optimal performance.

Troubleshooting Common Issues

If rice is mushy, reduce the water-to-rice ratio slightly in subsequent attempts. For dry rice, increase the water. A cooker failing to turn on may indicate a power supply issue; check the cord and outlet. If problems persist, avoid self-repair and consult service instructions. Never attempt internal adjustments, as this voids the warranty. Regularly cleaning and proper usage prevent most issues, ensuring consistent, delicious results with your Rival rice cooker.

Rice is Too Mushy

Mushy rice typically indicates an excess of water used during cooking. For future batches, slightly decrease the water-to-rice ratio. Begin by reducing the water by a tablespoon or two. Ensure accurate measurement of both rice and water is crucial. Avoid lifting the lid during the cooking cycle, as this releases steam and affects the cooking process. Consistent adjustments will help you achieve perfectly textured rice with your Rival cooker.

Rice is Too Dry

Dry rice usually means insufficient water was used during the cooking process. For the next attempt, incrementally increase the water amount – start with an extra tablespoon. Double-check your rice-to-water ratio against the guidelines for your specific rice type. Ensure the heating plate is clean, as residue can affect heat distribution; Remember not to open the lid mid-cycle, preserving essential steam for proper hydration and fluffy results with your Rival rice cooker.

Cooker Won’t Turn On

If your Rival rice cooker fails to power on, first verify the power cord is securely plugged into both the cooker and a functioning outlet. Test the outlet with another appliance to confirm it’s delivering power. Inspect the power cord for any visible damage – do not use if frayed. Avoid attempting self-repair of electrical components; this voids the warranty and poses a safety risk. Contact Rival customer support for assistance or potential service options.

Safety Precautions

Always prioritize safety when using your Rival rice cooker. Ensure proper electrical safety by avoiding use with damaged cords or wet hands. Prevent burns and scalds by carefully handling hot surfaces and steam. Utilize the power cord correctly, avoiding kinks or strain. Never immerse the cooker base in water. Do not attempt to repair electrical or mechanical functions yourself; contact qualified service personnel. Keep the appliance out of reach of children.

Electrical Safety Guidelines

To ensure safe operation, always plug your Rival rice cooker into a grounded outlet. Never operate the appliance with a damaged cord or plug. Avoid using extension cords if possible; if necessary, use a heavy-duty extension cord rated for the cooker’s wattage. Do not immerse the cooker base, cord, or plug in water or other liquids. Unplug the cooker when not in use and before cleaning. Never attempt self-repair of electrical components.

Avoiding Burns and Scalds

Exercise extreme caution when operating your Rival rice cooker, as surfaces become hot during use. Always use oven mitts or pot holders when handling the cooker, lid, and inner pot. Avoid touching hot surfaces directly. Be mindful of escaping steam, which can cause burns; open the lid away from your face and hands. Keep the cooker out of reach of children to prevent accidental burns. Allow the cooker to cool completely before cleaning or storing.

Proper Cord Usage

Ensure safe operation by inspecting the power cord regularly for damage. Never operate the cooker with a damaged cord or plug. Avoid using extension cords; plug directly into a grounded outlet. Do not let the cord hang over the edge of a counter or table, or touch hot surfaces. When unplugging, grasp the plug – never pull the cord. Keep the cord away from heat, oil, and sharp objects to prevent electrical hazards and maintain cooker functionality.

Finding Rival Rice Cooker Manuals Online

Locate your Rival rice cooker manual easily through several online resources. Start with Rival’s official website, then explore online manual databases. Utilize model-specific search terms (e.g., “Rival RC101 manual”) for precise results. Websites often archive older models, like the 4356 or 4450. Remember to verify the manual matches your specific cooker model number for accurate instructions and safety guidelines. Digital copies offer convenient access to cooking guidance.

Rival’s Official Website

Begin your search for Rival rice cooker manuals at the official Rival website. Though specific manual availability varies, it’s the primary source for current and potentially archived documentation. Navigate to the support or customer service section, then look for a manual download area. Utilize the search function, entering your exact model number for targeted results. Check frequently, as content updates occur. If unavailable, explore alternative online databases for your Rival cooker’s instructions.

Online Manual Databases

Numerous online manual databases host user manuals for various appliances, including Rival rice cookers. Websites dedicated to appliance documentation often compile manuals submitted by users or sourced from manufacturers. Explore these platforms using precise search terms – “Rival rice cooker manual” plus your specific model number. Be cautious regarding download sources, prioritizing reputable sites. ManualsLib and similar resources can be valuable, but always verify the manual’s accuracy before use.

Model-Specific Search Tips

Locating the correct manual hinges on your Rival rice cooker’s model number. This is typically found on a sticker underneath the unit or inside the cooker pot. When searching online, include the full model number (e.g., RC101, 4356, 4450) for precise results. Try variations like “Rival RC101 manual PDF” or “Rival 4356 instruction booklet.” If initial searches fail, broaden to include “Delron rice cooker manual” as Rival acquired Delron.

Rival Rice Cooker Model RC101 Specific Instructions

For the Rival RC101, measure rice and wash until water runs clear. Add rice to the cooker, then add water – a 1:1 ratio is standard for white rice. Select the “Cook” setting; the cooker automatically switches to “Warm” upon completion. This model is basic, lacking delay start or specialty settings. Refer to the full RC101 user manual, often available online, for detailed guidance and safety precautions. Remember to always unplug before cleaning!

Rival Rice Cooker Model 4356 Specific Instructions

The Rival 4356 model, a popular automatic rice cooker/steamer, requires careful attention to water levels. Begin by measuring your desired rice amount and washing thoroughly. Add rice and water – typically a 1:2 ratio for white rice, adjusting for brown or other varieties. Select the appropriate cooking cycle. This model may include steaming capabilities using its included basket. Always consult the full manual, as it’s difficult to find, for specific settings and safety guidelines.

Rival Rice Cooker Model 4450 Specific Instructions

For the Rival 4450, ensure the inner pot is securely placed before operation. Measure rice accurately and wash until the water runs clear. A standard water-to-rice ratio of 1:2 works well for most white rice types. Select the ‘Cook’ setting and allow the automatic cycle to complete. This model benefits from careful cleaning of the heating plate to maintain optimal performance. Refer to available online resources, as dedicated manuals are scarce, for detailed guidance.

piano book beginner pdf

Learning piano can be incredibly rewarding‚ and a beginner piano book PDF offers a convenient‚ accessible starting point for aspiring musicians․

These digital resources simplify the initial stages‚ providing structured lessons and exercises for a successful musical journey․

Many free options are available‚ making piano education attainable for everyone‚ regardless of budget or location․

What is a Piano Beginner PDF?

A Piano Beginner PDF is a digital document‚ typically in Portable Document Format‚ designed to guide individuals with no prior musical experience through the fundamentals of piano playing․ These resources consolidate essential piano learning materials into a single‚ easily downloadable file․

They commonly encompass lessons on reading musical notation‚ understanding rhythm‚ proper piano posture‚ correct hand positioning‚ and identifying keys and notes․ Many PDFs include exercises to build finger dexterity and coordination‚ alongside simplified arrangements of popular songs for practice․

The appeal lies in their accessibility – they are often free to download‚ readily available online‚ and can be accessed on various devices like computers‚ tablets‚ and smartphones․ A well-structured piano beginner book PDF serves as a self-paced learning tool‚ allowing students to progress at their own speed and convenience․

Why Use a PDF Piano Book?

Utilizing a PDF piano book offers numerous advantages for aspiring musicians․ Primarily‚ they are incredibly cost-effective‚ with a wealth of free resources readily available for download․ This eliminates the financial barrier often associated with traditional piano lessons or physical textbooks․

PDFs provide unparalleled convenience; you can access lessons anytime‚ anywhere‚ on a variety of devices․ They are portable and eliminate the need to carry heavy books․ Furthermore‚ many PDFs are interactive‚ featuring embedded audio examples or links to online tutorials․

For self-motivated learners‚ a piano beginner PDF allows for self-paced learning‚ enabling you to focus on areas where you need the most practice․ They often present information in a clear‚ step-by-step manner‚ simplifying complex musical concepts and fostering a solid foundation․

Types of Pianos for Beginners

Beginner piano books often discuss both acoustic and digital pianos‚ outlining their unique features․ Understanding these differences is crucial when selecting an instrument․

Choosing wisely supports effective learning․

Acoustic Pianos: Uprights and Grand Pianos

Acoustic pianos‚ particularly upright and grand models‚ represent the traditional foundation of piano learning․ Beginner piano books frequently detail their mechanics and sound production․ Upright pianos are more compact and affordable‚ making them suitable for homes with limited space and budgets․

They offer a genuine piano playing experience‚ fostering proper technique development; Grand pianos‚ renowned for their superior sound quality and responsive action‚ are often preferred by advanced players but can be a significant investment․

A piano book for beginners will explain how the hammer action and string resonance contribute to the instrument’s rich tone․ While requiring regular tuning and maintenance‚ acoustic pianos provide an unparalleled tactile and auditory connection for aspiring musicians‚ offering a classic and immersive learning experience․

Digital Pianos: Features and Benefits

Digital pianos have become increasingly popular for piano learners‚ offering a range of features beneficial to beginners․ A comprehensive piano book PDF often includes a section comparing acoustic and digital options․ Key advantages include adjustable volume – ideal for quiet practice – and headphone compatibility for private lessons․

Many digital pianos simulate the feel of acoustic piano keys‚ aiding in technique development․ They also offer built-in metronomes‚ recording capabilities‚ and various instrument sounds‚ enhancing the learning experience․

Furthermore‚ digital pianos eliminate the need for tuning and require less maintenance․ A beginner can benefit from the convenience and versatility‚ making them a practical choice for those starting their musical journey․ They provide a cost-effective alternative without sacrificing essential learning tools․

Essential Piano Basics Covered in Beginner PDFs

Beginner piano PDFs systematically teach fundamental skills‚ including musical notation‚ proper piano posture‚ and key identification․

These resources build a strong foundation for aspiring pianists․

Understanding Musical Notation

Beginner piano books in PDF format dedicate significant attention to deciphering musical notation‚ the language of music․ This crucial section typically begins with explaining the staff – the five horizontal lines and four spaces where notes are placed․

You’ll learn to identify treble and bass clefs‚ understanding which notes each represents․ The PDF will illustrate how notes themselves indicate pitch‚ while their shapes determine duration (whole‚ half‚ quarter‚ eighth notes‚ etc․)․

Rests‚ representing silence‚ are also thoroughly explained․ Furthermore‚ these resources introduce time signatures‚ dictating the rhythm of a piece‚ and key signatures‚ indicating sharps or flats․

Exercises often involve reading simple melodies and rhythms‚ gradually increasing in complexity․ Understanding these foundational elements is paramount to progressing beyond rote learning and truly interpreting musical scores․

Piano Posture and Hand Position

A good beginner piano book PDF emphasizes the importance of correct posture and hand position from the outset․ Proper technique prevents strain and facilitates efficient playing․ Typically‚ it advises sitting at a height allowing forearms to be parallel to the floor․

The back should be straight‚ but relaxed‚ and feet flat on the floor or a footrest․ Regarding hand position‚ the PDF will illustrate a naturally curved shape‚ as if holding a small ball․

Fingers should be rounded‚ striking the keys with the pads‚ not the fingertips․

Wrist flexibility is also highlighted‚ avoiding stiffness or excessive bending․

Exercises often focus on maintaining this correct form while playing simple scales or chords․ These beginner piano books often include diagrams and illustrations to visually demonstrate the ideal technique‚ ensuring a solid foundation for future progress and preventing bad habits․

Piano Key Identification and Note Chart

A crucial component of any beginner piano book PDF is a clear explanation of piano key identification and a comprehensive note chart․ These resources demystify the keyboard layout for newcomers․

Typically‚ the PDF will visually illustrate the repeating pattern of black and white keys‚ explaining how to locate middle C – a fundamental reference point․ It will detail how notes are named (A‚ B‚ C‚ D‚ E‚ F‚ G) and their corresponding positions on the keyboard․

The note chart will often show the entire range of the piano‚ indicating sharps and flats․

Understanding the relationship between notes and their positions is vital for reading music․

Many beginner piano books include exercises to practice identifying notes quickly and accurately‚ building a strong foundation for musical literacy and enabling the student to confidently navigate the keyboard․

Finding Free Piano Beginner PDFs

Numerous websites offer free piano beginner PDFs‚ providing accessible learning materials․ Downloading piano books is easy‚ but evaluating resource quality is essential for effective progress․

Top Websites Offering Free Downloads

Several online platforms specialize in providing free piano beginner PDFs‚ catering to diverse learning preferences․ Musicnotes․com often features a selection of beginner-friendly arrangements and exercises available for download․ 8notes․com is another valuable resource‚ offering a wide range of sheet music‚ including simplified pieces suitable for novices․

Free-scores․com boasts an extensive library of free sheet music‚ encompassing various genres and skill levels‚ making it a great place to discover beginner piano books in PDF format․ Additionally‚ many music education websites and blogs regularly publish free downloadable content‚ including lesson excerpts and practice materials․ Websites like Virtual Piano and dedicated piano tutorial blogs frequently offer free PDF resources as lead magnets or supplementary materials․

Remember to always check the terms of use and copyright restrictions before downloading and utilizing any free resources․

Evaluating the Quality of Free Resources

While numerous free piano beginner PDFs are available‚ assessing their quality is crucial for effective learning․ Look for resources created by qualified music educators or experienced pianists; author credentials matter․ Check for clear‚ accurate musical notation and well-structured lessons that progress logically․

Beware of PDFs with excessive errors‚ poor formatting‚ or incomplete explanations․ A good resource will offer a balance of theory‚ exercises‚ and simple songs for practice․ Consider the overall presentation – a visually appealing and easy-to-navigate PDF is more conducive to learning․ Read user reviews or seek recommendations from online piano communities to gauge the resource’s effectiveness․

Don’t hesitate to supplement free materials with other learning tools if needed‚ ensuring a well-rounded and comprehensive approach to piano education․

Content Typically Found in Beginner Piano Books (PDF)

Beginner piano books (PDF) commonly include step-by-step tutorials‚ finger dexterity exercises‚ and simple songs for practice․

These resources build foundational skills progressively‚ making learning enjoyable and effective․

Step-by-Step Tutorials

Step-by-step tutorials are a cornerstone of any effective beginner piano book PDF․ These tutorials break down complex concepts into manageable‚ easily digestible segments‚ guiding the learner through each stage of the process․ They typically begin with the very basics – understanding the piano keyboard layout‚ identifying notes‚ and learning proper hand positioning․

Good tutorials won’t just tell you what to do; they’ll show you‚ often with diagrams or illustrations․ They’ll then walk you through simple exercises‚ building upon previously learned skills․ Expect to find tutorials covering reading musical notation‚ playing basic chords‚ and coordinating both hands․ The best resources offer a logical progression‚ ensuring a solid foundation before introducing more challenging material․

Furthermore‚ these tutorials often incorporate practice tips and common mistakes to avoid‚ accelerating the learning curve․ They aim to simplify the learning process‚ making it less daunting for absolute beginners and fostering a sense of accomplishment with each completed step․

Exercises for Finger Dexterity

Exercises for finger dexterity are crucial components within a comprehensive beginner piano book PDF․ Developing independent finger control is fundamental to playing the piano effectively‚ and these exercises are specifically designed to build that strength and coordination․ You’ll commonly find exercises focusing on scales‚ arpeggios‚ and Hanon-style drills․

These aren’t about playing beautiful music initially; they’re about training your fingers to move accurately and efficiently․ A good PDF will start with simple five-finger exercises‚ gradually increasing the range and complexity․ Expect to see instructions on proper technique – curved fingers‚ relaxed wrists‚ and consistent pressure․

Regular practice of these exercises‚ even for short periods‚ will significantly improve your technique‚ speed‚ and overall playing ability․ They lay the groundwork for tackling more challenging pieces and mastering various musical styles․ Consistency is key to seeing noticeable improvements in finger dexterity․

Simple Songs for Practice

A quality beginner piano book PDF won’t just focus on technical exercises; it will also include a selection of simple songs for practice․ These songs are carefully chosen to reinforce the concepts learned and provide a more enjoyable learning experience․ Expect to encounter familiar melodies like “Mary Had a Little Lamb‚” “Hot Cross Buns‚” or simplified versions of folk tunes․

These pieces typically utilize a limited range of notes and basic rhythms‚ allowing beginners to apply their newly acquired skills in a musical context․ The PDF will often present the music in both standard notation and‚ sometimes‚ with lettered notes to aid in reading․

Learning to play these songs builds confidence and motivates continued practice․ They demonstrate how musical notation translates into actual sound‚ solidifying understanding and fostering a love for playing the piano․

Beyond the PDF: Additional Learning Resources

While piano book PDFs are excellent‚ consider supplementing your learning with online piano lessons and a helpful glossary of piano terms for faster progress․

Online Piano Lessons

Online piano lessons offer a dynamic and interactive complement to static beginner piano book PDFs․ These platforms frequently provide personalized feedback‚ allowing students to correct technique and address specific challenges in real-time – something a PDF simply cannot do․

Many services cater specifically to beginners‚ breaking down complex concepts into manageable steps․ Interactive features‚ like virtual keyboards and note recognition software‚ enhance the learning experience and accelerate progress․

Furthermore‚ online lessons often include a structured curriculum‚ ensuring a comprehensive understanding of music theory and practical application․ Some platforms even offer the opportunity to learn at your own pace‚ fitting lessons into your schedule․ Consider exploring options that offer trial periods to find a style and instructor that suits your learning preferences‚ maximizing the benefits beyond your piano book․

Glossary of Piano Terms

A comprehensive glossary of piano terms is an invaluable addition to any beginner piano book PDF․ Music is filled with specialized vocabulary‚ and understanding these terms is crucial for interpreting sheet music and following instructions effectively․

Common terms like “tempo‚” “dynamics‚” “staccato‚” and “legato” can initially seem daunting‚ but a well-defined glossary demystifies them․ It bridges the gap between reading instructions and actually playing the piano․

Furthermore‚ a glossary should explain musical symbols‚ such as clefs‚ time signatures‚ and accidentals․ Having quick access to these definitions within or alongside your PDF eliminates constant interruptions to search for explanations online․ This focused resource enhances comprehension and allows beginners to concentrate on developing their skills‚ rather than deciphering terminology․

Premium Piano Classes vs․ Free PDFs

While free piano beginner PDF resources offer an accessible entry point‚ comparing them to premium classes reveals key differences․ PDFs provide structured lessons and exercises‚ ideal for self-paced learning‚ but lack personalized feedback․

Premium classes‚ conversely‚ offer direct interaction with an instructor‚ allowing for customized guidance and correction of technique․ This personalized approach accelerates progress and prevents the development of bad habits․

PDFs are cost-effective‚ but may not cater to individual learning styles․ Premium classes often include supplementary materials and a supportive learning community․ Choosing between the two depends on your budget‚ discipline‚ and desired level of support․ A beginner might start with a PDF to gauge interest‚ then transition to classes for deeper instruction․

honeywell th8321u1006 installation manual pdf

Honeywell TH8321U1006 Installation Manual PDF: A Comprehensive Guide

This guide provides detailed instructions for installing and configuring your Honeywell TH8321U1006 thermostat, offering a 36-page resource and a 12-page installation guide available for free PDF download.

Understanding the Honeywell TH8321U1006 Thermostat

The Honeywell TH8321U1006 is a touchscreen programmable thermostat belonging to the VisionPRO 8000 series. It’s designed for effortless operation, featuring intuitive logic and a menu-driven programming system that adapts to your preferences and schedule for optimal comfort and energy efficiency. This thermostat supports 20 to 30 VAC power, operates at 50/60 Hz frequency, and handles currents from 0.6 to 1 Amp, with a power consumption of 15 to 25 Watts.

Key to its functionality is the ability to create 7-day programs, allowing customized temperature settings for different times and days. The included installation manual, available as a PDF, guides users through the process of connecting the thermostat to various HVAC systems. It’s a sophisticated system intended to provide precise temperature control and potentially reduce energy costs, making it a valuable addition to any home.

Key Features and Benefits

The Honeywell TH8321U1006 boasts a user-friendly touchscreen interface, simplifying programming and operation. Its 7-day programmability allows for customized comfort schedules, optimizing energy usage and potentially lowering bills. The VisionPRO 8000 series is known for its intuitive logic, responding directly to user choices.

A significant benefit is the thermostat’s compatibility with various HVAC systems, detailed in the downloadable installation manual. The system supports connection to Wi-Fi networks, enabling remote control and monitoring. With a power range of 15-25W and operating at 50/60Hz, it’s designed for reliable performance. The comprehensive PDF manual ensures a smooth installation process, maximizing the thermostat’s features and benefits for homeowners seeking enhanced climate control.

Thermostat Package Contents

While a detailed list isn’t explicitly provided in the readily available information, the Honeywell TH8321U1006 package typically includes the thermostat unit itself, featuring a vibrant touchscreen display. Expect a mounting base plate for secure wall installation, alongside necessary screws and wall anchors for a stable setup.

Crucially, the package contains a comprehensive installation manual – a 36-page PDF guide – detailing wiring diagrams and setup procedures. You’ll likely find wire labels to aid in correct HVAC system connection. The VisionPRO 8000 series emphasizes ease of use, and the included documentation supports this. Though not listed, some packages may include additional accessories; however, the core components focus on facilitating a straightforward and effective installation process, as outlined in the downloadable manual.

Installation Process

Follow basic steps outlined in the 36-page manual to install the thermostat, set installer options, and connect to your home’s Wi-Fi network effectively.

Safety Precautions Before Installation

Before beginning the installation of your Honeywell TH8321U1006 thermostat, it is crucial to prioritize safety. Always disconnect power to your HVAC system at the breaker box to avoid electrical shock. Read and save all provided instructions carefully before proceeding with any wiring or mounting procedures.

Ensure you understand the wiring diagram and identify all wires correctly before connecting them to the terminal blocks. If you are uncomfortable working with electrical wiring, consult a qualified HVAC technician. Improper wiring can damage the thermostat or your HVAC system, and may create a safety hazard. Verify compatibility with your system’s voltage (20 to 30 VAC) and current limits (0.6 to 1 A).

Take precautions to avoid damaging existing wires during installation. Always double-check connections before restoring power.

Wiring Diagram Overview

The Honeywell TH8321U1006 thermostat utilizes a standard wiring configuration, but understanding the diagram is essential for correct installation. Typically, terminals are designated for common (C), heating (W), cooling (Y), fan (G), and potentially auxiliary heat (AUX/E). Heat pump systems may include a reversing valve (O/B) terminal.

Refer to the 12-page installation guide for a detailed wiring diagram specific to your HVAC system type – forced air, heat pump, or others. Carefully note the wire designations and their corresponding terminal locations. Incorrect wiring can lead to system malfunction or damage. The VisionPRO 8000 series, of which the TH8321U1006 is a part, requires a common (C) wire for consistent power.

Ensure the wiring matches your existing thermostat’s configuration before disconnecting any wires. Document the existing wiring for reference.

Connecting the Thermostat to Your HVAC System

After identifying your HVAC system’s wiring, carefully connect each wire to the corresponding terminal block on the Honeywell TH8321U1006 thermostat base plate. Ensure each wire is securely inserted into the terminal, avoiding loose connections. Refer to the installation guide’s wiring diagram for accurate placement – common (C), heating (W), cooling (Y), fan (G), and auxiliary heat (AUX/E) are key.

For heat pump systems, verify the correct connection of the reversing valve wire (O/B). Double-check all connections against your documented existing wiring. The VisionPRO 8000 series requires a stable power supply, so a secure common (C) wire connection is crucial.

Once all wires are connected, gently tug on each wire to confirm it’s firmly held in place. Proceed to mounting the thermostat base plate after verifying all connections.

Identifying HVAC System Wiring

Before connecting the Honeywell TH8321U1006, carefully document your existing HVAC system’s wiring. Turn off power to your HVAC system at the breaker to ensure safety. Remove your old thermostat to expose the wiring terminals. Label each wire with its corresponding terminal designation – typically letters like R, W, Y, G, C, and potentially O/B for heat pumps.

Take a clear photograph of the wiring configuration for reference. Common wire colors don’t always match terminal designations, so rely on the labels, not color. If you lack confidence, consult a qualified HVAC technician. Understanding the wiring is crucial for a successful installation.

The VisionPRO 8000 series requires a ‘C’ wire for consistent power; its absence may necessitate professional assistance. Accurate identification prevents damage to your HVAC system and thermostat.

Connecting Wires to the Terminal Blocks

With the thermostat base plate mounted and power still off, carefully connect each labeled wire to the corresponding terminal block on the Honeywell TH8321U1006. Ensure each wire is fully inserted into the terminal, securing a firm connection. Use a small screwdriver to tighten the terminal screws, but avoid over-tightening, which could damage the terminals.

Double-check your wiring against the diagram and the photograph you took earlier. Incorrect wiring can cause system malfunction or damage. Pay close attention to the ‘C’ wire connection, as it’s essential for thermostat operation. Verify that no bare wire is exposed outside the terminal block.

Once all wires are connected, gently tug on each wire to confirm a secure hold. Proper connections are vital for reliable performance of your VisionPRO 8000 thermostat.

Mounting the Thermostat Base Plate

Before mounting, ensure the power to your HVAC system is completely switched off at the breaker. Position the thermostat base plate on the wall, using the existing screw holes if possible. If new holes are needed, use a level to ensure the base plate is straight. Mark the screw locations with a pencil.

Drill pilot holes at the marked locations, then insert wall anchors if necessary, depending on your wall material. Secure the base plate to the wall using the provided screws. Ensure the base plate is firmly attached and doesn’t wobble.

Carefully route the wires through the opening in the base plate. Double-check that no wires are pinched or damaged during this process. A secure and properly mounted base plate is crucial for the stable operation of your Honeywell TH8321U1006 thermostat.

Initial Setup and Configuration

After installation, power on the thermostat and follow the on-screen prompts to set the date, time, and configure your specific HVAC system type.

Powering On the Thermostat

Once the thermostat base plate is securely mounted and the wiring is correctly connected to the terminal blocks, you can proceed to power on the Honeywell TH8321U1006. The thermostat requires 20 to 30 VAC power, with a voltage of 750 mV and a current draw of 0.6 to 1 Amp, consuming 15 to 25 Watts.

Upon initial power-up, the touchscreen display will illuminate, initiating the startup sequence. The thermostat will perform a self-test, verifying the connections and system functionality. You should observe the Honeywell logo and then a series of screens prompting you to begin the configuration process.

If the thermostat does not power on, double-check the wiring connections, ensuring they are firmly seated on the terminal blocks and that the power source is active. Refer to the troubleshooting section for further assistance if needed.

Setting the Date and Time

After successfully powering on the Honeywell TH8321U1006, the thermostat will prompt you to set the current date and time. This is a crucial step for accurate scheduling and operation of your HVAC system. The intuitive touchscreen interface allows for easy navigation through the date and time settings.

Utilize the touchscreen controls to adjust the month, day, and year. Subsequently, set the current hour and minute, ensuring you select the correct AM or PM designation. The thermostat’s menu-driven programming responds to your choices, making the process straightforward.

Accurate date and time settings are essential for the thermostat to function correctly with programmed schedules and to provide reliable temperature control. Verify the settings before proceeding to the next configuration step.

Configuring System Type (Heat Pump, Forced Air, etc.)

Following the date and time setup, the Honeywell TH8321U1006 requires configuration of your specific HVAC system type. This ensures optimal performance and compatibility. The thermostat supports various systems, including heat pumps, forced air furnaces, and conventional heating and cooling setups.

Access the system configuration menu through the touchscreen interface. You’ll be presented with a list of available system types. Carefully select the option that accurately reflects your home’s heating and cooling infrastructure. Incorrect selection can lead to inefficient operation or inaccurate temperature control.

The VisionPRO 8000’s intuitive logic guides you through this process. Refer to your HVAC system’s documentation if you are unsure of the correct system type. Proper configuration is vital for maximizing energy efficiency and comfort.

Programming and Operation

The Honeywell TH8321U1006 boasts a user-friendly touchscreen interface, enabling effortless schedule creation, editing, and utilization of the convenient hold function.

Understanding the Touchscreen Interface

The Honeywell TH8321U1006 thermostat features an intuitive touchscreen interface designed for effortless control of your home’s climate. Its menu-driven programming responds directly to your selections, simplifying the process of setting schedules and preferences. Navigating the interface is straightforward; simply touch the desired options to access various settings, including temperature adjustments, fan control, and system modes.

The display clearly presents current temperature readings, setpoints, and operational status. Users can easily switch between heating, cooling, and auto modes, as well as adjust fan settings for continuous or programmed operation. The thermostat’s logic is designed to be user-friendly, guiding you through each step of the configuration process. Honeywell’s VisionPRO 8000 series, which includes the TH8321U1006, is specifically engineered for ease of use, making it accessible to users of all technical skill levels.

Creating and Editing Schedules

The Honeywell TH8321U1006 allows for highly customizable scheduling to optimize comfort and energy savings. Through the touchscreen interface, you can program different temperature settings for various times of the day and days of the week. The thermostat supports a 7-day programmable schedule, enabling you to tailor settings to your specific lifestyle.

Creating a schedule involves setting desired temperatures for “Wake,” “Leave,” “Return,” and “Sleep” periods. Editing existing schedules is equally simple, allowing you to make adjustments as needed. The intuitive menu-driven programming responds to your choices, ensuring a straightforward process. You can easily copy schedule settings from one day to another, saving time and effort. Honeywell’s VisionPRO 8000 series prioritizes user convenience, making schedule management accessible and efficient for all users.

Using the Hold Function

The Honeywell TH8321U1006’s “Hold” function provides temporary overrides to your programmed schedule, offering flexibility when routines change. This feature allows you to maintain a specific temperature indefinitely, bypassing the scheduled settings. You can activate a temporary hold for a defined duration, or a permanent hold until manually canceled.

Activating the hold function is easily done through the touchscreen interface. The thermostat displays clear options for setting the desired temperature and hold duration. This is particularly useful for unexpected events or changes in occupancy. Honeywell’s VisionPRO 8000 series is designed for effortless use, and the hold function exemplifies this commitment. The intuitive logic ensures that overriding your schedule is simple and straightforward, providing immediate comfort control without complex programming.

Troubleshooting Common Issues

Common problems like power failures, inaccurate readings, and Wi-Fi connectivity issues are addressed in the 36-page manual, offering solutions for optimal performance.

Thermostat Not Powering On

If your Honeywell TH8321U1006 thermostat fails to power on, several factors could be at play. First, verify the power supply voltage is within the specified range of 20 to 30 VAC. Consult the comprehensive 36-page manual for detailed electrical specifications.

Next, carefully inspect the wiring connections at the terminal blocks, ensuring they are secure and correctly matched to your HVAC system’s wiring. Double-check the C-wire (common wire) connection, as this is crucial for providing continuous power. Refer to the wiring diagram overview within the installation guide to confirm proper connections.

Additionally, examine the circuit breaker or fuse controlling the HVAC system to ensure it hasn’t tripped or blown. If the issue persists, consult a qualified HVAC technician for further assistance, as internal component failure may be the cause. The 12-page installation guide offers basic troubleshooting steps, but professional help may be necessary.

Incorrect Temperature Readings

If your Honeywell TH8321U1006 thermostat displays inaccurate temperature readings, several potential causes should be investigated. First, ensure the thermostat isn’t directly exposed to sunlight, drafts, or heat-generating appliances, as these can influence its sensors. Refer to the 36-page manual for optimal placement guidelines.

Next, verify the thermostat’s temperature calibration settings. The VisionPRO 8000 series allows for temperature offset adjustments within the menu-driven programming. Consult the installation guide to access and modify these settings. Confirm the system type is correctly configured (heat pump, forced air, etc.), as this impacts temperature interpretation.

Additionally, check for obstructions blocking the thermostat’s internal temperature sensor. If discrepancies persist, a faulty temperature sensor may require replacement. The 12-page installation guide provides basic diagnostic steps, but professional HVAC assistance might be needed for sensor-related issues.

Wi-Fi Connectivity Problems

Experiencing Wi-Fi connectivity issues with your Honeywell TH8321U1006 thermostat? Begin by verifying your home network is functioning correctly and that the thermostat is within range of your Wi-Fi router. The 36-page manual details the initial Wi-Fi setup process, emphasizing a stable internet connection.

Ensure you’ve entered the correct Wi-Fi password during configuration. Double-check for typos and confirm your router’s security settings (WPA2 is generally recommended). If the connection remains unstable, try restarting both your router and the thermostat. Refer to the installation guide for specific reset instructions.

Sometimes, router firmware updates can cause compatibility issues. Check for available updates for your router. For persistent problems, Honeywell’s support website (http://yourhome.honeywell.com) offers troubleshooting resources and contact information for assistance. The 12-page guide also offers basic network checks.