Dometic air handlers with adjustable vents offer precise airflow control, enhancing comfort and efficiency in RVs. Their universal design ensures compatibility with most rooflight openings, while manual controls provide easy adjustments for directional airflow, making them a versatile and user-friendly solution for climate management.
1.1 Overview of the Dometic Air Handler System
The Dometic air handler system is a versatile and efficient solution for climate control in recreational vehicles. Designed with universal compatibility, it fits most rooflight openings, ensuring seamless installation. The system features adjustable vents, allowing precise airflow direction to the front and rear of the vehicle. Manual controls provide straightforward management of fan speed and temperature settings. The air handler operates quietly and efficiently, distributing air evenly for optimal comfort. Its universal design makes it suitable for various RV configurations, while the adjustable vents ensure personalized airflow control. This system is ideal for maintaining a comfortable environment, offering both reliability and ease of use.
1.2 Importance of Adjustable Vents in Air Handlers
Adjustable vents in Dometic air handlers play a crucial role in optimizing airflow and comfort within recreational vehicles. By directing air to specific areas, either front or rear, they ensure even temperature distribution, preventing hot or cold spots. This feature enhances overall climate control efficiency, allowing users to customize airflow according to their needs. Additionally, adjustable vents contribute to energy savings by focusing air where it is most needed, reducing unnecessary circulation. Their manual controls make it easy to fine-tune airflow, providing a personalized environment that improves comfort and user satisfaction. This adaptability is essential for maintaining a consistent and comfortable interior climate in various conditions.
Key Features of Dometic Air Handlers
Dometic air handlers feature universal design for compatibility with most rooflights, manual controls for easy adjustments, and adjustable vents for directional airflow. Remote control options enhance convenience.
2.1 Universal Design for Compatibility
Dometic air handlers are designed for universal compatibility, fitting most standard rooflight openings; Their compact, lightweight construction ensures easy installation in various RV and caravan setups. The universal design eliminates the need for custom adjustments, making them a versatile solution for different vehicle types. Compatibility with existing systems and roof vents simplifies installation and maintenance, while their robust engineering ensures reliable performance across diverse applications. This adaptability makes Dometic air handlers a preferred choice for users seeking efficient and hassle-free climate control solutions. Their universal fitment ensures compatibility with a wide range of vehicles, enhancing their practicality and appeal in the market.
2.2 Manual Control Functionality
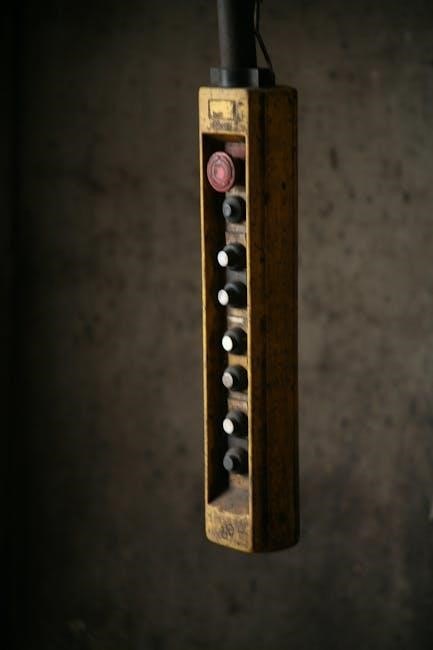
Dometic air handlers feature intuitive manual controls, allowing users to easily adjust fan speed and airflow direction. The manual fan mode enables selecting a desired speed, with an LED indicating the active setting. This functionality ensures consistent airflow and personalized comfort. The controls also include adjustable vents, which can be fine-tuned using turning knobs to direct air flow as needed. The manual thermostat allows users to set a preferred temperature, while the system maintains it efficiently. This user-friendly design provides precise control over climate settings, making it ideal for RV and caravan applications where flexibility and comfort are essential. The manual controls enhance the overall usability of the air handler, ensuring a seamless experience for users.
2.3 Adjustable Air Vents for Directional Airflow
Dometic air handlers are equipped with adjustable air vents, designed to deliver directional airflow for optimal comfort. Users can manually adjust the vent angles to direct air to specific areas, ensuring even distribution throughout the space. This feature is particularly useful in RVs and caravans, where customizable airflow enhances temperature regulation. The vents can be fine-tuned using simple controls, allowing for precise airflow management. By redirecting air flow, users can maximize the efficiency of their cooling or heating system, reducing energy consumption while maintaining a comfortable environment. This adaptability makes Dometic air handlers a practical choice for various vehicle layouts and climate conditions, ensuring consistent air circulation and user satisfaction.

Installation and Setup
Dometic air handlers are designed for easy installation, fitting most rooflight openings with a universal design. They align with caravan roof corners for secure placement and ensure proper airflow configuration upon setup.
3.1 Step-by-Step Installation Guide
Begin by removing the air handler from its packaging and positioning it over the caravan roof’s square hole, ensuring alignment with the gasket. Secure the unit firmly using the provided hardware. Next, connect the electrical and thermostat components according to the manual. Finally, test the system to ensure proper function and airflow. This straightforward process ensures a reliable and efficient setup for optimal climate control in your RV.
3.2 Compatibility with Rooflight Openings
Dometic air handlers are designed for universal compatibility with most rooflight openings, ensuring a seamless installation process. The unit fits over existing roof vents, aligning perfectly with the square hole in the caravan roof. This design eliminates the need for additional modifications, making it a convenient solution for RV owners. The air handler’s compact and adaptable structure ensures it integrates effortlessly with standard rooflight configurations, providing efficient airflow control without compromising space or aesthetics.
3.3 Initial Setup and Configuration
Initial setup of the Dometic air handler involves positioning the unit over the rooflight opening, ensuring the gasket is properly sealed. Once installed, the manual controls allow for easy configuration of fan speed and temperature settings. The adjustable vents can be fine-tuned using the provided knobs to direct airflow as needed. The thermostat, an adjustable control device, senses room temperature and operates the motorized valve, ensuring optimal climate management. Proper configuration ensures efficient operation, with the fan LED indicating the selected speed. Following the installation manual’s guidelines ensures a smooth setup process, allowing users to enjoy precise control over their RV’s climate system.
Operation and Controls
The Dometic air handler features manual controls for fan speed and temperature, allowing precise adjustments. Adjustable vents enable directional airflow, while the thermostat ensures consistent climate management.
4.1 Understanding Manual Fan Mode
Manual Fan Mode on Dometic air handlers allows users to select and maintain a desired fan speed, providing precise control over airflow. When activated, the Fan LED lights up, confirming the selected speed. This mode is independent of thermostat settings, enabling manual adjustment for consistent ventilation. It is ideal for scenarios where constant airflow is needed without temperature-based changes; Users can choose from multiple speed levels to customize comfort, ensuring optimal air circulation. This feature is particularly useful for noise reduction or maintaining a steady environment. The manual control ensures flexibility, making it easy to adapt the system to various conditions and preferences.
4.2 Thermostat and Temperature Control
The thermostat in Dometic air handlers is an adjustable control device that senses room temperature through an air thermistor or sensor. It operates the motorized valve on the air handler to maintain the desired temperature, ensuring efficient cooling or heating. Users can adjust the thermostat knob to set a warmer or cooler setting as needed. This feature prevents overheating or overcooling, optimizing energy use. The thermostat works seamlessly with the fan mode, allowing precise temperature management. Remote control compatibility adds convenience, enabling easy adjustments from anywhere in the room. This system ensures consistent comfort and energy efficiency, making it a reliable choice for climate control in various environments.
4.3 Adjusting Airflow Direction
Dometic air handlers feature adjustable vents that allow precise control over airflow direction, ensuring optimal comfort. Users can manually adjust the vent angles to direct air to specific areas, enhancing circulation. This feature is particularly useful in RVs, where customizable airflow can improve temperature distribution. The vents are designed for easy adjustment, with turning knobs that enable fine-tuning of airflow direction. By adjusting the vents, users can maximize cooling or heating efficiency, ensuring a consistent climate throughout the space. This functionality complements the manual controls, providing a user-friendly way to tailor airflow to individual preferences, thus enhancing overall comfort and energy efficiency in various environments.

Maintenance and Troubleshooting
Regular cleaning of vents and checking for obstructions ensures optimal airflow. Adjusting vent angles correctly and verifying thermostat settings can resolve common issues, maintaining efficiency and performance.

5.1 Cleaning and Maintaining the Air Handler
Regular cleaning of the Dometic air handler is essential for optimal performance. Dust and debris can accumulate, reducing airflow and efficiency. Use a soft brush or vacuum to gently remove dirt from vents and internal components. Ensure filters are checked and cleaned as needed to maintain proper air circulation. Adjustable vents should be inspected for obstructions and aligned correctly for directional airflow. Manual controls should be wiped clean to prevent dust buildup. Periodically, inspect the thermostat and ensure it is functioning accurately. By following these maintenance steps, the air handler will continue to provide reliable and efficient climate control in your RV or caravan.
5.2 Common Issues and Solutions
Common issues with Dometic air handlers include reduced airflow, uneven cooling, or inaccurate thermostat readings. To address reduced airflow, ensure vents are clean and unobstructed. For uneven cooling, adjust the directional vents to balance air distribution. If the thermostat is inaccurate, recalibrate it or consult the manual. Electrical issues may require resetting the system or checking connections. Regular maintenance, such as cleaning filters and vents, can prevent many problems. If issues persist, refer to the troubleshooting guide or contact a professional. Proper care ensures optimal performance and extends the lifespan of the air handler, maintaining comfort in your RV or caravan.
5.3 Fan Speed and Thermostat Adjustments
Adjusting the fan speed and thermostat on Dometic air handlers ensures optimal performance. Manual controls allow users to select desired fan speeds, with LED indicators confirming the setting. The thermostat, an adjustable control device, senses room temperature and regulates airflow accordingly. For consistent cooling, set the thermostat to a mid-range temperature and adjust as needed. Balancing fan speed and thermostat settings can enhance energy efficiency and comfort. Regularly inspect and clean vents to maintain airflow accuracy. For precise adjustments, refer to the manual for guidance on fine-tuning settings to match your environment. Proper calibration ensures the system operates efficiently, providing reliable climate control in your RV or caravan.
Dometic air handlers with adjustable vents offer enhanced comfort and efficiency. Their manual controls provide precise airflow management, making them an excellent choice for RV and caravan climate control systems.
6.1 Summary of Benefits
Dometic air handlers with adjustable vents offer numerous benefits, including enhanced airflow control, improved climate comfort, and energy efficiency. Their universal design ensures compatibility with most rooflight openings, making installation straightforward. Manual controls provide precise adjustments for directional airflow, allowing users to customize their environment. The system’s ability to distribute air evenly in both front and rear directions ensures consistent cooling or heating. Additionally, the adjustable vents enable fine-tuning of air output, reducing energy waste and optimizing performance. These features make Dometic air handlers a practical and efficient solution for maintaining a comfortable interior climate in RVs, caravans, and similar spaces.
6.2 Recommendations for Use
For optimal performance, Dometic air handlers with adjustable vents should be installed in well-ventilated areas to ensure proper airflow. Regular maintenance, such as cleaning air filters and inspecting vents, is essential to maintain efficiency. Users should take advantage of manual controls to adjust fan speed and airflow direction based on specific needs. It is recommended to use the thermostat feature to set desired temperatures, ensuring energy savings and consistent comfort. Additionally, adjusting the vents seasonally can help distribute air more effectively, whether for cooling or heating. Proper installation and adherence to the manufacturer’s guidelines will maximize the system’s benefits and extend its lifespan.