
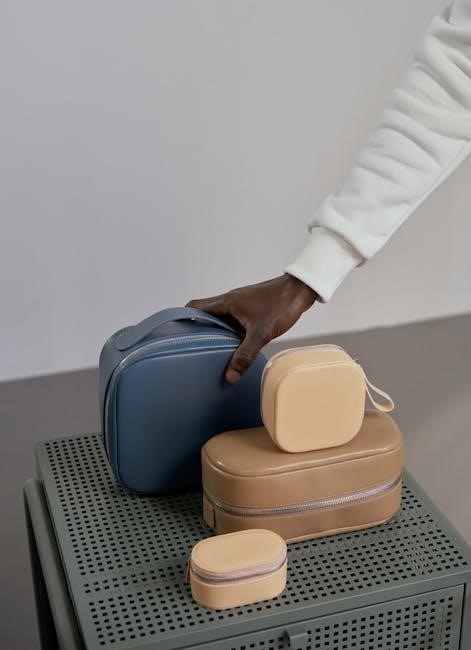
A flat bottom zippered pouch is a versatile and practical sewing project, perfect for crafters of all skill levels. These pouches feature a sleek, modern design with a sturdy base that allows them to stand upright. Ideal for storing small items like makeup, electronics, or craft supplies, they are both functional and stylish. The flat bottom design enhances stability, making them easy to use and transport. This tutorial will guide you through creating your own custom zippered pouch with professional finishes.
Benefits of a Flat Bottom Design
A flat bottom design offers numerous advantages, making it a popular choice for zippered pouches. One of the most significant benefits is the ability of the pouch to stand upright, providing stability and ease of access to contents. This design ensures that the pouch remains balanced, preventing it from tipping over, which is especially useful for storing small or heavy items. The flat bottom also allows for maximum use of interior space, as the pouch can expand fully without collapsing or tilting.
Another key advantage is the sleek and modern aesthetic that a flat bottom provides. Unlike traditional pouches with rounded or uneven bases, this design gives the pouch a professional and polished look, making it ideal for gifts or personalized projects. Additionally, the flat bottom makes it easier to sew, as the even surface simplifies aligning and stitching fabrics. This feature is particularly beneficial for beginners or those looking to create a clean, finished product.
From a functional perspective, the flat bottom enhances usability. It allows the pouch to sit firmly on surfaces, making it easy to fill or empty without needing to hold it in place. This design also reduces the likelihood of items getting lost in the corners, as the bottom lies flat and provides a smooth surface for contents to rest against. Overall, the flat bottom design combines practicality, aesthetics, and ease of use, making it a superior choice for crafting zippered pouches.

Materials and Tools Needed
To create a flat bottom zippered pouch, you will need a selection of materials and tools to ensure a professional finish. Start by gathering your fabrics: a durable outer fabric, a contrasting or matching lining fabric, and an optional layer of fusible fleece or interfacing for added stability. Choose fabrics that are suitable for bags, such as cotton, canvas, or polyester blends, and ensure they are pre-washed to prevent shrinkage after sewing.
A high-quality zipper is essential for the pouch. Opt for a zipper that is at least 8 inches long, as this will provide easy access to the contents. Select a zipper that matches your fabric’s style, whether it’s a subtle neutral tone or a bold color to add a decorative touch. Additionally, you may want to include a layer of interfacing or stabilizer to give the pouch structure and prevent stretching.
Your sewing tools should include a sewing machine, a rotary cutter and mat for precise fabric cutting, and a ruler or cutting grid to ensure accurate measurements. Sharp scissors, straight pins, and a zipper foot for your sewing machine are also necessary. A seam ripper, iron, and ironing board will help you achieve crisp seams and professional finishes. Other useful tools include a measuring tape, fabric clips, and a blunt tool for pushing out corners.
Optional but helpful materials include a walking foot for smooth sewing, a Teflon foot for gliding over the zipper, and decorative elements like labels or tabs. Gather basic sewing supplies such as thread (to match your fabric), a basting spray for stabilizing layers, and hand-sewing needles for any final touches. With these materials and tools ready, you will be well-prepared to construct a stylish and functional flat bottom zippered pouch.
Preparing the Fabric
Preparing your fabric is a crucial step in creating a flat bottom zippered pouch. Start by pre-washing and drying your fabric to prevent shrinkage after construction. This is especially important for natural fibers like cotton. Once dry, iron the fabric thoroughly while it’s still slightly damp to remove wrinkles and ensure a smooth surface for cutting.

Next, use a rotary cutter and mat or scissors to cut your fabric according to your pattern or measurements. Ensure accuracy by following the fabric’s grain to maintain stability and prevent distortion. If using a lining or contrasting fabric, cut the corresponding pieces to match your outer fabric.
Add interfacing or stabilizer to the outer fabric for structure and durability. Fuse it to the wrong side of the fabric using an iron, following the manufacturer’s instructions. This step is optional but recommended for a professional finish.
Mark your fabric for zipper placement and seam allowances using a pencil or disappearing ink. This helps guide your sewing and ensures precise alignment. If using batting or fusible fleece for added padding, cut it to size and layer it appropriately with your fabric.
Finally, organize your fabric pieces, including the lining and any additional layers, ready for sewing. Proper preparation ensures that your pouch will be well-constructed and visually appealing.
Step-by-Step Construction Guide
Begin by sewing the zipper to the top edge of the fabric panels, ensuring alignment for a professional finish. Next, attach the sides and bottom panel, carefully matching seams for a smooth construction. Make sure not to twist the fabric when sewing the sides. After sewing, backstitch at the beginning and end for durability. Press seams flat to create a crisp finish.
5.1. Attaching the Zipper
Attaching the zipper is a critical step in constructing a flat bottom zippered pouch. Begin by placing the zipper along the top edge of the fabric panels, ensuring the edges are aligned and the zipper is centered. Pin the fabric to the zipper, making sure the right sides are facing each other. Use a zipper foot on your sewing machine to get close to the zipper teeth and maintain even stitching.
Sew along the length of the zipper, backstitching at the beginning and end for durability. Once the zipper is securely attached, press the seams flat to create a crisp fold. This step ensures a professional finish and prevents the fabric from puckering. For a polished look, topstitch along the edge of the fabric, just above the zipper teeth.
If your zipper is longer than needed, trim the excess at the ends, leaving enough room to fold the fabric under for a clean finish. Some tutorials recommend adding zipper tabs or end covers for a more refined appearance. These small fabric pieces are sewn over the zipper ends to conceal any raw edges and add a decorative touch.
When sewing the zipper in place, ensure the fabric lies flat and smooth. Avoid twisting the fabric, as this can lead to misalignment and an uneven finish. Use clips or pins to secure the fabric in place while sewing, especially if working with slippery or stretchy materials. By carefully attaching the zipper, you set the foundation for a well-constructed and functional pouch.
5.2. Sewing the Sides and Bottom
Once the zipper is securely attached, the next step is to sew the sides and bottom of the pouch. Begin by aligning the side edges of the fabric panels, ensuring the seams are matched and the corners are squared. Pin the edges together to maintain alignment during sewing. Using a straight stitch, sew along the sides and bottom, leaving a small opening to turn the pouch right side out.
Before turning the pouch, press the seams flat to create a crisp fold. This step is essential for achieving a flat bottom and a professional finish. If desired, topstitch along the edges for a polished look. Once pressed, carefully turn the pouch right side out through the opening. Use a blunt object like a chopstick or pencil to push out the corners, ensuring they are sharp and well-defined.
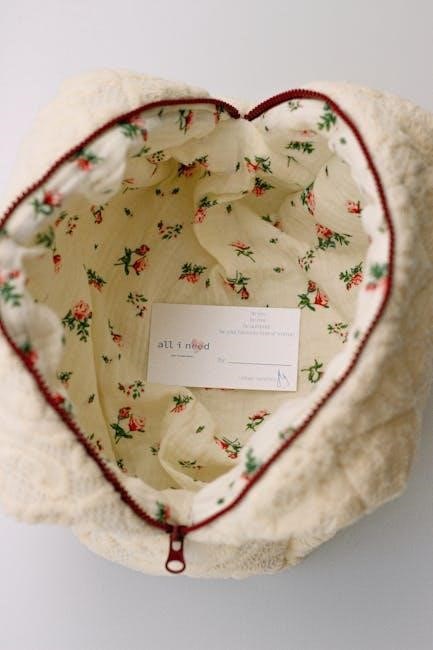
After turning the pouch, fold the raw edges of the opening under and press them flat. This creates a clean finish that can be hand-stitched or machine-sewn shut. For added stability, consider sewing across the bottom corners at a 90-degree angle to flatten the base further. This technique ensures the pouch stands upright and maintains its shape.
Finally, inspect the seams for any loose threads or imperfections. Trim excess fabric from the seams to prevent bulkiness, especially at the corners. Your flat bottom zippered pouch is now complete and ready for use. The structured design and secure zipper make it ideal for storing small items while maintaining a stylish appearance.