Electrolux Dishwasher Manual: A Comprehensive Guide
This manual provides detailed instructions for Electrolux dishwashers, covering setup, operation, maintenance, and troubleshooting. Locate your model and serial number for specific guidance.
Understanding Your Electrolux Dishwasher
Electrolux dishwashers offer innovative features designed for optimal cleaning and convenience. Familiarizing yourself with your appliance’s components and functions is crucial for efficient operation. This section details the key parts, including the spray arms, filters, detergent dispenser, and control panel.
Understanding the wash programs – from delicate cycles to intensive cleaning – ensures you select the appropriate setting for your dishes. Proper loading techniques, utilizing the adjustable racks and cutlery basket, maximize cleaning performance. Regularly consulting your manual will unlock the full potential of your Electrolux dishwasher, guaranteeing sparkling results and long-lasting reliability.

Locating the Model and Serial Number
Identifying your Electrolux dishwasher’s model and serial number is essential for accessing support, ordering parts, and referencing specific documentation. Typically, the rating plate – containing this vital information – is located on the appliance’s left side panel, often beneath the unit, or around the filter area.
The plate displays the model number and Product Number Code (PNC). For AEG, Zanussi, and other brands under the Electrolux umbrella, both numbers are necessary. This data is crucial when contacting customer service or searching for online manuals and FAQs. Keep this information readily available for future reference.
Where to Find the Rating Plate
Locating the rating plate on your Electrolux dishwasher is straightforward. Begin by checking beneath the unit itself, specifically on the left-hand side panel. Alternatively, examine the area surrounding the dishwasher’s filter; the plate is frequently positioned nearby. For some models, it might be found on the rim or base of the dishwasher tub.
The rating plate is a sticker or metal plate displaying crucial details, including the model number and Product Number Code (PNC). Carefully inspect these areas, and you should easily find the plate containing the necessary identification information for your appliance.
Decoding the Product Number (PNC)
The Product Number Code (PNC) is a unique identifier for your Electrolux dishwasher. It’s essential for identifying specific parts and accessing tailored support. The PNC is typically a 12-digit code found on the rating plate. Understanding its structure can reveal information about your appliance.

The serial number, often closely linked to the PNC, provides details about the manufacturing date. The second digit identifies the product, the third indicates the last digit of the year, and digits four and five represent the week of production. The remaining digits are an incremental unit number. Use this information when contacting customer service or ordering replacements.
Initial Setup and Installation
Proper installation ensures optimal Electrolux dishwasher performance. Begin by carefully reviewing all included documentation. Water connection requirements necessitate a compatible water supply line and appropriate pressure. Ensure the drain hose is correctly positioned to prevent backflow.
Electrical connection guidelines are crucial for safety; a dedicated, grounded circuit is recommended. Never use extension cords. After connecting water and electricity, run an initial test cycle without detergent to flush the system. Verify there are no leaks and that the dishwasher operates correctly before first use.
Water Connection Requirements
Your Electrolux dishwasher requires a reliable, potable water supply. A standard ¾-inch threaded connection is typically used, though adapters may be necessary. Water pressure should fall between 20 and 120 PSI for optimal operation. A hot water connection is recommended, ideally at 120°F (49°C), to enhance cleaning performance and reduce cycle times.
Install a backflow preventer to protect your potable water supply. Ensure the water supply line is free from kinks or obstructions. Regularly inspect the connection for leaks and address them promptly. Improper water connection can lead to reduced cleaning efficiency or water damage.
Electrical Connection Guidelines
Electrolux dishwashers typically require a dedicated 120V, 60Hz electrical circuit. A 15-amp circuit breaker is generally sufficient, but consult your dishwasher’s rating plate for specific requirements. The appliance must be properly grounded to prevent electrical shock. Do not use extension cords or adapters; a direct connection to a grounded outlet is essential.
Ensure the outlet is easily accessible for disconnection in case of emergencies. Electrical work should only be performed by a qualified electrician, adhering to local codes and regulations. Improper electrical connection can void your warranty and pose a safety hazard.
Operating Instructions
Electrolux dishwashers offer efficient cleaning with proper operation. Begin by scraping off large food particles before loading dishes. Arrange items to allow water circulation – face soiled surfaces towards the spray arms. Utilize appropriate detergent types and amounts, avoiding overuse. Select the correct wash program based on load size and soil level; options include normal, heavy, and delicate cycles.
Ensure the dishwasher is fully loaded but not overcrowded. Proper loading maximizes cleaning performance and minimizes water usage. Refer to the control panel for program details and cycle times.
Loading the Dishwasher Correctly
Optimal loading is crucial for effective cleaning. Scrape off large food debris before loading. Position items facing the spray arms for thorough water coverage. In the lower rack, place larger items like pots, pans, and baking dishes. Ensure these don’t block the detergent dispenser. The upper rack is ideal for glasses, cups, and smaller dishes.
Avoid overcrowding; allow space between items for water circulation. Secure lightweight items to prevent movement during the wash cycle. Check spray arm rotation isn’t obstructed. Proper loading maximizes cleaning and minimizes water usage.
Detergent Usage and Types
Electrolux dishwashers work best with high-quality dishwasher detergents. Use only detergents specifically designed for automatic dishwashers – hand soap creates excessive suds. Powder, gel, and tablet detergents are all suitable, but follow package instructions for correct dosage. Dosage depends on water hardness and soil level.
Avoid overfilling the detergent dispenser, as this can leave residue on dishes. For heavily soiled dishes, a slightly increased amount may be necessary. Consider using rinse aid for improved drying and to prevent water spots. Always store detergent in a cool, dry place.

Selecting Wash Programs
Electrolux dishwashers offer various wash programs to suit different needs. The ‘Normal’ cycle is ideal for everyday loads. ‘Eco’ saves energy and water, suitable for lightly soiled dishes. ‘Intensive’ tackles heavily soiled pots and pans. ‘Quick’ provides a fast wash for lightly soiled items.
‘Delicate’ is designed for fragile glassware. ‘Pre-wash’ loosens stubborn food residue. Refer to the control panel for program details and estimated durations. Select the appropriate program based on the load’s soil level and dish type for optimal cleaning results. Experiment to find what works best!
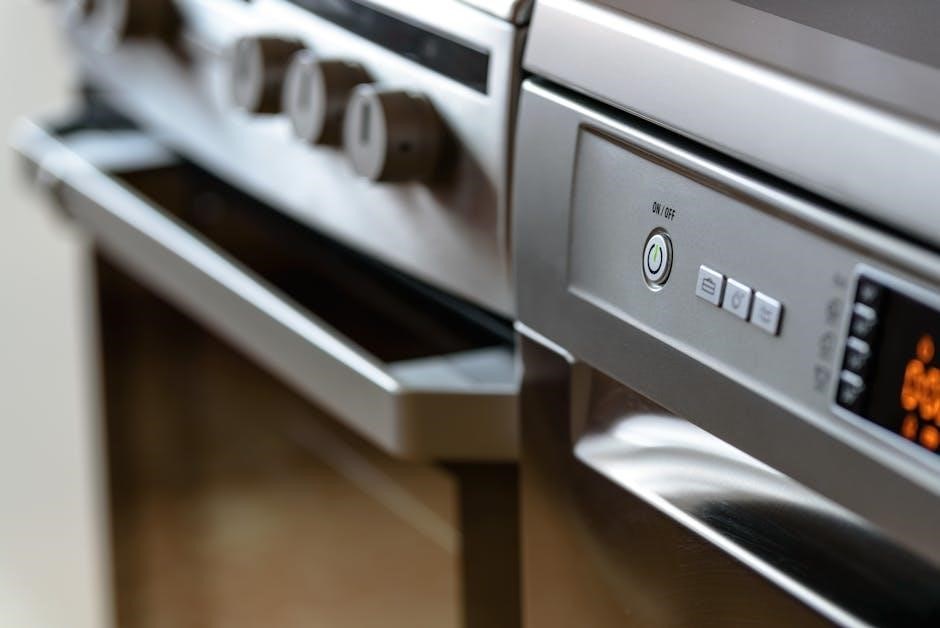
Control Panel Overview
Electrolux dishwasher control panels vary by model, but generally include power, program selection buttons, and option settings. The display shows the selected program, remaining time, and any error codes. Buttons control functions like delay start and extra hygiene options.

Familiarize yourself with the symbols representing each wash program. Some models feature a touch screen interface for easy navigation. Understanding the display symbols is crucial for operating your dishwasher effectively. Refer to the manual for a detailed explanation of each button and indicator light on your specific model.
Understanding the Display Symbols
Electrolux dishwasher display symbols provide vital information about the selected cycle and appliance status. A flashing symbol often indicates a selected option or ongoing process. Common symbols include wash temperature, rinse aid level, and remaining time. Error codes, displayed as letters and numbers, signal specific issues requiring attention.
The manual details each symbol’s meaning for your model. Pay attention to symbols indicating low rinse aid or salt levels, prompting refills; Understanding these indicators ensures optimal cleaning performance and prevents potential problems. Ignoring symbols could lead to inefficient washes or appliance damage.
Using the Delay Start Function
Electrolux dishwashers offer a convenient Delay Start function, allowing you to schedule washes for off-peak hours, saving energy and money. To utilize this feature, press the Delay Start button repeatedly to select a desired delay time, typically ranging from 30 minutes to 24 hours. The display will show the remaining delay time.
Once set, the dishwasher will automatically begin the wash cycle at the programmed time. Ensure the dishwasher is loaded with dishes and detergent before setting the delay. This function is ideal for taking advantage of lower electricity rates or running a quiet wash overnight.
Maintenance and Cleaning
Regular maintenance ensures optimal performance and longevity of your Electrolux dishwasher. Key areas include cleaning the filters – remove and rinse them under running water after each cycle to prevent clogging. Periodically check and adjust the rinse aid compartment to maintain spotless dishes.
The dishwasher interior benefits from monthly cleaning with a dishwasher cleaner or a vinegar-based solution. Wipe down the door seals to prevent leaks. Proper maintenance prevents odors, improves cleaning efficiency, and safeguards against potential issues, keeping your appliance running smoothly for years.

Cleaning the Filters
Regular filter cleaning is crucial for optimal dishwasher performance. Locate the filter assembly, typically at the bottom of the dishwasher’s interior. Remove the filter components – usually a coarse filter and a fine filter – and rinse them thoroughly under running water. Use a soft brush to remove any stubborn food particles.
Ensure the filters are securely reinstalled after cleaning. Clogged filters reduce cleaning effectiveness and can cause drainage problems. Cleaning filters after each cycle, or at least weekly, prevents buildup and maintains efficient operation, ensuring sparkling clean dishes every time.
Rinse Aid Compartment – Filling and Adjustment
Rinse aid enhances drying and prevents water spots on dishes. Locate the rinse aid compartment, usually near the detergent dispenser. Fill it with a quality rinse aid, avoiding overfilling. Adjust the rinse aid level using the compartment’s adjustment dial, typically ranging from 1 to 6.
Start with a mid-range setting (around 3 or 4) and adjust based on your water hardness and desired results. Harder water requires a higher setting. Observe your dishes after each wash; if spotting persists, increase the setting. Proper rinse aid usage ensures brilliant, streak-free drying.
Dishwasher Interior Cleaning
Regular cleaning maintains your Electrolux dishwasher’s performance and hygiene. Run an empty dishwasher with a dishwasher cleaner monthly, or more frequently with hard water. Alternatively, use a cup of white vinegar placed in the upper rack during a hot cycle.
Wipe down the door seals and interior walls with a damp cloth. Pay attention to the spray arms, ensuring they are free from blockages. Remove any food debris from the bottom of the dishwasher. Avoid abrasive cleaners, as they can damage the interior surfaces. A clean interior ensures optimal cleaning results.
Troubleshooting Common Issues
Encountering problems with your Electrolux dishwasher? This section addresses frequent concerns. If the dishwasher won’t start, check the power supply and door latch. For poor cleaning, verify proper loading, detergent usage, and filter cleanliness. Inspect spray arms for blockages.
Error codes indicate specific issues; consult the manual for their meanings. Common codes relate to water supply, drainage, or sensor malfunctions. If issues persist, contact Electrolux customer service. Always disconnect power before attempting any repairs. Addressing these issues promptly ensures continued optimal performance.
Dishwasher Not Starting
If your Electrolux dishwasher fails to start, first verify the power supply. Ensure the unit is properly plugged into a functioning outlet and the circuit breaker hasn’t tripped. Next, check the door latch – it must be securely closed for operation. A faulty door latch switch may prevent starting.
Also, examine the control panel for any locked or active delay start settings. If these aren’t the cause, consult the error code display (if applicable) for specific diagnostics. If problems continue, disconnect power and contact Electrolux support.
Poor Cleaning Performance
If your Electrolux dishwasher isn’t cleaning effectively, several factors could be at play. Begin by confirming correct loading practices – avoid overcrowding and ensure spray arms aren’t blocked. Verify you’re using the appropriate detergent type and quantity for your water hardness.
Additionally, inspect and clean the dishwasher filters regularly, as clogged filters significantly reduce cleaning power. A malfunctioning spray arm or low water temperature can also contribute to poor results. Run a dishwasher cleaner cycle periodically to remove buildup and restore optimal performance.
Error Codes and Their Meanings
Electrolux dishwashers utilize error codes to signal specific issues, aiding in troubleshooting. A code like “i20” often indicates a water inlet problem, while “i30” suggests a drainage issue. “i40” typically points to a heating element malfunction. Consult your specific model’s manual for a complete list.
These codes aren’t meant for self-repair; they help pinpoint the problem for a qualified technician. Ignoring error codes can lead to further damage. Record the code before contacting customer support, as it streamlines the diagnostic process and ensures a faster resolution to your dishwasher’s problem.
Safety Precautions
Prioritize safety when operating your Electrolux dishwasher. Always disconnect power before maintenance or cleaning. Never allow children to play with the appliance or its controls. Ensure proper grounding to prevent electrical shock. Avoid using extension cords.
Sharp objects, like knives and forks, should be loaded handle-down to prevent injury. Hot water can cause burns; allow dishes to cool before unloading; If the dishwasher leaks, immediately shut off the water supply. Utilize the child lock function to prevent accidental operation, safeguarding young children.
General Safety Guidelines
Electrolux dishwashers are designed for household use only. Misuse can lead to hazards. Always read all instructions before operating the appliance. Do not tamper with safety features. Ensure the dishwasher is properly installed and grounded by a qualified technician. Never operate a damaged dishwasher.
Keep flammable materials away from the dishwasher. Avoid overloading, which can affect cleaning performance and potentially cause damage. Do not sit or stand on the dishwasher door. Regularly inspect the power cord for damage. If you smell gas, immediately ventilate the area and contact emergency services.
Child Lock Function
Electrolux dishwashers often feature a Child Lock function, enhancing safety by preventing unintended operation. To activate, typically press and hold two specific buttons simultaneously – consult your model’s control panel diagram. This disables the buttons, protecting children from altering settings or starting cycles.
A visual indicator, like a padlock symbol, confirms activation. To deactivate, repeat the button combination. This feature is crucial in households with young children, preventing accidental starts or changes to wash programs. Remember to deactivate the lock when you need to operate the dishwasher.
Decoding the Serial Number
Electrolux serial numbers offer valuable insights into your dishwasher’s production details. Typically, the second digit identifies the product, while the third digit reveals the last digit of the manufacturing year. Digits four and five denote the week of the year it was produced.
The remaining digits, six through ten, represent an incremental unit number. Understanding this code helps determine the appliance’s age and potentially identify production batches. This information is useful for warranty claims or researching potential known issues associated with specific production periods. Refer to Electrolux resources for precise decoding.
Year of Manufacture Identification
Determining your Electrolux dishwasher’s year of manufacture is straightforward using the serial number. The third digit within the serial number sequence directly corresponds to the last digit of the production year. For example, if the third digit is ‘3’, the dishwasher was manufactured in 2013 or 2023.
Combining this with the week of production (digits four and five) provides a precise manufacturing timeframe. This information is crucial for warranty verification and understanding potential component revisions. Always consult official Electrolux documentation for accurate decoding, as formats may vary slightly between models.
Week of Production Determination
The fourth and fifth digits of your Electrolux dishwasher’s serial number reveal the week of production. These digits represent the specific week within the manufacturing year. For instance, ‘01’ signifies the first week of January, while ‘52’ indicates the last week of December.
Knowing the production week is valuable for tracking potential manufacturing batches and identifying any associated service bulletins or updates. This detail, combined with the year of manufacture, offers a comprehensive understanding of your appliance’s production date. Refer to Electrolux resources for clarification if needed.
Appliance Age Lookup
Determining your Electrolux dishwasher’s age is straightforward using the serial number. This information is crucial for warranty verification, accessing relevant support documentation, and understanding potential parts compatibility. The serial number, typically a 10-digit alphanumeric code, holds the key to unlocking your appliance’s history.
Locate the rating plate, usually on the appliance’s rear or side, or within the dishwasher door frame. Deciphering the serial number’s digits reveals the year and week of manufacture, allowing for a precise age calculation. Utilize Electrolux’s online resources or contact customer service for assistance.
Customer Support and Resources
Electrolux provides comprehensive customer support for your dishwasher. Should you encounter issues not addressed in this manual, several resources are available. You can directly contact Electrolux Customer Service at 1-800-269-2609 for personalized assistance or initiate a Live Chat session through their website.
Extensive online manuals and frequently asked questions (FAQs) are readily accessible on the Electrolux website, offering self-service troubleshooting and guidance. Hardreset.info also provides helpful video tutorials. These resources aim to empower you with the knowledge to resolve common concerns efficiently and effectively.
Contacting Electrolux Customer Service
Electrolux offers multiple avenues for reaching their dedicated customer service team. For immediate assistance, you can call their toll-free number at 1-800-269-2609. This connects you directly with a representative who can address your specific dishwasher concerns. Alternatively, Electrolux provides a convenient Live Chat option on their official website, allowing for real-time support.
Before contacting support, having your model number and product number (PNC) readily available will expedite the process. These details, found on the appliance’s rating plate, enable the representative to provide accurate and tailored solutions to your dishwasher issues.
Online Manuals and FAQs
Electrolux provides a comprehensive online resource center for dishwasher owners. To access digital versions of your appliance’s manual, visit the Electrolux website and utilize the search function, entering either your model denomination or product number (PNC). This ensures you find the correct documentation for your specific dishwasher.
Beyond manuals, the website features an extensive Frequently Asked Questions (FAQs) section. This resource addresses common issues, troubleshooting tips, and operational guidance. Exploring the FAQs can often provide quick solutions without needing to contact customer service, saving you time and effort.
Spare Parts and Replacements
Maintaining your Electrolux dishwasher often requires replacing worn components. Finding compatible parts is crucial for optimal performance. Electrolux recommends using genuine Electrolux spare parts to ensure compatibility and maintain warranty validity. You can locate suitable parts by referencing your dishwasher’s model number on the Electrolux website or through authorized retailers.
Common replacements include filters, spray arms, and door seals. Ordering replacement filters is particularly important for maintaining cleaning efficiency. Always verify the part number before ordering to guarantee a proper fit. If you require assistance, contact Electrolux customer service for guidance.
Finding Compatible Parts

Locating the correct spare parts for your Electrolux dishwasher begins with identifying your appliance’s precise model number. This number, along with the Product Number Code (PNC), is found on the rating plate, typically located beneath the unit or on the side panel. Utilize this information when searching online at the Electrolux website or contacting authorized retailers.
Ensure the part number matches your dishwasher’s specifications. Electrolux strongly advises using genuine parts to maintain performance and warranty coverage. Third-party parts may not offer the same level of compatibility or quality. If unsure, consult the Electrolux customer service team for assistance in identifying the correct replacement.
Ordering Replacement Filters
Maintaining optimal Electrolux dishwasher performance requires regular filter replacement. Filters typically need changing every six to twelve months, depending on usage. First, identify your dishwasher’s model number, found on the rating plate. Then, visit the official Electrolux website or authorized parts retailers to find compatible filters.
Genuine Electrolux filters ensure proper water circulation and prevent debris from recirculating. When ordering, verify the part number matches your specific model. You can also contact Electrolux customer service for assistance. Avoid using non-genuine filters, as they may compromise cleaning efficiency and potentially damage your appliance.
Warranty Information
Electrolux dishwashers come with a limited warranty covering manufacturing defects in materials and workmanship. The standard warranty period is typically one year for parts and labor, beginning from the original purchase date. Extended warranties may be available for purchase, offering longer coverage. To be eligible for warranty service, retain your proof of purchase and register your appliance.
Warranty coverage excludes damage caused by misuse, improper installation, or lack of maintenance. Registering your Electrolux dishwasher online ensures efficient claims processing. Contact Electrolux customer service at 1-800-269-2609 to initiate a warranty claim or for detailed warranty terms.
Understanding Your Warranty Coverage
Electrolux’s dishwasher warranty generally covers defects in materials and workmanship for one year from the purchase date. This includes parts and labor for repairs deemed necessary by Electrolux. However, the warranty doesn’t cover issues arising from improper installation, misuse, accidents, or normal wear and tear. Damage caused by hard water or lack of preventative maintenance is also excluded.
To ensure valid coverage, use genuine Electrolux replacement parts. Modifications or repairs performed by unauthorized technicians may void the warranty. Keep your original purchase receipt as proof of date and location. Review the complete warranty details available online or by contacting customer support.
Registering Your Appliance
Registering your Electrolux dishwasher offers several benefits, including streamlined warranty service and access to important product updates and promotions. Registration confirms your ownership and simplifies the claims process should you require repairs. You’ll need your model number and serial number, typically found on the appliance’s rating plate.
You can register online through the Electrolux website, often within 30 days of purchase. Alternatively, some retailers offer registration services at the point of sale. Keeping your appliance registered ensures you receive timely notifications regarding safety recalls or software enhancements, maximizing your appliance’s lifespan.